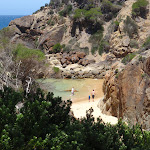
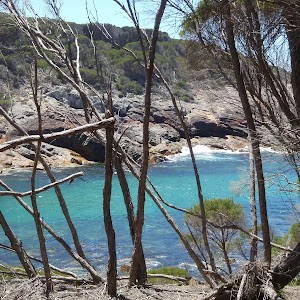
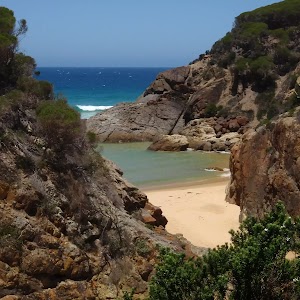
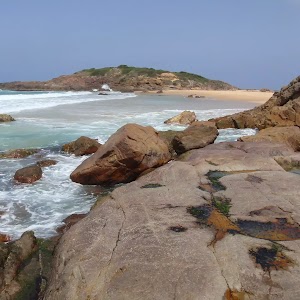
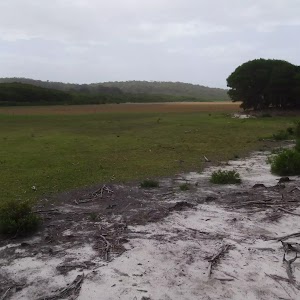
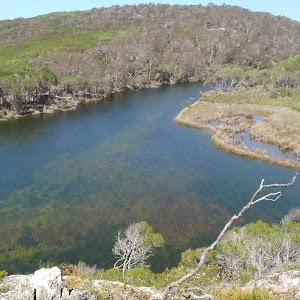
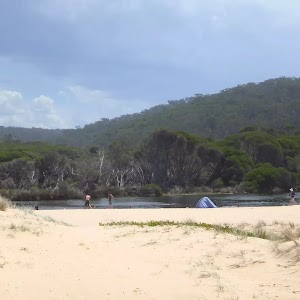
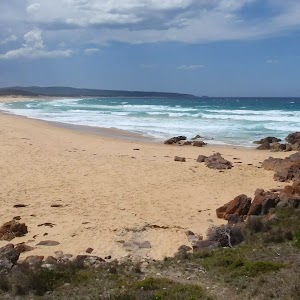
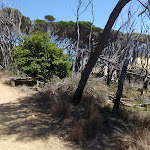
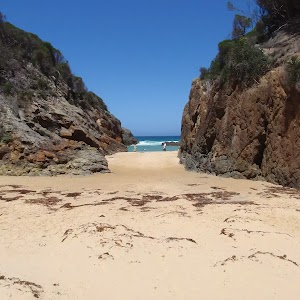
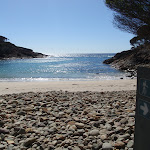
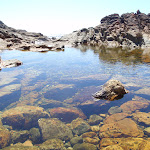
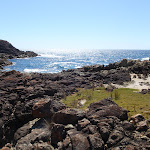
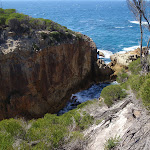
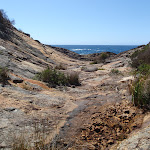
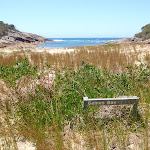
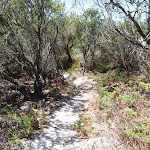
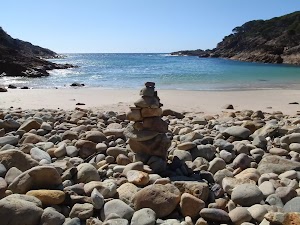
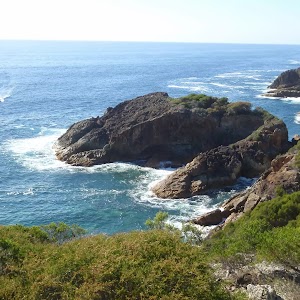
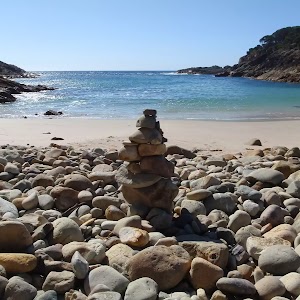
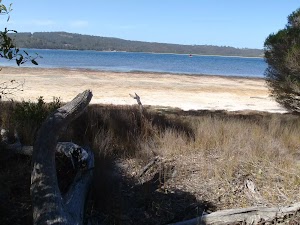
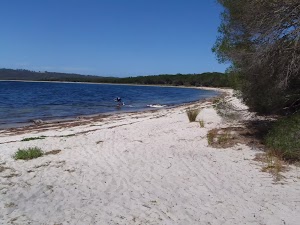
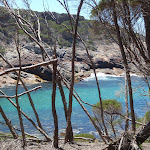
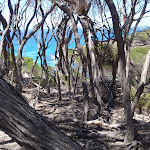
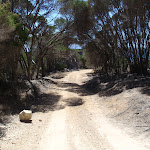
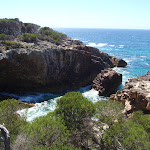
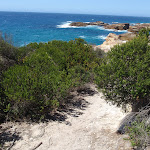
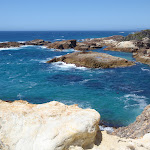
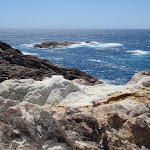
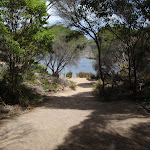
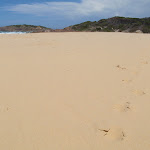
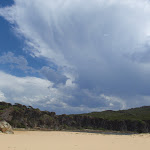
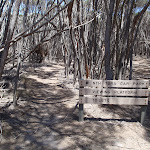
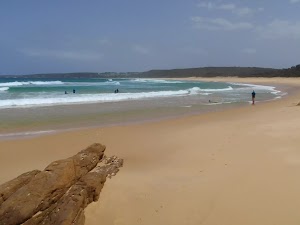
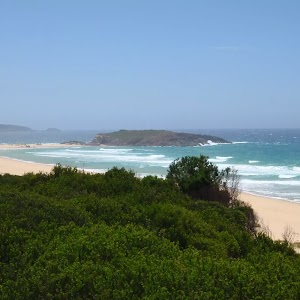
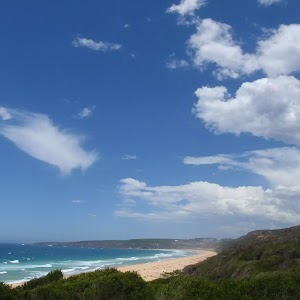
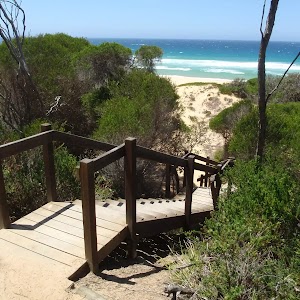
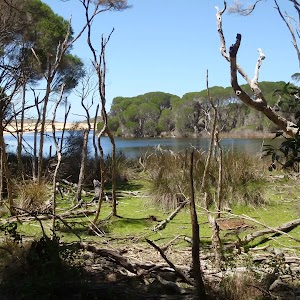
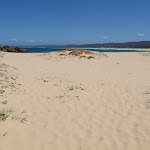
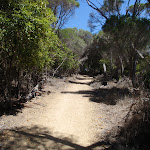
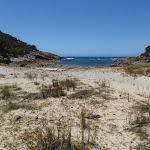
Wallagoot Gap is a spectacular gorge, cut into the rock by the ocean. The Gap is a popular swimming spot where the water is channeled over a small reef and through the tall rock walls. The seclusion created by the tall walls of the beach give some protection from the wind and waves, but there is no lifeguard patrol. The walk down to Wallagoot Gap is well signposted and well maintained.
Wallagoot Gap
And Walk
Wallagoot Gap


15 mins
648 m Return

22 m
Easy track


(0km) Wallagoot Beach Carpark → Wallagoot Gap

320 m
6 mins
7m
-15m
Easy track
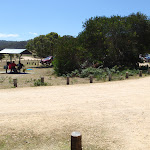
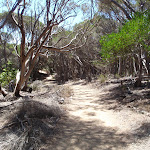
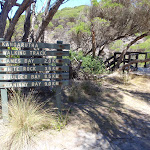
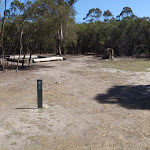
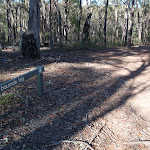
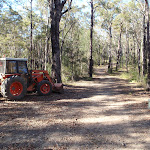
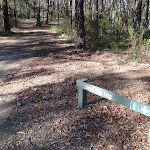
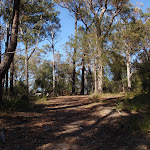
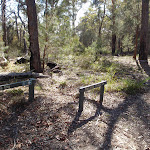
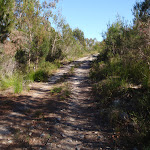
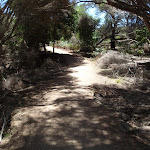
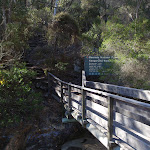
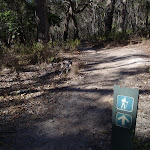
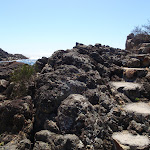
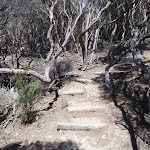
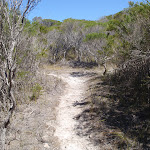
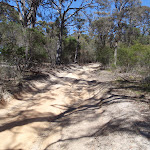
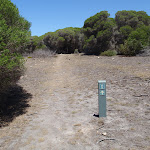
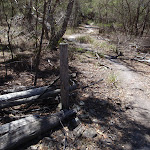
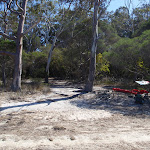
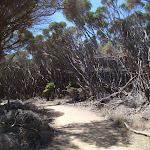
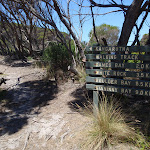
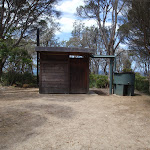
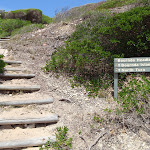
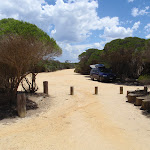
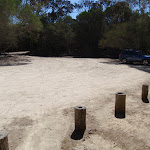
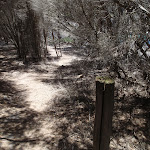
(Wallagoot car park is found at the end of Wallagoot Lake Rd, off the Sapphire Coast Drive.) This walk leaves the car park along the track between the information sign (on the right) and toilet (on the left), heading between two cut logs. The wide track dips through a valley then heads over a rise, coming to a signposted intersection (with a timber platform on the right).
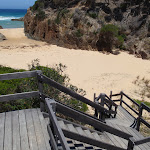
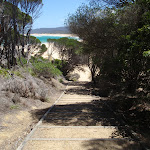
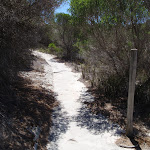
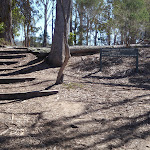
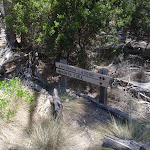
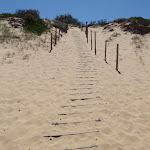
Veer right: From the intersection, the walk heads to the timber platform then down the timber steps onto Wallagoot Gap Beach.
Veer right: From the intersection, the walk heads to the timber platform then down the timber steps onto Wallagoot Gap Beach.
Wallagoot Gap
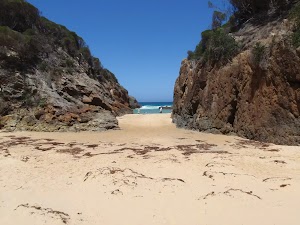
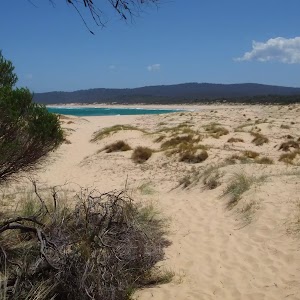
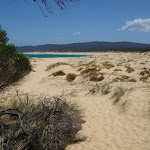
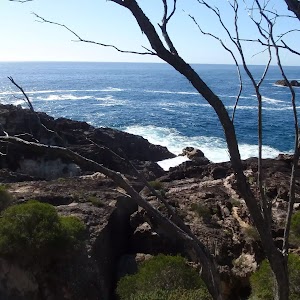
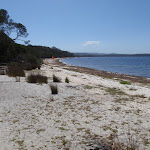
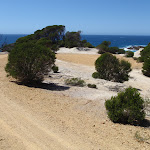
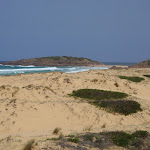
Wallagoot Gap is situated south of Tathra, facing east out onto the South Pacific Ocean. The gap is created by two headlands that protect the main beach from the wind. A second beach can be found around the corner of Wallagoot Gap, by following the right-hand side wall. Wallagoot Gap is an excellent place for a swim or a play in the sand. The gap can be accessed from Wallagoot Beach car park at the end of Wallagoot Lake Rd or the Kangarutha Track.
Maps for the Wallagoot Gap walk
You can download the PDF for this walk to print a map.
These maps below cover the walk and the wider area around the walk, they are worth carrying for safety reasons.
| Wolumla | 1:25 000 Map Series | 88242N WOLUMLA | NSW-88242N |
| Bega | 1:100 000 Map Series | 8824 BEGA | 8824 |
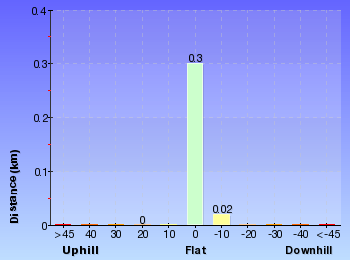
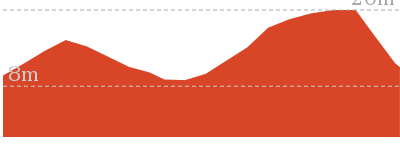
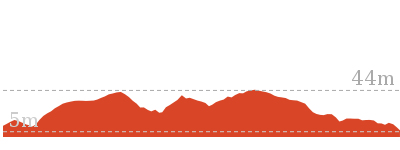
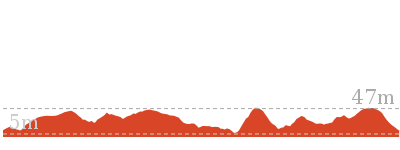
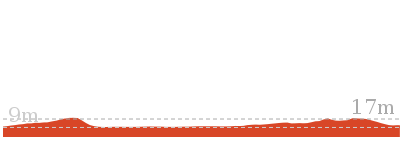
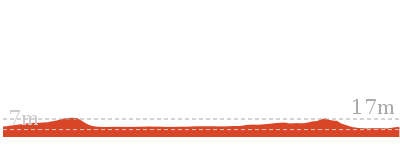
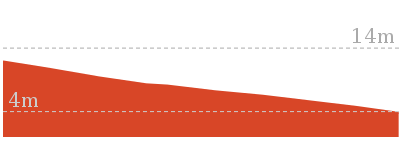
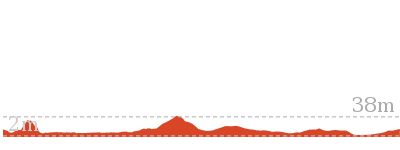
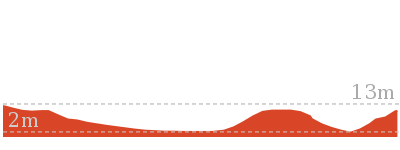
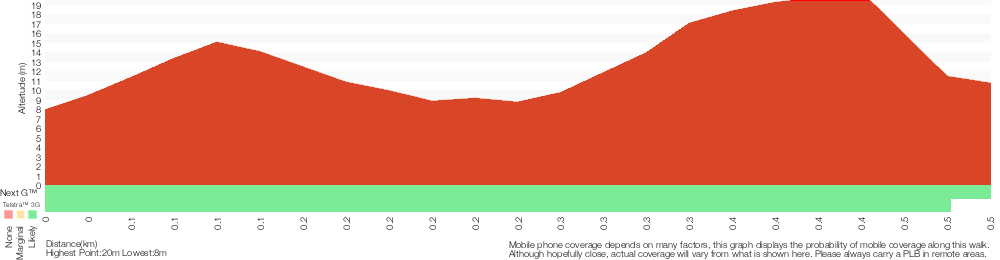
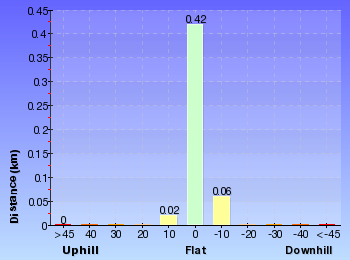
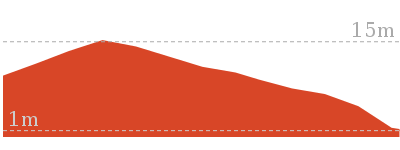
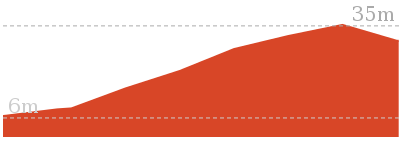
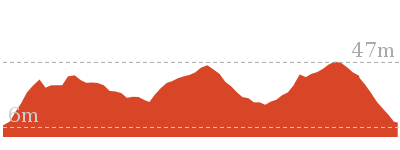
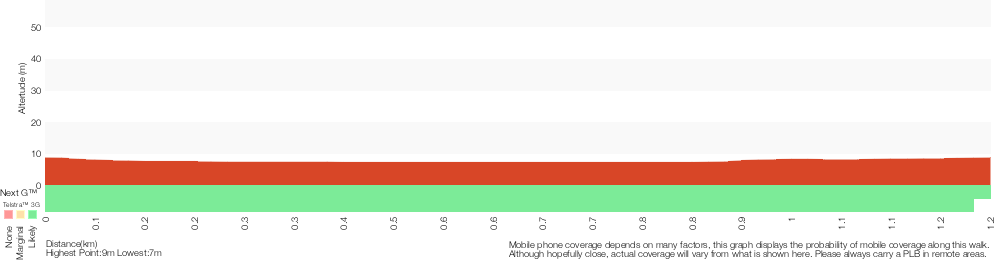
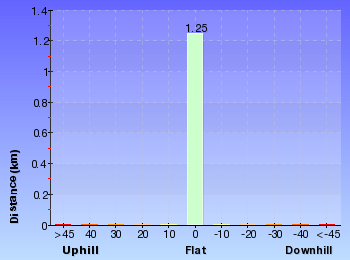
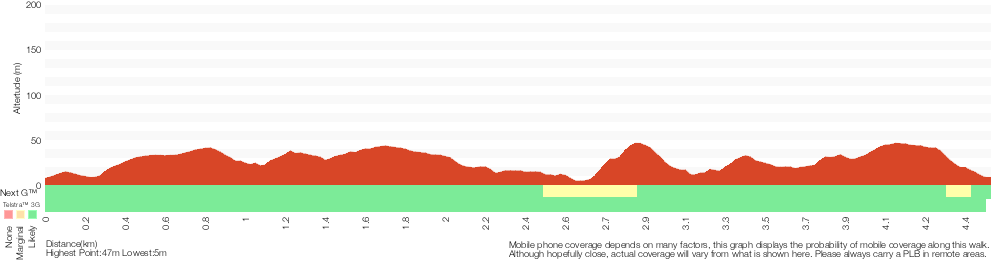
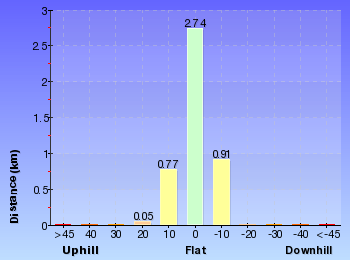
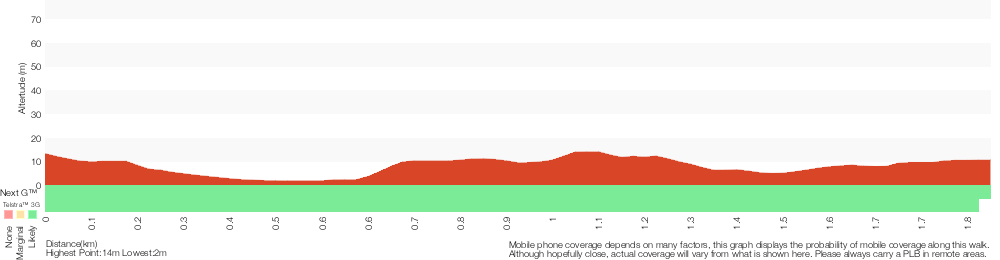
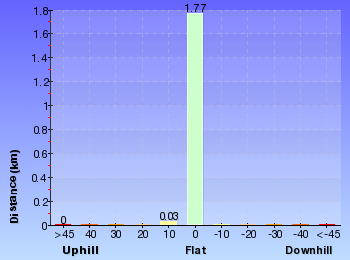
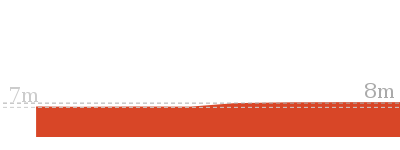
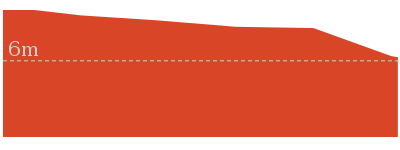
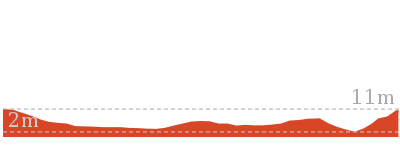
Cross sectional view of the Wallagoot Gap bushwalking track
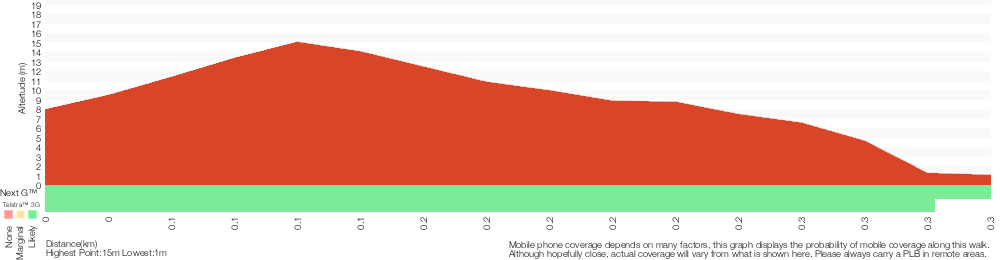
Analysis and summary of the altitude variation on the Wallagoot Gap
Overview of this walks grade – based on the AS 2156.1 – 2001
Under this standard, a walk is graded based on the most difficult section of the walk.
| Length | 648 m | ||
| Time | 15 mins | ||
| . | |||
| Grade 2/6 Easy track |
AS 2156.1 | Gradient | Gentle hills with occasional steps (2/6) |
| Quality of track | Clear and well formed track or trail (2/6) | ||
| Signs | Clearly signposted (1/6) | ||
| Experience Required | No experience required (1/6) | ||
| Weather | Weather generally has little impact on safety (1/6) | ||
| Infrastructure | Generally useful facilities (such as fenced cliffs and seats) (1/6) |
Some more details of this walks Grading
Here is a bit more details explaining grading looking at sections of the walk
Gradient
This whole walk, 320m has gentle hills with occasional steps.
Quality of track
This whole walk, 320m follows a clear and well formed track or trail.
Signs
This whole walk, 320m is clearly signposted.
Experience Required
This whole walk, 320m requires no previous bushwalking experience.
weather
This whole walk, 320m is not usually affected by severe weather events (that would unexpectedly impact safety and navigation).
Infrastructure
This whole walk, 320m is close to useful facilities (such as fenced cliffs and seats).
Similar walks
A list of walks that share part of the track with the Wallagoot Gap walk.
1 km Return
30 mins
Moderate track
5.2 km Return
2 hrs
Hard track

6 km Return
1 hr 45 mins
Moderate track
8.8 km One way
4 hrs
Hard track

9 km Return
3 hrs 30 mins
Hard track

10.5 km Return
3 hrs 30 mins
Hard track
11.5 km One way
4 hrs 30 mins
Hard track
Other Nearby walks
A list of walks that start near the Wallagoot Gap walk.
1.2 km Circuit
45 mins
Moderate track
3.6 km Return
1 hr 15 mins
Easy track

10.6 km Circuit
3 hrs 45 mins
Hard track

5 km Return
1 hr 30 mins
Moderate track
7.6 km Circuit
2 hrs 15 mins
Hard track

8 km Circuit
3 hrs 30 mins
Experienced only
5 km Return
1 hr 45 mins
Experienced only

194 m Circuit
10 mins
Hard track
464 m Return
10 mins
Moderate track
482 m Return
12 mins
Hard track
5.2 km Circuit
2 hrs
Hard track
286 m Return
5 mins
Moderate track
Plan your trip to and from the walk here
The Wallagoot Gap walk starts and ends at the Wallagoot Beach Carpark (gps: -36.785005, 149.96105)
Your main transport option to Wallagoot Beach Carpark is by;
![]() Car. A park entry fee is required for driving into the park.
Car. A park entry fee is required for driving into the park.
(get details)


Short URL = http://wild.tl/wg
Gallery images
There are other downloads I am still working on.
You will probably need to login to access these — still all free.
* KML (google earth file)
* GPX (GPS file)
Special Maps/ brochures
* A3 topo maps
* PDF with Lands Topo map base
* PDF with arial image (and map overlay)
I wanted to get the main site live first, this extra stuff will come in time.
Happy walking
Matt 🙂
Hobart Beach camping area to Bournda Trig loop

3 hrs 30 mins
8 km Circuit
251 m
Experienced only
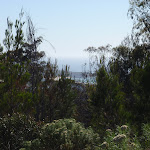
The walk from Hobart Beach camping area to Bournda Trig is a long walk, heading up the biggest hill in the area. The view from the top is shrouded by trees, giving visitors water glimpses and views of the ranges to the east. The walk is great exercise and explores a diverse range of environments in the park.* This walk passes through very remote areas and sections have no visible track. At least one person in your group should have training and experience in off track walking and navigation. Even with these notes and a GPS these extra skills and equipment are required.


(0km) Hobart Beach large shelter → Int. just north of Bournda Rd
360 m
6 mins
6m
0m
Easy track
From the intersection, this walk follows the path and the sign to the ‘Field Study Huts’[1] past the large picnic shelter (on the left). The track soon passes a volleyball court (on the right) and a fire pit (on the left), then follows a track marker through the dense melaleuca. The track soon comes to a three-way intersection marked with several signs, including one pointing back to ‘Hobart Beach Camping Area’[2].
From the intersection, the walk continues straight along the track, following the ‘Bondi Lake’ sign[3] through the melaleuca. The track soon comes to another three-way intersection, marked with another sign pointing back to ‘Hobart Beach Camping Area’[4].
From the intersection, the walk continues straight along the track, following the ‘Bondi Lake’ sign[3] through the melaleuca. The track soon comes to another three-way intersection, marked with another sign pointing back to ‘Hobart Beach Camping Area’[4].
(0.36km) Int. Bournda Rd and Hobart Beach Rd → Bournda Trig Station
3.4 km
1 hr 16 mins
227m
-35m
Moderate track
Turn right: From the intersection, the walk follows the ‘Bournda Trig’ sign[5], along the shaded trail which follows roughly parallel to the road (above on the left). The trail winds and undulates a little for about 700m to come to a clear intersection where a ‘Hobart Beach camping area’ sign[6] points back along the trail.
Turn left: From the intersection, the walk follows the ‘Bournda Trig’ sign[7] up the hill to the road, which is in sight. The walk crosses the road to the gate and signpost.
Continue straight: From the gate, the walk heads up the hill away from the road. The trail tends right before leading up the hill, where it steepens towards an intersection with a trail (leading to a water tank) on the right.
Continue straight: From the intersection, the walk heads up the hill, keeping the water tank below on the right. The trail leads up the hill to a signposted intersection.
Turn right: From the intersection, the walk follows the sign to ‘Bournda Trig’[8] down the hill. The trail passes a water tank on the right before winding up the hill onto the ridge. The trail then continues along the ridge to a signposted intersection.
Continue straight: From the intersection, the walk follows the ‘Bournda Trig’ sign[9] along the flat. The trail continues to wind through the bush to a large pile of logs on the right of the track. From here, the track tends right, up the hill, to climb steeply to a signposted intersection.
Veer right: From the intersection, the walk follows the ‘Bournda Trig’ sign up the hill. The track winds up the hill, around a knoll (to the right) and comes to the Trig Station in a clearing. If you go down hill you have gone too far.
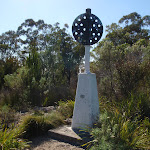
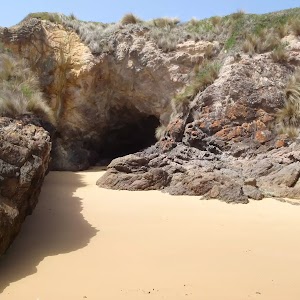
Bournda Trig

Bournda Trig is the highest point in Bournda National Park, situated between Tathra and Merimbula. The trig point stands in a small clearing beside the management trail, and does not have great views over the surrounding area. The trig station stands at 207 m.a.s.l. The Bournda Trig can be accessed by the Bournda Trig Fire Trail[10] which off Bournda Rd and Sapphire Coast Dr.
(3.77km) Bournda Trig Station → Int Bournda Trig and Field Studies Trks
320 m
9 mins
3m
-36m
Moderate track
Turn around: From the intersection, the walk keeps the Trig Station on the left as it heads down the hill. The track tends left around a knoll and then continues down the hill to a signposted intersection.
(4.09km) Int. Bournda Trig and Field Studies Trks → Field Study Huts
1.7 km
31 mins
4m
-108m
Experienced only
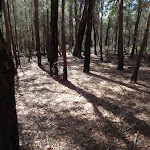
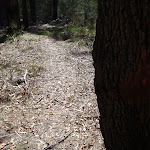
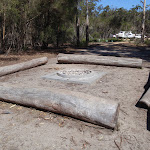
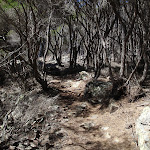
Veer right: From the intersection, the walk follows the ‘Field Studies’ sign[11] down the hill. The track meanders down along a ridgeline before following the path which is just visible down the hill. The track is covered in sections with fallen trees, many with paths trodden around them. The track continues to descend the ridge for sometime before coming out at a clearing with numerous A-frame shelters. The track continues through these to a campfire setting in front of a homestead-style home.
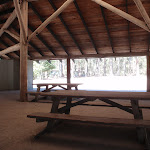
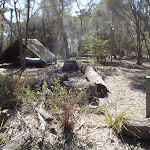
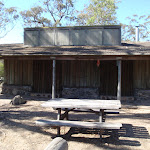
Field Study Huts

The Field Study Huts are located just above Bournda Rd in Bournda National Park, between Tathra and Merimbula. The main hut is a homestead-style wood cottage with a fire pit, BBQ plate, picnic tables and a toilet. Just near the hut, there are four open A-frame shelters. These facilities support a range of education services provided by the Bournda Environmental Education Centre. Parking is available near the road, and walking access from Bournda Lagoon and Trig is also possible. More info.
(5.79km) Field Study Huts → Field Study Huts Carpark
150 m
3 mins
1m
-9m
Moderate track
Turn left: From the campfire, the walk heads down the hill away from the homestead-style building, keeping the A-frame shelters to the left. The trail tends left down the hill to a gate and a signpost across the road.
(5.94km) Field Study Huts Car park → Int. just north of Bournda Rd
1.7 km
33 mins
10m
-58m
Experienced only
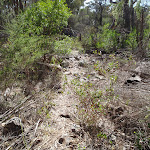
Continue straight: From the intersection, the walk heads down into the car park. The track continues down the ridge of the hill, passing over a fallen log and following a barely-visible trodden path down the slope. The track winds down the hill to meet a signpost on a more defined bush track.
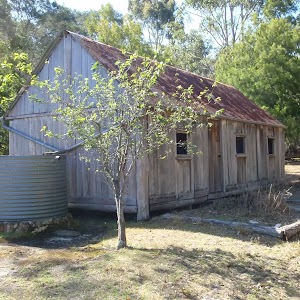
Veer left: From the intersection, with the ‘Field Studies Huts’ sign[12] on the left, this walk heads north along the wide track. The track passes along the side of Bondi Lake (not visable on the right) to come to a three way intersection marked with a ‘Bondi Lake’ sign[13] pointing back along the track (as an old hut is just visible on the right).
From the intersection, this walk follows the ‘hobart beach camp’ sign[14] north passing and old fence and the view to the old hut (on the right). The track winds throught the bush to soon come pass another ‘Bondi Lake’ sign[15], and head between the timber posts to come to the dirt road.
Continue straight: From intersection with Bournda Rd, this walk crosses the dirt road and follows the ‘Hobart Beach camping area 0.5km’ sign[16] north along the track. The track winds through the melaleuca for a short time, to a three way intersection marked with a ‘Bondi Lake’ sign[17] pointing back to the dirt road.
(7.67km) Int. just north of Bournda Rd → Hobart Beach large shelter
360 m
6 mins
0m
-6m
Easy track
Continue straight: From the intersection, this walk follows the ‘Hobart Beach Camping Area’[18] through the melaleuca, soon coming to another three-way intersection with a ‘Bondi Lake’ sign[19] pointing back along the track.
From the intersection, the walk continues straight follows the ‘Hobart Beach Camping Area’[20] through the dense melaleuca, soon coming to a large clearing at the back of the camping area. The walk continues past the volleyball court to the dirt road in front of the large picnic shelter[21].
From the intersection, the walk continues straight follows the ‘Hobart Beach Camping Area’[20] through the dense melaleuca, soon coming to a large clearing at the back of the camping area. The walk continues past the volleyball court to the dirt road in front of the large picnic shelter[21].
Hobart Beach campground
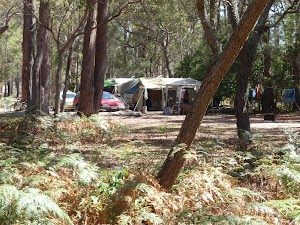
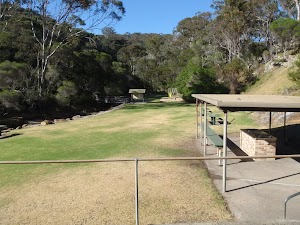
This is a well-established campsite close to the beach and lake. There are garbage and recycling bins. Each camping space is well-defined and there is a large covered common area. The camp surrounds the stone and timber toilet and laundry facility.
Maps for the Hobart Beach camping area to Bournda Trig loop walk
You can download the PDF for this walk to print a map.
These maps below cover the walk and the wider area around the walk, they are worth carrying for safety reasons.
| Wolumla | 1:25 000 Map Series | 88242N WOLUMLA | NSW-88242N |
| Bega | 1:100 000 Map Series | 8824 BEGA | 8824 |
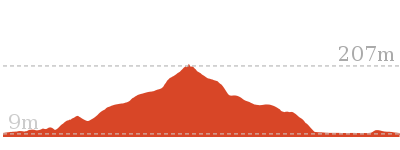
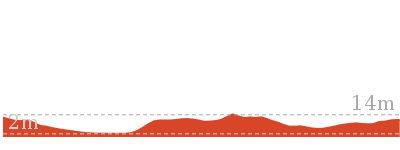
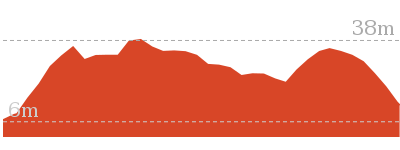
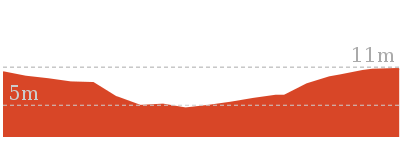
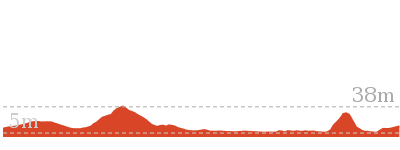
Cross sectional view of the Hobart Beach camping area to Bournda Trig loop bushwalking track
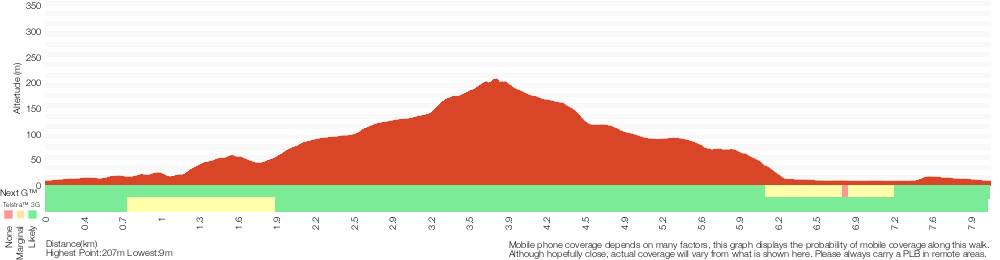
Analysis and summary of the altitude variation on the Hobart Beach camping area to Bournda Trig loop
Overview of this walks grade – based on the AS 2156.1 – 2001
Under this standard, a walk is graded based on the most difficult section of the walk.
| Length | 8 km | ||
| Time | 3 hrs 30 mins | ||
| . | |||
| Grade 5/6 Experienced only |
AS 2156.1 | Gradient | Very steep (4/6) |
| Quality of track | Rough unclear track (5/6) | ||
| Signs | No directional signs (5/6) | ||
| Experience Required | Some bushwalking experience recommended (3/6) | ||
| Weather | Weather generally has little impact on safety (1/6) | ||
| Infrastructure | Limited facilities, not all cliffs are fenced (3/6) |
Some more details of this walks Grading
Here is a bit more details explaining grading looking at sections of the walk
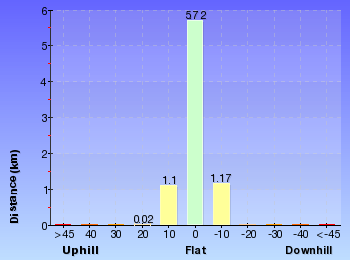
Gradient
3km of this walk has short steep hills and another 2.1km is very steep. Whilst another 2.1km is flat with no steps and the remaining 920m has gentle hills with occasional steps.
Quality of track
3.2km of this walk follows a formed track, with some branches and other obstacles and another 2.8km follows a clear and well formed track or trail. The remaining (2.1km) follows a rough unclear track.
Signs
4.8km of this walk has directional signs at most intersection and another 1.7km Has no directional signs. The remaining (1.5km) is clearly signposted.
Experience Required
Around 6km of this walk requires no previous bushwalking experience, whilst the remaining 1.7km requires some bushwalking experience.
weather
This whole walk, 8km is not usually affected by severe weather events (that would unexpectedly impact safety and navigation).
Infrastructure
Around 4.6km of this walk is close to useful facilities (such as fenced cliffs and seats), whilst the remaining 3.4km has limited facilities (such as not all cliffs fenced).
Similar walks
A list of walks that share part of the track with the Hobart Beach camping area to Bournda Trig loop walk.
5 km Return
1 hr 30 mins
Moderate track
5 km Return
1 hr 45 mins
Experienced only
7.6 km Circuit
2 hrs 15 mins
Hard track
10.6 km Circuit
3 hrs 45 mins
Hard track
Other Nearby walks
A list of walks that start near the Hobart Beach camping area to Bournda Trig loop walk.
3.6 km Return
1 hr 15 mins
Easy track
1.2 km Circuit
45 mins
Moderate track
10.5 km Return
3 hrs 30 mins
Hard track
6 km Return
1 hr 45 mins
Moderate track
464 m Return
10 mins
Moderate track
482 m Return
12 mins
Hard track
5.2 km Circuit
2 hrs
Hard track
286 m Return
5 mins
Moderate track
2.1 km Return
45 mins
Hard track
1.8 km One way
45 mins
Moderate track
1 km Return
30 mins
Moderate track
5.2 km Return
2 hrs
Hard track
Plan your trip to and from the walk here
The Hobart Beach camping area to Bournda Trig loop walk starts and ends at the Hobart Beach large shelter (gps: -36.797001, 149.93998)
Your main transport option to Hobart Beach large shelter is by;
![]() Car. A park entry fee is required for driving into the park.
Car. A park entry fee is required for driving into the park.
(get details)
Short URL = http://wild.tl/21
Gallery images
There are other downloads I am still working on.
You will probably need to login to access these — still all free.
* KML (google earth file)
* GPX (GPS file)
Special Maps/ brochures
* A3 topo maps
* PDF with Lands Topo map base
* PDF with arial image (and map overlay)
I wanted to get the main site live first, this extra stuff will come in time.
Happy walking
Matt 🙂
Wallagoot Beach
And Walk
Wallagoot Beach

30 mins
1 km Return
37 m
Moderate track
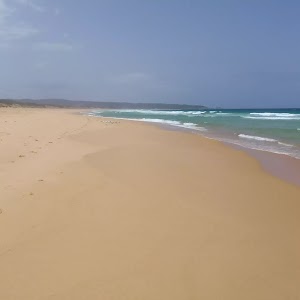
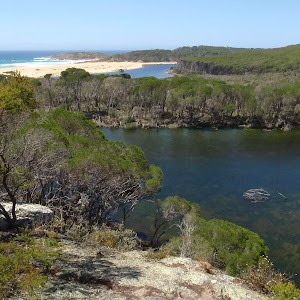
This walk is a short route onto Wallagoot Beach. On the walk down to the beach you are rewarded with views across Wallagoot Lake as well as the long Wallagoot and Bournda Beaches. The beach is a popular place for swimming and in good conditions the rocks on the northern end of the beach provide some opportunities for exploring.

(0km) Wallagoot Beach Carpark → Int. Wallagoot Gap and Kangarutha Trks
220 m
4 mins
7m
-7m
Easy track
(Wallagoot car park is found at the end of Wallagoot Lake Rd, off the Sapphire Coast Drive.) This walk leaves the car park along the track between the information sign (on the right) and toilet (on the left), heading between two cut logs. The wide track dips through a valley then heads over a rise, coming to a signposted intersection (with a timber platform on the right).
(0.22km) Int. Wallagoot Gap and Kangarutha Trks → Wallagoot Gap
110 m
2 mins
0m
-8m
Easy track
Veer right: From the intersection, the walk heads to the timber platform then down the timber steps onto Wallagoot Gap Beach. At the end of this side trip, retrace your steps back to the main walk then Turn sharp left.
Wallagoot Gap
Wallagoot Gap is situated south of Tathra, facing east out onto the South Pacific Ocean. The gap is created by two headlands that protect the main beach from the wind. A second beach can be found around the corner of Wallagoot Gap, by following the right-hand side wall. Wallagoot Gap is an excellent place for a swim or a play in the sand. The gap can be accessed from Wallagoot Beach car park at the end of Wallagoot Lake Rd or the Kangarutha Track.
(0.22km) Int. Wallagoot Gap and Kangarutha Trks → Wallagoot Beach North
280 m
6 mins
12m
-11m
Moderate track
Turn right: From the intersection, this walk heads down the hill, keeping the ocean and the wooden platform to the left. The track tends right, down the hill to reveal a great view over Wallagoot Beach. The walk then heads down the hill and a set of stairs onto the beach.
Maps for the Wallagoot Beach walk
You can download the PDF for this walk to print a map.
These maps below cover the walk and the wider area around the walk, they are worth carrying for safety reasons.
| Wolumla | 1:25 000 Map Series | 88242N WOLUMLA | NSW-88242N |
| Bega | 1:100 000 Map Series | 8824 BEGA | 8824 |
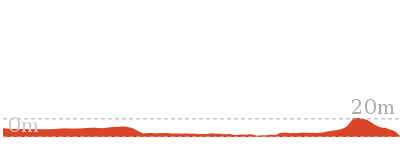
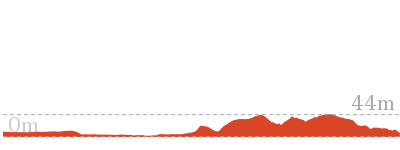
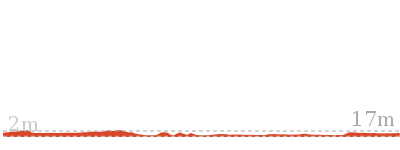
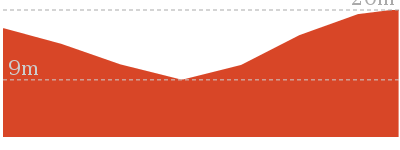
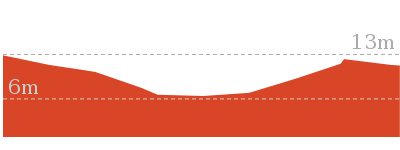
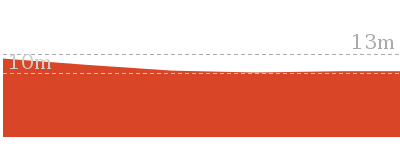
Cross sectional view of the Wallagoot Beach bushwalking track
Analysis and summary of the altitude variation on the Wallagoot Beach
Overview of this walks grade – based on the AS 2156.1 – 2001
Under this standard, a walk is graded based on the most difficult section of the walk.
| Length | 1 km | ||
| Time | 30 mins | ||
| . | |||
| Grade 3/6 Moderate track |
AS 2156.1 | Gradient | Short steep hills (3/6) |
| Quality of track | Formed track, with some branches and other obstacles (3/6) | ||
| Signs | Directional signs along the way (3/6) | ||
| Experience Required | No experience required (1/6) | ||
| Weather | Weather generally has little impact on safety (1/6) | ||
| Infrastructure | Limited facilities, not all cliffs are fenced (3/6) |
Some more details of this walks Grading
Here is a bit more details explaining grading looking at sections of the walk
Gradient
Around 280m of this walk has short steep hills, whilst the remaining 220m has gentle hills with occasional steps.
Quality of track
Around 280m of this walk follows a formed track, with some branches and other obstacles, whilst the remaining 220m follows a clear and well formed track or trail.
Signs
Around 280m of this walk has directional signs at most intersection, whilst the remaining 220m is clearly signposted.
Experience Required
This whole walk, 500m requires no previous bushwalking experience.
weather
This whole walk, 500m is not usually affected by severe weather events (that would unexpectedly impact safety and navigation).
Infrastructure
Around 280m of this walk has limited facilities (such as not all cliffs fenced), whilst the remaining 220m is close to useful facilities (such as fenced cliffs and seats).
Similar walks
A list of walks that share part of the track with the Wallagoot Beach walk.
648 m Return
15 mins
Easy track
5.2 km Return
2 hrs
Hard track
6 km Return
1 hr 45 mins
Moderate track
8.8 km One way
4 hrs
Hard track
9 km Return
3 hrs 30 mins
Hard track
10.5 km Return
3 hrs 30 mins
Hard track
11.5 km One way
4 hrs 30 mins
Hard track
Other Nearby walks
A list of walks that start near the Wallagoot Beach walk.
1.2 km Circuit
45 mins
Moderate track
3.6 km Return
1 hr 15 mins
Easy track
10.6 km Circuit
3 hrs 45 mins
Hard track
5 km Return
1 hr 30 mins
Moderate track
7.6 km Circuit
2 hrs 15 mins
Hard track
8 km Circuit
3 hrs 30 mins
Experienced only
5 km Return
1 hr 45 mins
Experienced only
194 m Circuit
10 mins
Hard track
464 m Return
10 mins
Moderate track
482 m Return
12 mins
Hard track
5.2 km Circuit
2 hrs
Hard track
286 m Return
5 mins
Moderate track
Plan your trip to and from the walk here
The Wallagoot Beach walk starts and ends at the Wallagoot Beach Carpark (gps: -36.785005, 149.96105)
Your main transport option to Wallagoot Beach Carpark is by;
![]() Car. A park entry fee is required for driving into the park.
Car. A park entry fee is required for driving into the park.
(get details)
Short URL = http://wild.tl/wb
Gallery images
There are other downloads I am still working on.
You will probably need to login to access these — still all free.
* KML (google earth file)
* GPX (GPS file)
Special Maps/ brochures
* A3 topo maps
* PDF with Lands Topo map base
* PDF with arial image (and map overlay)
I wanted to get the main site live first, this extra stuff will come in time.
Happy walking
Matt 🙂
Kangarutha Track
And Walk
Kangarutha Track

4 hrs
8.8 km One way
453 m
Hard track
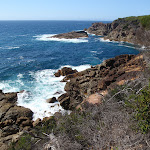
The Kangarutha Track takes walkers from Tathra south to near Wallagoot Gap. The walk explores about half of the Bournda National Park coast line. This coastline has many beautiful bays and scenic ocean views. There are a few bays where you would be able to have a splash to cool yourself down on those warmer days. Allow time to rest and enjoy the view from these secluded bays and headlands.


(0km) Kianinny Boat Ramp → Kianinny Park
60 m
1 mins
3m
0m
Easy track
From the car park, this walk keeps the water on the left as it heads down the stairs to the grassed area of the park. The track then continues along the creek, below on the left, to a bridge and information sign.
Kianinny Bay picnic area
Kianinny Bay picnic area is found at the end of Davidson St in Tathra. The picnic area leads off the boat ramp’s parking area. Kianinny Bay picnic area has an electric BBQ hot plate underneath a shelter. The picnic area also boasts a number of tables, grass clearing, toilets and a playground. Kianinny Bay picnic area is at one end of the Kangarutha Track and, with the large car park at the bay, this makes it quite convenient for car shuffles.
(0.06km) Kianinny Park → Kianinny Bay Lookout
150 m
5 mins
27m
-5m
Hard track
Veer left: From the information sign, this walk crosses the bridge and heads up the hill. The walk soon leads up the logged steps to a rock platform at the top. On the ocean side of the rock platform is a great lookout over Kianinny Bay and the coast.
Kianinny Bay Lookout

Kianinny Bay Lookout is perched on the hill, just south of Kianinny Bay. The lookout is an unfenced rock platform which has two white nautical markers placed on it. The lookout views the passage of boats into Kianinny Bay as they avoid the rocks near the northern headland. The lookout can be accessed from Kianinny Bay car park in Tathra, using the Kangarutha Track.
(0.21km) Kianinny Bay Lookout → Boulder Bay
1.5 km
35 mins
72m
-93m
Hard track
Turn right: From the intersection, this walk keeps the ocean to the left as it crosses straight over the rock platform to a gap in the heath. The track passes down through the heath to meander and undulate for some time. The track continues past a cleared area on the right before turning into a gully. The track winds out of the gully tending right, up the hill, to an area of low heath with a faint track on the left.
Veer right: From the intersection, this walk heads up the hill away from the ocean. The track winds along an area of low heath to soon turn left into taller heath. The track winds and undulates through the cleared passage in the heathland, passing through a few gullies. The walk crosses a large creek with stairs leading down and away from a rock platform. The track then continues up and around the hillside through an area of more open vegetation. This walk then leads down the hill to an arrow post, marking the track on the right.
Continue straight: From the intersection, this walk heads down the hill along the track, soon coming into view of the beach. The walk winds down the stairs onto a rock which leads onto the beach. This walk continues to the middle of the beach.
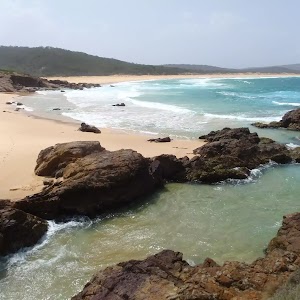
Boulder Bay
Boulder Bay is located on the Kangarutha Track, south of Tathra, within Bournda National Park. The bay is sided by two rocky coast lines that funnel the water to the sandy beach. The sand of Boulder Bay is lower on the beach and the area behind this is covered in rounded rocks in a variety of sizes. Boulder Bay Creek runs into the bay but is usually a dry creek bed at the back of the beach. Access to Boulder Bay is by the Kangarutha Track.
(1.73km) Boulder Bay → Int Kangarutha Trk Nth and White Rock Rd
2.8 km
1 hr 9 mins
186m
-152m
Hard track
Continue straight: From the middle of the beach, the walk heads towards the track marker near a tree on the beach, keeping the water to the left. The walk then follows the arrow along a bush track, away from the beach and winds through areas of heath and open bush. After passing a small trail to the left (which accesses the cliffs through the heath), the track continues, keeping the ocean to the left, and arrives at a signposted intersection with an overgrown service trail.
Continue straight: From the intersection, the walk follows the arrow down the steps, towards the ocean. The track opens out onto the coast and arrives at a white post on the rock platform beside the bay.
Turn right: From the first white post, the walk heads towards the next visible white post, keeping the ocean on the left. The track meanders along the rocky platform then tends away from the bay, turning right, up the hill. As it climbs up the hill, the walk passes an ant mound, to the left, and soon heads over a very rocky area, following the most worn and compacted route through the rocks. The track continues, with the ocean on the left, and follows a track marker down the hill, arriving at the middle of a rocky bay.
Continue straight: From the middle of the rocky bay, the walk follows rock-cut steps up onto the rocky headland, keeping the water on the left. The track then winds its way over the rocks, passing a lookout on the left, and dropping into a U-shaped rock valley (which points out to sea).
Continue straight: From the U-shaped rock valley, the walk climbs the hill, keeping the ocean on the left. The track continues for some time passing many great views of the coast. After passing through more areas of open and closed heath, the track bends right and goes up some stairs to an intersection with a service trail.
(4.57km) Int. Kangarutha Trk Nth and White Rock Rd → White Rock Nth route
230 m
5 mins
1m
-34m
Hard track
Turn left : From the intersection, this walk heads down the hill towards the ocean. The track soon tends right, down to a cul-de-sac in the management trail.
Continue straight: On the side of the car park where the road leads up the hill, this walk follows track around the cliff tops, keeping the small bay below on the left. The track heads around the small hill (above on the right), leading to a point on the white rock which overlooks the sea and surrounding coast. At the end of this side trip, retrace your steps back to the main walk then Continue straight.
Continue straight: On the side of the car park where the road leads up the hill, this walk follows track around the cliff tops, keeping the small bay below on the left. The track heads around the small hill (above on the right), leading to a point on the white rock which overlooks the sea and surrounding coast. At the end of this side trip, retrace your steps back to the main walk then Continue straight.
White Rock

White Rock, Bournda National Park, as the name suggests, is an area of white coloured rocks, south of Tathra. The rocks form the headland with spectacular views of the coastline both to the North and South, and across the South Pacific Ocean. White Rock car park is backed by an old quarry, which formed the amphitheatre of rock behind it. White Rock can be accessed by White Rock Rd, off the Snowy Mountains Highway.
(4.57km) Int. Kangarutha Trk Nth and White Rock Rd → Int. White Rock Rd and Kangarutha Trk Sth
40 m
1 mins
3m
0m
Moderate track
Veer right: From the intersection, this walk heads up the hill to a bend in the management trail, where a small green track marker indicates the intersection.
(4.6km) Int. White Rock Rd and Kangarutha Trk Sth → Games Bay
1.6 km
36 mins
69m
-109m
Hard track
Veer left: From the intersection, this walk heads south-west, away from the management trail and up the slight hill following the track marker. The track meanders for a short time to tend left down the hill, towards the ocean. Here, the track meets a large black termite mound and turns right. The walk passes a number of good views, and a track on the left (which leads down to the ocean). This walk continues along the hillside, and soon tends to the right, heading through the heath to enter an area of trees. The track then heads down the hill into a rocky bay.
Turn right: From the bay, this walk heads up the hill, keeping the ocean on the left of the track. The walk winds up the steps to then meander along the hillside, coming to a track marker at an intersection.
Veer left: From the intersection, this walk heads down the stairs following the track marker arrow. The track very quickly winds down into the sandy creek bed behind Games Bay. A signpost marking ‘Games Bay’ is hidden in the low bush at the back of the beach area.
Games Bay
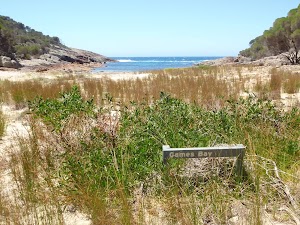
Games Bay, Bournda National Park, is located along the Kangarutha Track, south of Tathra. The bay is formed by two rocky sides, and backed by a sandy beach. Games Bay Creek runs through the beach out to sea, but flows intermittently. The bay is named after Mr Games, a settler who cleared and used the surrounding area of the bay for dairy farming. Mr Games also made a track from Games Bay to White Rock. The bay is backed by a small fireplace with driftwood seats around it.
(6.21km) Games Bay → Int. Wallagoot Gap and Kangarutha Trks
2.4 km
49 mins
86m
-82m
Hard track
Turn right: From the sandy creek bed, this walk heads up the hill out of Games Bay, keeping the ocean to the left of the track. The walk keeps Games Bay just below on the left for a short time, as it winds up the hill and then tends right with the hill, following posts marking the track. The walk passes many access tracks down to the side of Games Bay. This walk leads through heath and banksia, with the posts still leading the way through large clear areas and areas of thick vegetation. The track continues for quite some time, winding with the ocean far below to the left until coming to the signposted intersection just before the timber platform overlooking Wallagoot Gap.
(8.61km) Int. Wallagoot Gap and Kangarutha Trks → Wallagoot Gap
110 m
2 mins
0m
-8m
Easy track
Turn left: From the intersection, the walk heads to the timber platform then down the timber steps onto Wallagoot Gap Beach. At the end of this side trip, retrace your steps back to the main walk then Veer left.
Wallagoot Gap
Wallagoot Gap is situated south of Tathra, facing east out onto the South Pacific Ocean. The gap is created by two headlands that protect the main beach from the wind. A second beach can be found around the corner of Wallagoot Gap, by following the right-hand side wall. Wallagoot Gap is an excellent place for a swim or a play in the sand. The gap can be accessed from Wallagoot Beach car park at the end of Wallagoot Lake Rd or the Kangarutha Track.
(8.61km) Int. Wallagoot Gap and Kangarutha Trks → Wallagoot Beach North
280 m
6 mins
12m
-11m
Moderate track
Turn right: From the intersection, this walk heads down the hill, keeping the ocean and the wooden platform to the left. The track tends right, down the hill to reveal a great view over Wallagoot Beach. The walk then heads down the hill and a set of stairs onto the beach. At the end of this side trip, retrace your steps back to the main walk then Turn left.
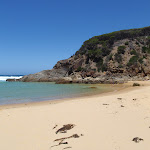
Wallagoot Beach
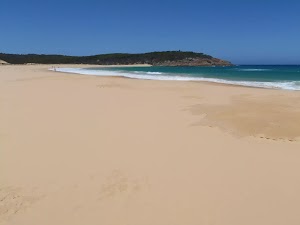
Wallagoot Beach, is located east of Wallagoot Lake in Bournda National Park, between Tathra and Merimbula. The beach is a large expanse of white sand, with surf conditions created by its south easterly aspect. The beach’s northern end sometimes floods, due to Wallagoot Lake breaking through the beach’s sand barrier. Alternative access (instead of Wallagoot Lake Rd) is from Bournda Rd, through Hobart Beach camping area.
(8.61km) Int. Wallagoot Gap and Kangarutha Trks → Wallagoot Beach Carpark
220 m
4 mins
7m
-7m
Easy track
Turn right: From the intersection, the walk heads away from the coast slightly uphill (that is, away from the face of the sign). The track tends left and dips through a valley, soon leading to a car park. (The car park is found at the end of Wallagoot Lake Rd, off the Sapphire Coast Drive.)
Maps for the Kangarutha Track walk
You can download the PDF for this walk to print a map.
These maps below cover the walk and the wider area around the walk, they are worth carrying for safety reasons.
| Wolumla | 1:25 000 Map Series | 88242N WOLUMLA | NSW-88242N |
| Bega | 1:25 000 Map Series | 88241S BEGA | NSW-88241S |
| Bega | 1:100 000 Map Series | 8824 BEGA | 8824 |
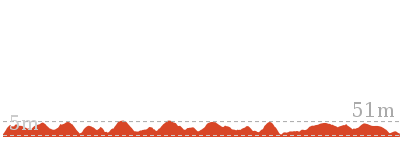
Cross sectional view of the Kangarutha Track bushwalking track
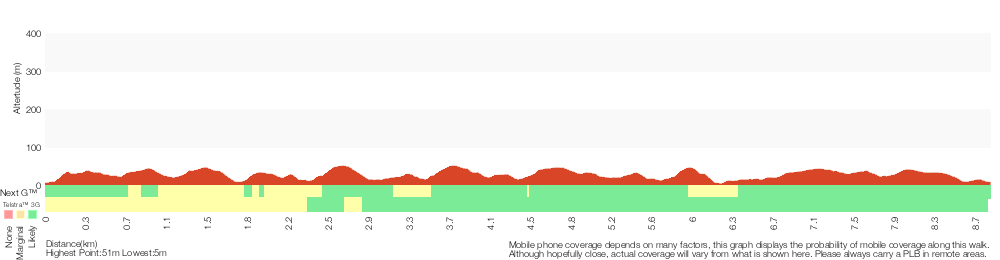
Analysis and summary of the altitude variation on the Kangarutha Track
Overview of this walks grade – based on the AS 2156.1 – 2001
Under this standard, a walk is graded based on the most difficult section of the walk.
| Length | 8.8 km | ||
| Time | 4 hrs | ||
| . | |||
| Grade 4/6 Hard track |
AS 2156.1 | Gradient | Very steep (4/6) |
| Quality of track | Rough track, where fallen trees and other obstacles are likely (4/6) | ||
| Signs | Minimal directional signs (4/6) | ||
| Experience Required | No experience required (1/6) | ||
| Weather | Weather generally has little impact on safety (1/6) | ||
| Infrastructure | Limited facilities (such as cliffs not fenced, significant creeks not bridged) (4/6) |
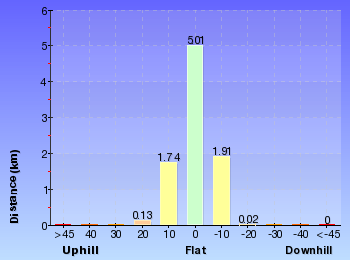
Some more details of this walks Grading
Here is a bit more details explaining grading looking at sections of the walk
Gradient
4.6km of this walk is very steep and another 4km has short steep hills. The remaining (280m) has gentle hills with occasional steps.
Quality of track
6km of this walk follows a rough track, where fallen trees and other obstacles are likely and another 2.3km follows a formed track, with some branches and other obstacles. The remaining (280m) follows a clear and well formed track or trail.
Signs
8km of this walk has minimal directional signs and another 500m has directional signs at most intersection. The remaining (280m) is clearly signposted.
Experience Required
This whole walk, 9km requires no previous bushwalking experience.
weather
This whole walk, 9km is not usually affected by severe weather events (that would unexpectedly impact safety and navigation).
Infrastructure
8km of this walk has limited facilities (such as cliffs not fenced, significant creeks not bridged) and another 430m is close to useful facilities (such as fenced cliffs and seats). The remaining (35m) has limited facilities (such as not all cliffs fenced).
Similar walks
A list of walks that share part of the track with the Kangarutha Track walk.
194 m Circuit
10 mins
Hard track
416 m Return
15 mins
Hard track
648 m Return
15 mins
Easy track
1 km Return
30 mins
Moderate track
1.8 km Return
1 Hr
Hard track
3.5 km Return
2 hrs
Hard track
5.2 km Return
2 hrs
Hard track
6 km Return
1 hr 45 mins
Moderate track
9 km Return
3 hrs 30 mins
Hard track
10.5 km Return
3 hrs 30 mins
Hard track
11.5 km One way
4 hrs 30 mins
Hard track
Other Nearby walks
A list of walks that start near the Kangarutha Track walk.
1.2 km Circuit
45 mins
Moderate track
3.6 km Return
1 hr 15 mins
Easy track
10.6 km Circuit
3 hrs 45 mins
Hard track
5 km Return
1 hr 30 mins
Moderate track
7.6 km Circuit
2 hrs 15 mins
Hard track
8 km Circuit
3 hrs 30 mins
Experienced only
5 km Return
1 hr 45 mins
Experienced only
464 m Return
10 mins
Moderate track
482 m Return
12 mins
Hard track
5.2 km Circuit
2 hrs
Hard track
286 m Return
5 mins
Moderate track
2.1 km Return
45 mins
Hard track
Plan your trip to and from the walk here
The Kangarutha Track walk starts at the Kianinny Boat Ramp (gps: -36.736751, 149.9819)
Your main transport option to Kianinny Boat Ramp is by;
![]() Car. There is free parking available.
Car. There is free parking available.
(get details)
The Kangarutha Track ends at the Wallagoot Beach Carpark (gps: -36.785005, 149.96105)
Your main transport option to Wallagoot Beach Carpark is by;
![]() Car. There is free parking available.
Car. There is free parking available.
(get details)
Short URL = http://wild.tl/kt
Gallery images
There are other downloads I am still working on.
You will probably need to login to access these — still all free.
* KML (google earth file)
* GPX (GPS file)
Special Maps/ brochures
* A3 topo maps
* PDF with Lands Topo map base
* PDF with arial image (and map overlay)
I wanted to get the main site live first, this extra stuff will come in time.
Happy walking
Matt 🙂
Hobart Beach loop
And Walk
Hobart Beach loop

45 mins
1.2 km Circuit
1 m
Moderate track


Hobart Beach campground
This is a well-established campsite close to the beach and lake. There are garbage and recycling bins. Each camping space is well-defined and there is a large covered common area. The camp surrounds the stone and timber toilet and laundry facility.
(0km) Hobart Beach large shelter → Wallagoot Lake Shore (Hobart Beach)
330 m
5 mins
0m
-1m
Easy track
From the shelter, the walk crosses the road (away from the face of the signpost and shelter). The track follows the road into the campsites, turning right immediately through the logs. The track then continues away from the campsites, with the lake and beach coming into view on the left. The track continues to tend left towards the lake, where it comes to a clearing just behind Hobart Beach.
Wallagoot Lake (Lagoon)
Wallagoot Lake, Bournda National Park, is located between Tathra and Merimbula on the Sapphire Coast Drive. Wallagoot Lake is a large expanse of water, although it is only two to three metres deep. The lake’s catchment is found predominantly within Bournda National Park, the main tributary being Moncks Creek. The lake is blocked from the ocean by sand dunes on the eastern end – these dunes are broken intermittently, connecting the lake with the sea. Wallagoot Lake is home to many bird species including Black Swans and a threatened Tern.
The lake is a popular spot for picnics and other recreation. Hobart Beach camping area lies on the southern shore of the lake, and on the northern edge lies the Wallagoot Lake Boat Club, with its parking, and also a picnic area, providing plenty of opportunities to enjoy the lake. Wallagoot Lake can be accessed by Wallagoot Lake Rd off the Sapphire Coast Drive. More info.
The lake is a popular spot for picnics and other recreation. Hobart Beach camping area lies on the southern shore of the lake, and on the northern edge lies the Wallagoot Lake Boat Club, with its parking, and also a picnic area, providing plenty of opportunities to enjoy the lake. Wallagoot Lake can be accessed by Wallagoot Lake Rd off the Sapphire Coast Drive. More info.
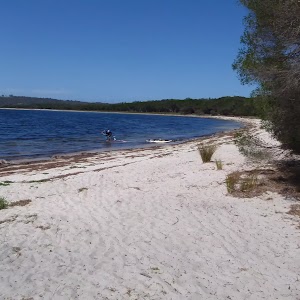
Hobart Beach
Hobart Beach is located on the southern shores of Wallagoot Lake, in Bournda NP between Tathra and Merimbula. Hobart Beach expands from the sand dunes to Scotts Bay on Wallagoot Lake. The beach is a thin slice of white sand between the treeline and the lake, providing a nice opportunity to enjoy the water. Access to the beach is through Hobart Beach camping area, off Bournda Rd in Bournda National Park.
(0.33km) Wallagoot Lake Shore (Hobart Beach) → Int. Hobart Lagoon and Hobart Campground Trks
510 m
8 mins
0m
0m
Moderate track
Turn sharp left: From the intersection, the walk follows the track along the shore line keeping Wallagoot Lake to the right. The track soon comes to a three way intersection marked with a ‘Walking track’ sign[1].
Continue straight: From the intersection, this walk follows a track along the shore keeping Wallagoot Lake to the right. Soon the track leads to a three way intersection with a ‘Ocean Beaches’ sign[2] pointing back (and a set of steps on the left).
Continue straight: From the intersection, this walk follows a track along the shore keeping Wallagoot Lake to the right. Soon the track leads to a three way intersection with a ‘Ocean Beaches’ sign[2] pointing back (and a set of steps on the left).
(0.84km) Int. Hobart Lagoon and Hobart Campground Trks → Hobart Beach large shelter
410 m
6 mins
1m
0m
Easy track
Turn left: From the intersection, this walk heads up the stairs following the ‘Hobart Beach Camping Area’ sign[3]. At the road continues straight to soon turn left at the ‘T’ intersection (heading away from ‘Sites 36-54’[4]). Soon this road leads to to a large green-roofed, wooden building, the toilet block.
Continue straight: From the intersection in front of the toilet block, the walk follows the dirt road (leaving the toilet block behind on the left). The walk follows the dirt road for a short distance to a signposted intersection (with a footpath) beside a large, open shelter. The shelter covers a number of picnic tables.
Continue straight: From the intersection in front of the toilet block, the walk follows the dirt road (leaving the toilet block behind on the left). The walk follows the dirt road for a short distance to a signposted intersection (with a footpath) beside a large, open shelter. The shelter covers a number of picnic tables.
Maps for the Hobart Beach loop walk
You can download the PDF for this walk to print a map.
These maps below cover the walk and the wider area around the walk, they are worth carrying for safety reasons.
| Wolumla | 1:25 000 Map Series | 88242N WOLUMLA | NSW-88242N |
| Bega | 1:100 000 Map Series | 8824 BEGA | 8824 |
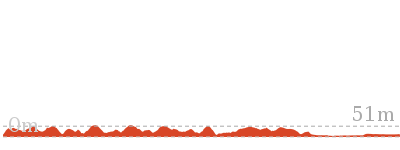
Cross sectional view of the Hobart Beach loop bushwalking track
Analysis and summary of the altitude variation on the Hobart Beach loop
Overview of this walks grade – based on the AS 2156.1 – 2001
Under this standard, a walk is graded based on the most difficult section of the walk.
| Length | 1.2 km | ||
| Time | 45 mins | ||
| . | |||
| Grade 3/6 Moderate track |
AS 2156.1 | Gradient | Gentle hills with occasional steps (2/6) |
| Quality of track | Formed track, with some branches and other obstacles (3/6) | ||
| Signs | Directional signs along the way (3/6) | ||
| Experience Required | No experience required (1/6) | ||
| Weather | Weather generally has little impact on safety (1/6) | ||
| Infrastructure | Limited facilities, not all cliffs are fenced (3/6) |
Some more details of this walks Grading
Here is a bit more details explaining grading looking at sections of the walk
Gradient
Around 630m of this walk has gentle hills with occasional steps, whilst the remaining 620m is flat with no steps.
Quality of track
630m of this walk follows a clear and well formed track or trail and another 510m follows a formed track, with some branches and other obstacles. The remaining (110m) follows a smooth and hardened path.
Signs
Around 740m of this walk is clearly signposted, whilst the remaining 510m has directional signs at most intersection.
Experience Required
This whole walk, 1.2km requires no previous bushwalking experience.
weather
This whole walk, 1.2km is not usually affected by severe weather events (that would unexpectedly impact safety and navigation).
Infrastructure
Around 740m of this walk is close to useful facilities (such as fenced cliffs and seats), whilst the remaining 510m has limited facilities (such as not all cliffs fenced).
Similar walks
A list of walks that share part of the track with the Hobart Beach loop walk.
3.6 km Return
1 hr 15 mins
Easy track
6 km Return
1 hr 45 mins
Moderate track
7.6 km Circuit
2 hrs 15 mins
Hard track
10.5 km Return
3 hrs 30 mins
Hard track
10.6 km Circuit
3 hrs 45 mins
Hard track
11.5 km One way
4 hrs 30 mins
Hard track
Other Nearby walks
A list of walks that start near the Hobart Beach loop walk.
5 km Return
1 hr 30 mins
Moderate track
8 km Circuit
3 hrs 30 mins
Experienced only
5 km Return
1 hr 45 mins
Experienced only
464 m Return
10 mins
Moderate track
482 m Return
12 mins
Hard track
5.2 km Circuit
2 hrs
Hard track
286 m Return
5 mins
Moderate track
2.1 km Return
45 mins
Hard track
1.8 km One way
45 mins
Moderate track
1 km Return
30 mins
Moderate track
5.2 km Return
2 hrs
Hard track
648 m Return
15 mins
Easy track
Plan your trip to and from the walk here
The Hobart Beach loop walk starts and ends at the Hobart Beach large shelter (gps: -36.797, 149.93998)
Your main transport option to Hobart Beach large shelter is by;
![]() Car. A park entry fee is required for driving into the park.
Car. A park entry fee is required for driving into the park.
(get details)
Short URL = http://wild.tl/hbl
Gallery images
There are other downloads I am still working on.
You will probably need to login to access these — still all free.
* KML (google earth file)
* GPX (GPS file)
Special Maps/ brochures
* A3 topo maps
* PDF with Lands Topo map base
* PDF with arial image (and map overlay)
I wanted to get the main site live first, this extra stuff will come in time.
Happy walking
Matt 🙂
Wallagoot Gap to White Rock
And Walk
Wallagoot Gap to White Rock

3 hrs 30 mins
9 km Return
398 m
Hard track
The walk to White Rock from Wallagoot Gap is an excellent way to experience the Bournda National Park coastline. The walk is scattered with many views of the coastline, with Games Bay, about halfway, a nice spot to cool down. The White Rocks provide a great picnic area (no facilities) for lunch before returning to Wallagoot car park.


(0km) Wallagoot Beach Carpark → Int. Wallagoot Gap and Kangarutha Trks
220 m
4 mins
7m
-7m
Easy track
(Wallagoot car park is found at the end of Wallagoot Lake Rd, off the Sapphire Coast Drive.) This walk leaves the car park along the track between the information sign (on the right) and toilet (on the left), heading between two cut logs. The wide track dips through a valley then heads over a rise, coming to a signposted intersection (with a timber platform on the right).
(0.22km) Int. Wallagoot Gap and Kangarutha Trks → Wallagoot Gap
110 m
2 mins
0m
-8m
Easy track
Veer right: From the intersection, the walk heads to the timber platform then down the timber steps onto Wallagoot Gap Beach. At the end of this side trip, retrace your steps back to the main walk then Turn right.
Wallagoot Gap
Wallagoot Gap is situated south of Tathra, facing east out onto the South Pacific Ocean. The gap is created by two headlands that protect the main beach from the wind. A second beach can be found around the corner of Wallagoot Gap, by following the right-hand side wall. Wallagoot Gap is an excellent place for a swim or a play in the sand. The gap can be accessed from Wallagoot Beach car park at the end of Wallagoot Lake Rd or the Kangarutha Track.
(0.22km) Int. Wallagoot Gap and Kangarutha Trks → Games Bay
2.4 km
49 mins
82m
-86m
Hard track
Turn left: From the intersection, this walk follows the ‘Kangarutha Walking Track’ arrow through the trees, keeping the coast to the right. The track winds for some time, with the ocean far below to the right of the track. The track winds back and forth for quite some time, with posts leading the way through areas of open and closed vegetation. The walk then turns left into a Games Bay, a large bay, with many access track leading down to the ocean on the right of the track. This walk leads around the bay to turn right, down to into the sandy Games Bay. The small bushes at the back of the bay hide the signpost for ‘Games Bay’.
Games Bay
Games Bay, Bournda National Park, is located along the Kangarutha Track, south of Tathra. The bay is formed by two rocky sides, and backed by a sandy beach. Games Bay Creek runs through the beach out to sea, but flows intermittently. The bay is named after Mr Games, a settler who cleared and used the surrounding area of the bay for dairy farming. Mr Games also made a track from Games Bay to White Rock. The bay is backed by a small fireplace with driftwood seats around it.
(2.62km) Games Bay → Int. White Rock Rd and Kangarutha Trk Sth
1.6 km
36 mins
109m
-69m
Hard track
Turn left: From the sandy creek bed at the back of Games Bay, this walk follows the track marker arrow up the hill, keeping the ocean to the right. The walk winds up the stairs to a signposted intersection.
Veer right: From the intersection, this walk follows the arrow across the hill. The track meanders for a short time to then wind down steps to a sandy river bed at the peak of a bay, with an easy-to-miss signpost for ‘Games Bay’.
Turn left: From the intersection, this walk heads up the hill away from the valley, keeping the ocean on the right. The track leads up to an area of tall bush trees, then tends left down the hill. The walk continues along the hillside, keeping the ocean on the right. The track meanders through the heath, passing a few good viewing points of the coast. The walk then meets a large black termite mound, where the track turns left up the hill. The track continues up the hill, tending right to then go down a slight hill to a signposted intersection with a management trail.
(4.22km) Int. White Rock Rd and Kangarutha Trk Sth → White Rock Carpark
160 m
4 mins
0m
-25m
Moderate track
Veer right: From the intersection, this walk heads down the hill following the track marker arrow. The track heads down the hill for a short time to another track marker on the left of the management trail.
Continue straight: From the intersection, this walk heads down the hill towards the ocean. The track soon tends right, down to a cul-de-sac in the management trail.
Continue straight: From the intersection, this walk heads down the hill towards the ocean. The track soon tends right, down to a cul-de-sac in the management trail.
(4.38km) White Rock Carpark → White Rock Nth route
100 m
2 mins
1m
-12m
Hard track
Continue straight: On the side of the car park where the road leads up the hill, this walk follows track around the cliff tops, keeping the small bay below on the left. The track heads around the small hill (above on the right), leading to a point on the white rock which overlooks the sea and surrounding coast.
White Rock
White Rock, Bournda National Park, as the name suggests, is an area of white coloured rocks, south of Tathra. The rocks form the headland with spectacular views of the coastline both to the North and South, and across the South Pacific Ocean. White Rock car park is backed by an old quarry, which formed the amphitheatre of rock behind it. White Rock can be accessed by White Rock Rd, off the Snowy Mountains Highway.
Maps for the Wallagoot Gap to White Rock walk
You can download the PDF for this walk to print a map.
These maps below cover the walk and the wider area around the walk, they are worth carrying for safety reasons.
| Wolumla | 1:25 000 Map Series | 88242N WOLUMLA | NSW-88242N |
| Bega | 1:100 000 Map Series | 8824 BEGA | 8824 |
Cross sectional view of the Wallagoot Gap to White Rock bushwalking track
Analysis and summary of the altitude variation on the Wallagoot Gap to White Rock
Overview of this walks grade – based on the AS 2156.1 – 2001
Under this standard, a walk is graded based on the most difficult section of the walk.
| Length | 9 km | ||
| Time | 3 hrs 30 mins | ||
| . | |||
| Grade 4/6 Hard track |
AS 2156.1 | Gradient | Very steep (4/6) |
| Quality of track | Rough track, where fallen trees and other obstacles are likely (4/6) | ||
| Signs | Minimal directional signs (4/6) | ||
| Experience Required | No experience required (1/6) | ||
| Weather | Weather generally has little impact on safety (1/6) | ||
| Infrastructure | Limited facilities (such as cliffs not fenced, significant creeks not bridged) (4/6) |
Some more details of this walks Grading
Here is a bit more details explaining grading looking at sections of the walk
Gradient
3.8km of this walk has short steep hills and another 420m is very steep. The remaining (220m) has gentle hills with occasional steps.
Quality of track
4.1km of this walk follows a rough track, where fallen trees and other obstacles are likely and another 220m follows a clear and well formed track or trail. The remaining (160m) follows a formed track, with some branches and other obstacles.
Signs
4km of this walk has minimal directional signs and another 310m has directional signs at most intersection. The remaining (220m) is clearly signposted.
Experience Required
This whole walk, 4.5km requires no previous bushwalking experience.
weather
This whole walk, 4.5km is not usually affected by severe weather events (that would unexpectedly impact safety and navigation).
Infrastructure
4km of this walk has limited facilities (such as cliffs not fenced, significant creeks not bridged) and another 260m has limited facilities (such as not all cliffs fenced). The remaining (220m) is close to useful facilities (such as fenced cliffs and seats).
Similar walks
A list of walks that share part of the track with the Wallagoot Gap to White Rock walk.
194 m Circuit
10 mins
Hard track
648 m Return
15 mins
Easy track
1 km Return
30 mins
Moderate track
5.2 km Return
2 hrs
Hard track
6 km Return
1 hr 45 mins
Moderate track
8.8 km One way
4 hrs
Hard track
10.5 km Return
3 hrs 30 mins
Hard track
11.5 km One way
4 hrs 30 mins
Hard track
Other Nearby walks
A list of walks that start near the Wallagoot Gap to White Rock walk.
1.2 km Circuit
45 mins
Moderate track
3.6 km Return
1 hr 15 mins
Easy track
10.6 km Circuit
3 hrs 45 mins
Hard track
5 km Return
1 hr 30 mins
Moderate track
7.6 km Circuit
2 hrs 15 mins
Hard track
8 km Circuit
3 hrs 30 mins
Experienced only
5 km Return
1 hr 45 mins
Experienced only
464 m Return
10 mins
Moderate track
482 m Return
12 mins
Hard track
5.2 km Circuit
2 hrs
Hard track
286 m Return
5 mins
Moderate track
2.1 km Return
45 mins
Hard track
Plan your trip to and from the walk here
The Wallagoot Gap to White Rock walk starts and ends at the Wallagoot Beach Carpark (gps: -36.785005, 149.96105)
Your main transport option to Wallagoot Beach Carpark is by;
![]() Car. A park entry fee is required for driving into the park.
Car. A park entry fee is required for driving into the park.
(get details)
Short URL = http://wild.tl/wgtwr
Gallery images
There are other downloads I am still working on.
You will probably need to login to access these — still all free.
* KML (google earth file)
* GPX (GPS file)
Special Maps/ brochures
* A3 topo maps
* PDF with Lands Topo map base
* PDF with arial image (and map overlay)
I wanted to get the main site live first, this extra stuff will come in time.
Happy walking
Matt 🙂
Bournda Lagoon to North Tura
And Walk
Bournda Lagoon to North Tura

45 mins
1.8 km One way
23 m
Moderate track


(0km) Bournda Lagoon Car Park → Bournda Lagoon
140 m
2 mins
0m
-3m
Moderate track
From the car park, the walk heads past the gate following the sign to ‘Bournda Lagoon’ past the toilet. The walk heads down the hill, becoming more sandy as it comes to meet the lagoon shore.
Bournda Lagoon

Bournda Lagoon has formed behind Bournda Beach, between Tathra and Merimbula in Bournda National Park. The lagoon is deep enough for swimming and is a popular spot for a freshwater swim. The lagoon is fed by Sandy Beach Creek, which has been silted up at the southernmost end of Bournda Beach. The lagoon supports a variety of environments, including a rainforest, on its shores. However, the lagoon is subject to environmental issues such as algal blooms. The lagoon can be accessed by bush track from Bournda Lagoon car park, at the end of Bournda Rd. More info.
(0.14km) Bournda Lagoon → Bournda Bch Sth
460 m
8 mins
0m
-8m
Moderate track
Continue straight: From the lagoon, this walk heads over the dunes towards the ocean, keeping the lagoon behind on the right. The walk turns right on the beach, keeping the ocean to the left, and follows the beach to the end where there is a signposted intersection.
(0.6km) Bournda Bch Sth → Int Bournda Lagoon and Steps onto Beach Trks
1.1 km
20 mins
21m
-13m
Moderate track
Continue straight: From the intersection, this walk follows the sign to ‘Bournda Island’ and ‘North Tura Beach’ up the hill, passing a grassy platform on the left (which has great views over Bournda Island). The walk leads along the top of the dunes, along the fenced track to an intersection with a sign pointing back to ‘Bournda Island’ and ‘Bournda Lagoon’.
Continue straight: From the intersection, this walk follows none of the signed directions, instead it keeps the ocean on the left of the track and continues behind the dunes. The walk winds along the sandy track for a short time, heading down into the melaleuca trees to a signposted intersection.
Veer left: From the intersection, the walk follows the ‘Nth Tura Carpark’ sign, keeping the ocean to the left. The track winds up through melaleuca trees, away from the ocean views to come to an un-signposted intersection with a set of stairs on the left of the track.
(1.73km) Int. Bournda Lagoon and Steps onto Beach Trks → Nth Tura Beach
60 m
1 mins
0m
-3m
Moderate track
Turn left: From the intersection, this walk follows the stairs down the hill and through the heath and then onto the beach. At the end of this side trip, retrace your steps back to the main walk then Turn left .
North Tura Beach
North Tura Beach is located north of Merimbula and Tura Heads. The beach is a beautiful expanse of sand of nearly 2.5km, stretching from Tura Heads to Bournda Island in the north. North Tura is an easterly-facing beach which is accessed by Widgeram Rd off the Sapphire Coast Drive.
(1.73km) Int. Bournda Lagoon and Steps onto Beach Trks → Nth Tura Lookout int.
70 m
2 mins
2m
0m
Moderate track
Continue straight: From the intersection, this walk leaves the beach and stairs behind on the left, as the track winds up the hill for a short time to the car park.
Continue straight: From the intersection, the walk heads away from the face of the ‘North Tura Beach’ sign[1] initially the picnic tables to your right. The walk leads gently uphill along the wide gravel track, past the large ‘Welcome to North Tura Beach’ information sign[2], and toilet
Continue straight: From the intersection, the walk heads away from the face of the ‘North Tura Beach’ sign[1] initially the picnic tables to your right. The walk leads gently uphill along the wide gravel track, past the large ‘Welcome to North Tura Beach’ information sign[2], and toilet

to come to an intersection beside the car park marked with a timber ‘North Tura Beach’ sign[3].
(1.8km) Nth Tura Lookout int. → Nth Tura Lookout
30 m
1 mins
0m
-1m
Very easy
Turn left: From the intersection, this walk follows the ‘Viewing Platform’ sign[4], towards the lookout. The walk leads along the gravel path, around the timber bollard[5] then up the fiberglass ramp (1.5m wide), keeping a timber fence either side. At the end of this side trip, retrace your steps back to the main walk then Turn right.
North Tura Lookout

North Tura Beach Lookout is between Tathra and Merimbula in Bournda National Park. The lookout platform (4.6×4.6m) has stunning views[6] over North Tura Beach, all the way south to Tura Headland[7] and out to sea. The lookout is also a perfect viewing point for Turingal Head[8] and Bournda Island. The fence[9] is 91cm high and the ramp leading up is 1.5m wide[10].
Maps for the Bournda Lagoon to North Tura walk
You can download the PDF for this walk to print a map.
These maps below cover the walk and the wider area around the walk, they are worth carrying for safety reasons.
| Wolumla | 1:25 000 Map Series | 88242N WOLUMLA | NSW-88242N |
| Bega | 1:100 000 Map Series | 8824 BEGA | 8824 |
Cross sectional view of the Bournda Lagoon to North Tura bushwalking track
Analysis and summary of the altitude variation on the Bournda Lagoon to North Tura
Overview of this walks grade – based on the AS 2156.1 – 2001
Under this standard, a walk is graded based on the most difficult section of the walk.
| Length | 1.8 km | ||
| Time | 45 mins | ||
| . | |||
| Grade 3/6 Moderate track |
AS 2156.1 | Gradient | Short steep hills (3/6) |
| Quality of track | Formed track, with some branches and other obstacles (3/6) | ||
| Signs | Directional signs along the way (3/6) | ||
| Experience Required | No experience required (1/6) | ||
| Weather | Weather generally has little impact on safety (1/6) | ||
| Infrastructure | Limited facilities, not all cliffs are fenced (3/6) |
Some more details of this walks Grading
Here is a bit more details explaining grading looking at sections of the walk
Gradient
1.1km of this walk has short steep hills and another 680m has gentle hills with occasional steps. The remaining (65m) is flat with no steps.
Quality of track
Around 1.8km of this walk follows a formed track, with some branches and other obstacles, whilst the remaining 30m follows a clear and well formed track or trail.
Signs
Around 1.8km of this walk has directional signs at most intersection, whilst the remaining 30m is clearly signposted.
Experience Required
This whole walk, 1.8km requires no previous bushwalking experience.
weather
This whole walk, 1.8km is not usually affected by severe weather events (that would unexpectedly impact safety and navigation).
Infrastructure
Around 1.6km of this walk has limited facilities (such as not all cliffs fenced), whilst the remaining 210m is close to useful facilities (such as fenced cliffs and seats).
Similar walks
A list of walks that share part of the track with the Bournda Lagoon to North Tura walk.
124 m Return
5 mins
Very easy
286 m Return
5 mins
Moderate track
316 m Return
10 mins
Moderate track
471 m Circuit
15 mins
Moderate track
2.1 km Return
45 mins
Hard track
2.3 km Return
45 mins
Hard track
3.5 km One way
1 hr 15 mins
Hard track
5 km Return
1 hr 30 mins
Moderate track
5.2 km Circuit
2 hrs
Hard track
7.6 km Circuit
2 hrs 15 mins
Hard track
10.6 km Circuit
3 hrs 45 mins
Hard track
Other Nearby walks
A list of walks that start near the Bournda Lagoon to North Tura walk.
482 m Return
12 mins
Hard track
464 m Return
10 mins
Moderate track
8 km Circuit
3 hrs 30 mins
Experienced only
5 km Return
1 hr 45 mins
Experienced only
3.6 km Return
1 hr 15 mins
Easy track
1.2 km Circuit
45 mins
Moderate track
10.5 km Return
3 hrs 30 mins
Hard track
6 km Return
1 hr 45 mins
Moderate track
1 km Return
30 mins
Moderate track
5.2 km Return
2 hrs
Hard track
648 m Return
15 mins
Easy track
9 km Return
3 hrs 30 mins
Hard track
Plan your trip to and from the walk here
The Bournda Lagoon to North Tura walk starts at the Bournda Lagoon Car Park (gps: -36.815627, 149.93752)
Your main transport option to Bournda Lagoon Car Park is by;
![]() Car. A park entry fee is required for driving into the park.
Car. A park entry fee is required for driving into the park.
(get details)
The Bournda Lagoon to North Tura ends at the Nth Tura Lookout int. (gps: -36.829061, 149.93448)
Your main transport option to Nth Tura Lookout int. is by;
![]() Car. A park entry fee is required for driving into the park.
Car. A park entry fee is required for driving into the park.
(get details)
Short URL = http://wild.tl/bltnt
Gallery images
There are other downloads I am still working on.
You will probably need to login to access these — still all free.
* KML (google earth file)
* GPX (GPS file)
Special Maps/ brochures
* A3 topo maps
* PDF with Lands Topo map base
* PDF with arial image (and map overlay)
I wanted to get the main site live first, this extra stuff will come in time.
Happy walking
Matt 🙂
Hobart Beach to Games Bay
And Walk
Hobart Beach to Games Bay

3 hrs 30 mins
10.5 km Return
230 m
Hard track


Hobart Beach campground
This is a well-established campsite close to the beach and lake. There are garbage and recycling bins. Each camping space is well-defined and there is a large covered common area. The camp surrounds the stone and timber toilet and laundry facility.
(0km) Hobart Beach large shelter → Ocean beaches carpark Trk
760 m
11 mins
2m
-2m
Moderate track
From the shelter, the walk crosses the road (away from the face of the signpost and shelter). The track follows the road into the campsites, turning right immediately through the logs. The track then continues away from the campsites, with the lake and beach coming into view on the left. The track continues to tend left towards the lake, where it comes to a clearing just behind Hobart Beach.
Turn sharp right: From the intersection, this walk heads directly away from the lake, towards the slight clearing on the left and past the white dot on the tree. The track meanders through the melaleuca for a short time to open out onto a car park, with a signpost pointing back to ‘Wallagoot Lake’[1].
Turn left: From the middle of the carpark, this walk follows the sign to ‘Wallagoot Beach’[2] away from the carpark (not the ‘Wallagoot Lake’ sign next to the picnic table). The wide track soon comes to a timber boardwak and a three way intersection maked with a ‘Hobart Beach camp’ sign[3] point back to the carpark.
From this intersection the walk heads along the timber boardwalk following the ‘Ocean Beaches’ sign[4]. The boardwalk soon end and the track winds through the melaleuca to come to a three way intersection marked with a ‘Parking Area’ sign[5] pointing back along the track.
(0.76km) Ocean beaches carpark Trk → Wallagoot Beach
300 m
5 mins
2m
-7m
Moderate track
Turn right: From the intersection, this walk follows the arrow on the sign to Wallagoot Beach, towards the sound of the ocean. The walk winds along the sandy track to a set of stairs, climbing the stairs to then drop down the dune on the other side, by erosion control steps in the sand. The track continues across the beach towards the water.
Wallagoot Beach
Wallagoot Beach, is located east of Wallagoot Lake in Bournda National Park, between Tathra and Merimbula. The beach is a large expanse of white sand, with surf conditions created by its south easterly aspect. The beach’s northern end sometimes floods, due to Wallagoot Lake breaking through the beach’s sand barrier. Alternative access (instead of Wallagoot Lake Rd) is from Bournda Rd, through Hobart Beach camping area.
(1.06km) Wallagoot Beach → Wallagoot Beach North
1.5 km
25 mins
17m
-9m
Moderate track
Turn left: From the bottom of the ladder steps, this walk heads along the beach, keeping the ocean to the right. Wallagoot Lake soon appears on the left, behind the dunes. The walk continues along the beach to the end, where there is a set of stairs leading away from the beach. (This track may be impassable in high water, the hillside further down the beach can be used to access the stairs depending on water levels.)
(2.59km) Wallagoot Beach North → Int. Wallagoot Gap and Kangarutha Trks
280 m
6 mins
11m
-12m
Moderate track
Veer right: From the beach, this walk heads up the stairs and hill through the melaleuca trees, and soon tends left. The track continues up through the trees to an intersection just beyond the timber platform (on the right), marked with ‘Kangarutha Walking Track’ signs.
(2.87km) Int. Wallagoot Gap and Kangarutha Trks → Wallagoot Gap
110 m
2 mins
0m
-8m
Easy track
Turn sharp right: From the intersection, the walk heads to the timber platform then down the timber steps onto Wallagoot Gap Beach. At the end of this side trip, retrace your steps back to the main walk then Turn right.
Wallagoot Gap
Wallagoot Gap is situated south of Tathra, facing east out onto the South Pacific Ocean. The gap is created by two headlands that protect the main beach from the wind. A second beach can be found around the corner of Wallagoot Gap, by following the right-hand side wall. Wallagoot Gap is an excellent place for a swim or a play in the sand. The gap can be accessed from Wallagoot Beach car park at the end of Wallagoot Lake Rd or the Kangarutha Track.
(2.87km) Int. Wallagoot Gap and Kangarutha Trks → Games Bay
2.4 km
49 mins
82m
-86m
Hard track
Veer right: From the intersection, this walk follows the ‘Kangarutha Walking Track’ arrow through the trees, keeping the coast to the right. The track winds for some time, with the ocean far below to the right of the track. The track winds back and forth for quite some time, with posts leading the way through areas of open and closed vegetation. The walk then turns left into a Games Bay, a large bay, with many access track leading down to the ocean on the right of the track. This walk leads around the bay to turn right, down to into the sandy Games Bay. The small bushes at the back of the bay hide the signpost for ‘Games Bay’.
Games Bay
Games Bay, Bournda National Park, is located along the Kangarutha Track, south of Tathra. The bay is formed by two rocky sides, and backed by a sandy beach. Games Bay Creek runs through the beach out to sea, but flows intermittently. The bay is named after Mr Games, a settler who cleared and used the surrounding area of the bay for dairy farming. Mr Games also made a track from Games Bay to White Rock. The bay is backed by a small fireplace with driftwood seats around it.
Maps for the Hobart Beach to Games Bay walk
You can download the PDF for this walk to print a map.
These maps below cover the walk and the wider area around the walk, they are worth carrying for safety reasons.
| Wolumla | 1:25 000 Map Series | 88242N WOLUMLA | NSW-88242N |
| Bega | 1:100 000 Map Series | 8824 BEGA | 8824 |
Cross sectional view of the Hobart Beach to Games Bay bushwalking track
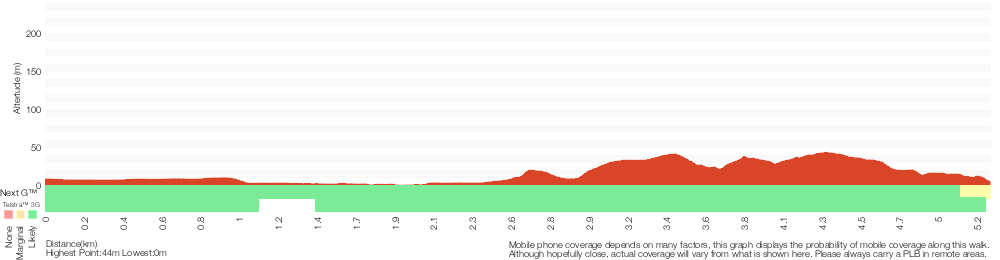
Analysis and summary of the altitude variation on the Hobart Beach to Games Bay
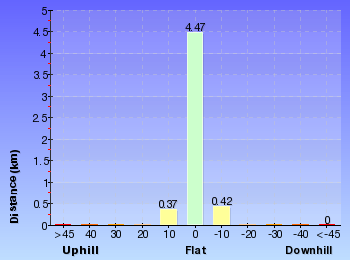
Overview of this walks grade – based on the AS 2156.1 – 2001
Under this standard, a walk is graded based on the most difficult section of the walk.
| Length | 10.5 km | ||
| Time | 3 hrs 30 mins | ||
| . | |||
| Grade 4/6 Hard track |
AS 2156.1 | Gradient | Short steep hills (3/6) |
| Quality of track | Rough track, where fallen trees and other obstacles are likely (4/6) | ||
| Signs | Minimal directional signs (4/6) | ||
| Experience Required | No experience required (1/6) | ||
| Weather | Weather generally has little impact on safety (1/6) | ||
| Infrastructure | Limited facilities (such as cliffs not fenced, significant creeks not bridged) (4/6) |
Some more details of this walks Grading
Here is a bit more details explaining grading looking at sections of the walk
Gradient
3km of this walk has short steep hills and another 2km is flat with no steps. The remaining (330m) has gentle hills with occasional steps.
Quality of track
2.4km of this walk follows a rough track, where fallen trees and other obstacles are likely and another 2.4km follows a formed track, with some branches and other obstacles. The remaining (480m) follows a clear and well formed track or trail.
Signs
2.4km of this walk has minimal directional signs and another 2.4km has directional signs at most intersection. The remaining (480m) is clearly signposted.
Experience Required
This whole walk, 5km requires no previous bushwalking experience.
weather
This whole walk, 5km is not usually affected by severe weather events (that would unexpectedly impact safety and navigation).
Infrastructure
2.4km of this walk has limited facilities (such as cliffs not fenced, significant creeks not bridged) and another 2.4km has limited facilities (such as not all cliffs fenced). The remaining (480m) is close to useful facilities (such as fenced cliffs and seats).
Similar walks
A list of walks that share part of the track with the Hobart Beach to Games Bay walk.
648 m Return
15 mins
Easy track
1 km Return
30 mins
Moderate track
1.2 km Circuit
45 mins
Moderate track
5.2 km Return
2 hrs
Hard track
6 km Return
1 hr 45 mins
Moderate track
7.6 km Circuit
2 hrs 15 mins
Hard track
8.8 km One way
4 hrs
Hard track
9 km Return
3 hrs 30 mins
Hard track
10.6 km Circuit
3 hrs 45 mins
Hard track
11.5 km One way
4 hrs 30 mins
Hard track
Other Nearby walks
A list of walks that start near the Hobart Beach to Games Bay walk.
3.6 km Return
1 hr 15 mins
Easy track
5 km Return
1 hr 30 mins
Moderate track
8 km Circuit
3 hrs 30 mins
Experienced only
5 km Return
1 hr 45 mins
Experienced only
464 m Return
10 mins
Moderate track
482 m Return
12 mins
Hard track
5.2 km Circuit
2 hrs
Hard track
286 m Return
5 mins
Moderate track
2.1 km Return
45 mins
Hard track
1.8 km One way
45 mins
Moderate track
3.5 km One way
1 hr 15 mins
Hard track
2.3 km Return
45 mins
Hard track
Plan your trip to and from the walk here
The Hobart Beach to Games Bay walk starts and ends at the Hobart Beach large shelter (gps: -36.797, 149.93998)
Your main transport option to Hobart Beach large shelter is by;
![]() Car. A park entry fee is required for driving into the park.
Car. A park entry fee is required for driving into the park.
(get details)
Short URL = http://wild.tl/hbtgb
Gallery images
There are other downloads I am still working on.
You will probably need to login to access these — still all free.
* KML (google earth file)
* GPX (GPS file)
Special Maps/ brochures
* A3 topo maps
* PDF with Lands Topo map base
* PDF with arial image (and map overlay)
I wanted to get the main site live first, this extra stuff will come in time.
Happy walking
Matt 🙂
Kianiny Bay to White Horse Bay lookout

1 Hr
1.8 km Return
114 m
Hard track
White Horse Bay is not the most spectacular bay in the area but the walk to it is quite nice. The walk takes you from Kianiny Bay and picnic area past the Kianiny lookout, through some of the signature heath of Bournda National Park. The walk heads to the northern point of White Horse Bay where there are views out to sea over the black, rough and steep rock shoreline.
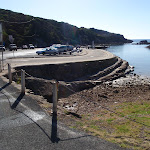

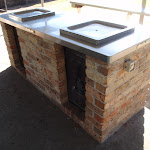

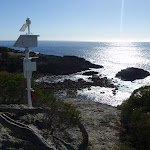
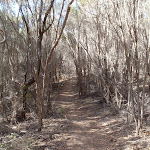
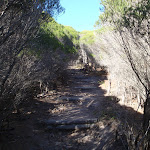
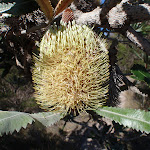
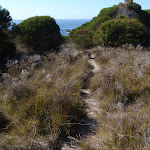

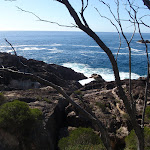
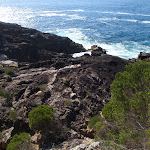
(0km) Kianinny Boat Ramp → Kianinny Park
60 m
1 mins
3m
0m
Easy track
From the car park, this walk keeps the water on the left as it heads down the stairs to the grassed area of the park. The track then continues along the creek, below on the left, to a bridge and information sign.
Kianinny Bay picnic area
Kianinny Bay picnic area is found at the end of Davidson St in Tathra. The picnic area leads off the boat ramp’s parking area. Kianinny Bay picnic area has an electric BBQ hot plate underneath a shelter. The picnic area also boasts a number of tables, grass clearing, toilets and a playground. Kianinny Bay picnic area is at one end of the Kangarutha Track and, with the large car park at the bay, this makes it quite convenient for car shuffles.
(0.06km) Kianinny Park → Kianinny Bay Lookout
150 m
5 mins
27m
-5m
Hard track
Veer left: From the information sign, this walk crosses the bridge and heads up the hill. The walk soon leads up the logged steps to a rock platform at the top. On the ocean side of the rock platform is a great lookout over Kianinny Bay and the coast.
Kianinny Bay Lookout
Kianinny Bay Lookout is perched on the hill, just south of Kianinny Bay. The lookout is an unfenced rock platform which has two white nautical markers placed on it. The lookout views the passage of boats into Kianinny Bay as they avoid the rocks near the northern headland. The lookout can be accessed from Kianinny Bay car park in Tathra, using the Kangarutha Track.
(0.21km) Kianinny Bay Lookout → Wild Horse Bay Lookout
710 m
16 mins
31m
-48m
Hard track
Turn right: From the intersection, this walk keeps the ocean to the left as it crosses straight over the rock platform to a gap in the heath. The track passes down through the heath to meander and undulate for some time. The track continues past a cleared area on the right before turning into a gully. The track winds out of the gully tending right, up the hill, to an area of low heath with a faint track on the left.
Turn left: From the intersection, the walk follows the bush track down the hill, towards the coast. The track winds down through areas of low heath and taller melaleuca trees. The track then bends to the right, in a clearing with views of the ocean, keeping the rocks on the left and comes to a small clearing overlooking the rocky coastline.
Turn left: From the intersection, the walk follows the bush track down the hill, towards the coast. The track winds down through areas of low heath and taller melaleuca trees. The track then bends to the right, in a clearing with views of the ocean, keeping the rocks on the left and comes to a small clearing overlooking the rocky coastline.
White Horse Bay Lookout
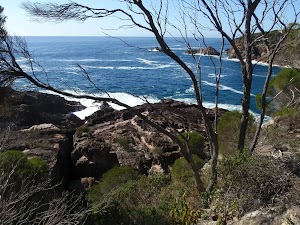
Wild Horse Bay Lookout, in Bournda National Park, is located south of Tathra. The lookout offers views out across the South Pacific Ocean and the waves crashing into Wild Horse Bay. The bay is surrounded by rock platforms and cliffs. The lookout is accessed by a side trip from the Kangarutha Track.
Maps for the Kianiny Bay to White Horse Bay lookout walk
You can download the PDF for this walk to print a map.
These maps below cover the walk and the wider area around the walk, they are worth carrying for safety reasons.
| Bega | 1:25 000 Map Series | 88241S BEGA | NSW-88241S |
| Bega | 1:100 000 Map Series | 8824 BEGA | 8824 |
Cross sectional view of the Kianiny Bay to White Horse Bay lookout bushwalking track
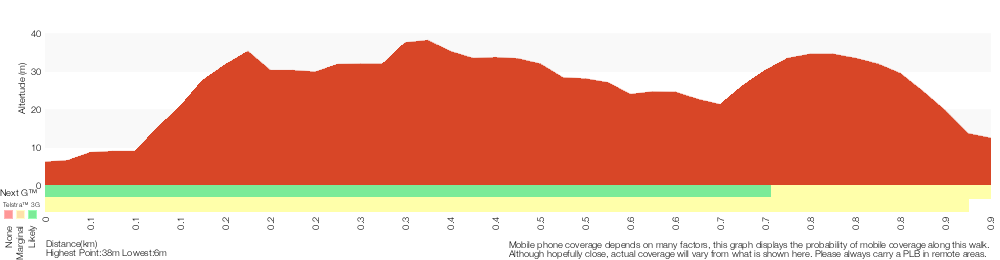
Analysis and summary of the altitude variation on the Kianiny Bay to White Horse Bay lookout
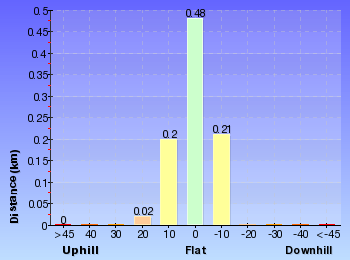
Overview of this walks grade – based on the AS 2156.1 – 2001
Under this standard, a walk is graded based on the most difficult section of the walk.
| Length | 1.8 km | ||
| Time | 1 Hr | ||
| . | |||
| Grade 4/6 Hard track |
AS 2156.1 | Gradient | Very steep (4/6) |
| Quality of track | Rough track, where fallen trees and other obstacles are likely (4/6) | ||
| Signs | Minimal directional signs (4/6) | ||
| Experience Required | No experience required (1/6) | ||
| Weather | Weather generally has little impact on safety (1/6) | ||
| Infrastructure | Limited facilities (such as cliffs not fenced, significant creeks not bridged) (4/6) |
Some more details of this walks Grading
Here is a bit more details explaining grading looking at sections of the walk
Gradient
Around 700m of this walk is very steep, whilst the remaining 210m has gentle hills with occasional steps.
Quality of track
700m of this walk follows a formed track, with some branches and other obstacles and another 160m follows a rough track, where fallen trees and other obstacles are likely. The remaining (55m) follows a clear and well formed track or trail.
Signs
710m of this walk has minimal directional signs and another 150m has directional signs at most intersection. The remaining (55m) is clearly signposted.
Experience Required
This whole walk, 910m requires no previous bushwalking experience.
weather
This whole walk, 910m is not usually affected by severe weather events (that would unexpectedly impact safety and navigation).
Infrastructure
Around 710m of this walk has limited facilities (such as cliffs not fenced, significant creeks not bridged), whilst the remaining 210m is close to useful facilities (such as fenced cliffs and seats).
Similar walks
A list of walks that share part of the track with the Kianiny Bay to White Horse Bay lookout walk.
416 m Return
15 mins
Hard track
3.5 km Return
2 hrs
Hard track
8.8 km One way
4 hrs
Hard track
11.5 km One way
4 hrs 30 mins
Hard track
Other Nearby walks
A list of walks that start near the Kianiny Bay to White Horse Bay lookout walk.
194 m Circuit
10 mins
Hard track
1 km Return
30 mins
Moderate track
5.2 km Return
2 hrs
Hard track
648 m Return
15 mins
Easy track
9 km Return
3 hrs 30 mins
Hard track
1.2 km Circuit
45 mins
Moderate track
10.5 km Return
3 hrs 30 mins
Hard track
6 km Return
1 hr 45 mins
Moderate track
3.6 km Return
1 hr 15 mins
Easy track
10.6 km Circuit
3 hrs 45 mins
Hard track
5 km Return
1 hr 30 mins
Moderate track
7.6 km Circuit
2 hrs 15 mins
Hard track
Plan your trip to and from the walk here
The Kianiny Bay to White Horse Bay lookout walk starts and ends at the Kianinny Boat Ramp (gps: -36.736751, 149.9819)
Your main transport option to Kianinny Boat Ramp is by;
![]() Car. There is free parking available.
Car. There is free parking available.
(get details)
Short URL = http://wild.tl/kbtwhbl
Gallery images
There are other downloads I am still working on.
You will probably need to login to access these — still all free.
* KML (google earth file)
* GPX (GPS file)
Special Maps/ brochures
* A3 topo maps
* PDF with Lands Topo map base
* PDF with arial image (and map overlay)
I wanted to get the main site live first, this extra stuff will come in time.
Happy walking
Matt 🙂
Hobart Beach, Bournda Lagoon and Beach loop

3 hrs 45 mins
10.6 km Circuit
139 m
Hard track
This is an expansive walk out from Hobart Beach camping area taking in some of the best sights of Bournda National Park. The walk explores the area from the campsite, and around Bournda Lagoon, before following the beautiful North Tura and Bournda beaches back to the start. There is plenty of opportunity along this walk to get the toes wet and to simply enjoy your surroundings.
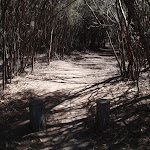
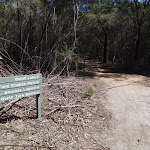

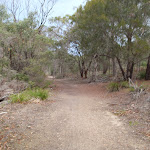
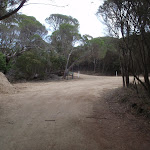

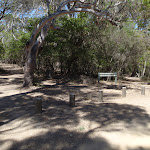
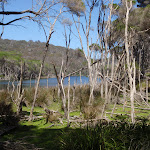
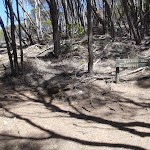

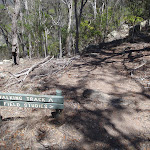
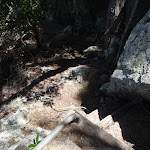
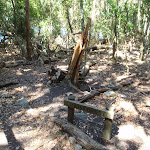
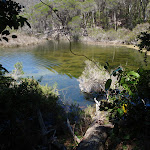
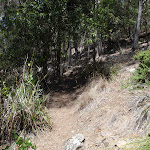
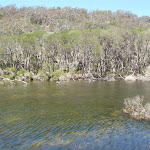
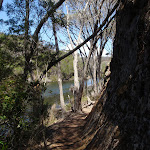
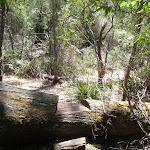

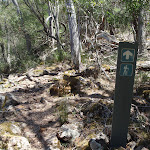
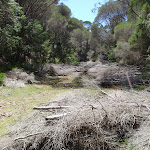
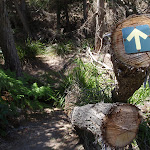

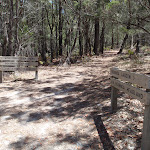
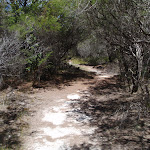

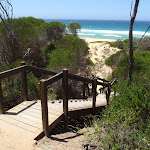
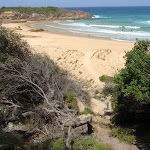


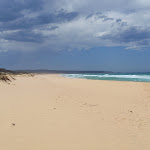
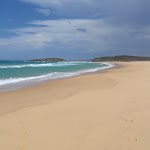
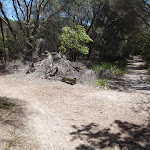
Hobart Beach campground
This is a well-established campsite close to the beach and lake. There are garbage and recycling bins. Each camping space is well-defined and there is a large covered common area. The camp surrounds the stone and timber toilet and laundry facility.
(0km) Hobart Beach large shelter → Int. near Bournda Rd and Hobart Beach Rd
410 m
7 mins
8m
0m
Easy track
From the intersection, this walk follows the path and the sign to the ‘Field Study Huts’[1] past the large picnic shelter (on the left). The track soon passes a volleyball court (on the right) and a fire pit (on the left), then follows a track marker through the dense melaleuca. The track soon comes to a three-way intersection marked with several signs, including one pointing back to ‘Hobart Beach Camping Area’[2].
From the intersection, the walk continues straight along the track, following the ‘Bondi Lake’ sign[3] through the melaleuca. The track soon comes to another three-way intersection, marked with another sign pointing back to ‘Hobart Beach Camping Area’[4].
Continue straight: From this intersection, this walk heads south along the track, following the ‘Bondi Lake’ sign[5] through the melaleuca. The track soon comes to then crosses the dirt Bournda Rd to the ‘Hobart Beach Camping Area 0.5km’sign[6] on the otherside.
(0.41km) Int. Bournda Rd and Hobart Beach Rd → Bournda Beach car park
1.7 km
28 mins
12m
-13m
Moderate track
Continue straight: From the road, this walk follows the sign to ‘Bondi Lake’[7] between the timber posts and along the wide track. The track winds through the tall heath for a while untill passing an old hut (on the left) where the track comes to a three way intersection marked with a ‘hobart beach camp’ sign[8] pointing back along the track.
From the intersection, this walk follows the ‘bournda lagoon’ sign[9] along with wide track. The track passes along the side of Bondi Lake (not visable on the left) to come to a faint intersection with the signposted ‘Field Studies Huts’[10] track (on the right).
Continue straight: From the intersection, this walk leaves the hill and the ‘Field Studies Huts’ sign behind, on the right of the track, as the track continues through the heath,heading up a slight rise to a signposted intersection in Bournda Beach car park.
(2.11km) Bournda Beach car park → Bondi Lake Sth
390 m
6 mins
2m
-7m
Experienced only
Turn left : From the car park, this walk heads between the trees at the point where three short vertical logs mark the track. The track heads down through the bush to the base of a set of stairs.
Turn left: From the bottom of the stairs, the walk keeps the bottom of the dunes to the right for some time and then tends to the left through the trees. The track winds through the trees to open out onto the large treeless clearing of Bondi Lake. At the end of this side trip, retrace your steps back to the main walk then Veer left.
Turn left: From the bottom of the stairs, the walk keeps the bottom of the dunes to the right for some time and then tends to the left through the trees. The track winds through the trees to open out onto the large treeless clearing of Bondi Lake. At the end of this side trip, retrace your steps back to the main walk then Veer left.
Bondi Lake
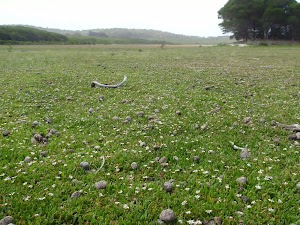
Bondi Lake lies south of Tathra, behind Bournda Beach in Bournda National Park. The lake, when filled, is a shallow body of fresh water, which is fed by streams all found within the National Park. The lake, when dry, resembles a paddock with many kangaroos grazing in the middle of the dry lake. The lake can be accessed by bush tracks from Bournda Lagoon car park or Hobart Beach camping area.
(2.11km) Bournda Beach car park → Int Bournda Rd and Bournda Beach Parking Area
90 m
1 mins
3m
0m
Moderate track
Continue straight: From the intersection, the walk follows the ‘Bournda Lagoon’ sign up the hill to the signposted intersection with a management trail.
(2.19km) Bournda Lagoon Carpark → Int. Bournda Rd and Bournda Beach Parking Area
150 m
3 mins
0m
-4m
Moderate track
Turn left: From the gate, this walk heads up through the car park following the ‘Hobart Beach Camping Area’ arrow on the signpost. The trail comes to a signpost for ‘Bournda Beach Parking Area’.
Bournda Beach picnic area
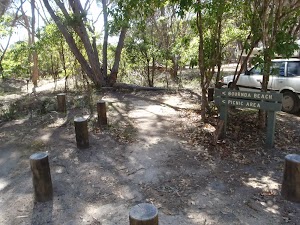
Bournda Beach picnic area is found next to Bournda Lagoon car park, in Bournda National Park. The picnic area is shaded by the trees behind Bournda Beach, which is between Tathra and Merimbula. The picnic area has modest facilities with a few picnic tables, BBQ pit and a toilet nearby. The picnic area is a great place to eat lunch before heading down to Bournda Beach or Lagoon, which are only a stroll away through the bush.
(2.34km) Bournda Lagoon Carpark → Bournda Lagoon Lookout
240 m
5 mins
6m
-8m
Hard track
Turn right: From the intersection, this walk heads along the car park (on the right) to the signposted intersection at the other corner of the car park. The walk then follows the sign ‘Bournda Walking Track’ down the hill. The track winds for a short time to come to a ‘Walking Track’ signposted intersection before the lagoon.
Veer right: From the intersection, this walk follows the arrow on the sign ‘Walking Track’ keeping the lagoon on the left. The track soon meets a signposted hill, which it heads up, coming to an signposted intersection on the left.
Continue straight: From the intersection, this walk follows the sign to the lookout. The track winds through the trees, up onto a rocky platform overlooking the lagoon and beach.
Bournda Lagoon Lookout

Bournda Lagoon lookout is a small unfenced rock platform perched above Bournda Lagoon, in Bournda National Park. The views to the south, over the lake, reveal how close the lagoon is to the beach. The angle of the lookout onto the water gives a look through the water to the bottom of the lagoon.
(2.58km) Bournda Lagoon Lookout → Int. North Tura Carpark and Bournda Lagoon Trk
2.3 km
45 mins
64m
-62m
Hard track
Turn around: From the lookout, this walk heads away from the unfenced rock edge and into the trees. The track keeps the lagoon below on the right as it winds through the trees to a signposted intersection.
Turn left: From the intersection, this walk follows the sign ‘Walking Track’, winding up the hill, then turning left and soon coming to a ‘Walking Track’ signposted intersection.
Continue straight: From the intersection, this walk follows the ‘Walking Track’ arrow down the steps. The steps lead the walk beneath a line of cliffs, then the track turns left, down the hill, entering an area of rainforest vegetation (which is signposted). The track then continues down closer to the water where it turns right, and keeps the lagoon on the left for some time. The track then passes a whole lot of seats with a signpost marked ‘Study Area 1’. The track continues past this to more closely follow the waterline, on the left, coming to ‘Study Area 2’. The walk passes over a log then follows the track markers along the creek bank. The track then turns left, up the hill, and follows a rocky path over the hill and down to a dry creek crossing. The track crosses to the other side, where there is a signpost.
Veer right: From the intersection, this walk follows the arrow up the rocky hill. The track winds along the hillside, with Sandy Beach Creek below on the right. The track soon descends from the hill, meandering through the bush, tending left (away from the creek) to a well-signposted intersection.
(4.91km) Int North Tura Carpark and Bournda Lagoon Trk → Int. Bournda Lagoon and Island Trks
960 m
17 mins
15m
-18m
Moderate track
Turn left : From the intersection, the walk follows the ‘Bournda Lagoon via Bournda Headland’ sign, tending left down the hill. The walk heads straight past a ‘Kunzea’ sign to the right, before passing over numerous speed bump like mounds on a white dirt path. The track continues straight up this hill to wind past a ‘Melaleuca’ sign to the left of the track. From here, the track meanders down the hill to a signposted intersection.
Veer left: From the intersection, this walk follows the sign to ‘Bournda Lagoon via Bournda Headland’, keeping the ocean on the right of the track. The track winds behind the dunes to soon come to a signposted intersection. Now Continue straight to rejoin the main walk .
Veer left: From the intersection, this walk follows the sign to ‘Bournda Lagoon via Bournda Headland’, keeping the ocean on the right of the track. The track winds behind the dunes to soon come to a signposted intersection. Now Continue straight to rejoin the main walk .
(4.91km) Int. North Tura Carpark and Bournda Lagoon Trk → Nth Tura Car Park Picnic Area
760 m
13 mins
11m
-13m
Moderate track
Turn right: From the intersection, this walk follows the sign ‘Nth Tura Carpark’ down the hill. The sandy track meanders through the heath to a signposted intersection.
Turn left: From the intersection, this walk follows the sign to ‘Nth Tura Carpark’, heading down the track through the thick heath. The track winds a little as it passes into areas of open and closed heath, and also passes a ‘Walking Track’ sign. The walk continues for a short time to meet a signposted intersection with picnic tables at the car park.
Turn left: From the intersection, this walk follows the sign to ‘Nth Tura Carpark’, heading down the track through the thick heath. The track winds a little as it passes into areas of open and closed heath, and also passes a ‘Walking Track’ sign. The walk continues for a short time to meet a signposted intersection with picnic tables at the car park.
(5.68km) Nth Tura Picnic Area → Nth Tura Lookout
60 m
2 mins
1m
-1m
Easy track
Turn right: From the intersection, the walk heads away from the face of the ‘North Tura Beach’ sign[11] initially the picnic tables to your right. The walk leads gently uphill along the wide gravel track, past the large ‘Welcome to North Tura Beach’ information sign[12], and toilet
to come to an intersection beside the car park marked with a timber ‘North Tura Beach’ sign[13].
Turn left: From the intersection, this walk follows the ‘Viewing Platform’ sign[14], towards the lookout. The walk leads along the gravel path, around the timber bollard[15] then up the fiberglass ramp (1.5m wide), keeping a timber fence either side. At the end of this side trip, retrace your steps back to the main walk then Continue straight.
North Tura Lookout
North Tura Beach Lookout is between Tathra and Merimbula in Bournda National Park. The lookout platform (4.6×4.6m) has stunning views[16] over North Tura Beach, all the way south to Tura Headland[17] and out to sea. The lookout is also a perfect viewing point for Turingal Head[18] and Bournda Island. The fence[19] is 91cm high and the ramp leading up is 1.5m wide[20].
(5.68km) Nth Tura Car Park Picnic Area → Nth Tura Beach
100 m
2 mins
0m
-4m
Moderate track
Turn left: From the intersection, this walk follows the sign ‘Steps to Beach 80m’ down the hill. The walk winds down through the melaleuca trees to an unsignposted intersection with a set of stairs.
Turn right: From the intersection, this walk follows the stairs down the hill and through the heath and then onto the beach.
Turn right: From the intersection, this walk follows the stairs down the hill and through the heath and then onto the beach.
(5.77km) Nth Tura Beach → Nth Tura Beach and Bournda Island Trk
780 m
13 mins
7m
-6m
Moderate track
Turn left: From the staircase, this walk heads north along the beach towards Bournda Island, keeping the ocean to the right. Just before the rocky Bournda Island, there is a small but distinct track on the left through the heath.
(6.56km) Nth Tura Beach and Bournda Island Trk → Bournda Island
220 m
4 mins
8m
-5m
Hard track
Turn right: From the bottom of the steps, this walk heads away from the stairs and across the beach towards Bournda Island. The walk continues along the sand to a small cave feature at the base of the island.
Veer right: From the intersection, the walk keeps the cave feature on the right and climbs up the ridge of rock. The track winds along the left-hand side of the island, with the ocean below on the left. The walk heads up onto the hill with views of both North Tura and Bournda Beaches. At the end of this side trip, retrace your steps back to the main walk then Veer right.
Veer right: From the intersection, the walk keeps the cave feature on the right and climbs up the ridge of rock. The track winds along the left-hand side of the island, with the ocean below on the left. The walk heads up onto the hill with views of both North Tura and Bournda Beaches. At the end of this side trip, retrace your steps back to the main walk then Veer right.
Bournda Island
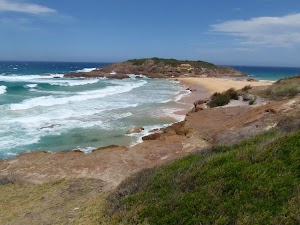
Bournda Island separates Bournda and North Tura beaches, and is located between Tathra and Merimbula. The island is joined to the mainland by a tombola beach, which can be submerged by the tide to form a real island. Bournda Island is covered in low dune shrub vegetation species that are perched on top of the rocky island. Access to the island is at low tide from Bournda or North Tura beaches. Bournda Island can also be accessed from the Bournda Lagoon via Headland Track.
(6.56km) Nth Tura Beach and Bournda Island Trk → Bournda Bch Sth
230 m
4 mins
3m
-8m
Hard track
Turn left: From the beach, the walk heads up the stairs away from the ocean. The walk heads over the top of the hill to a signposted intersection.
Turn right: From the intersection, this walk follows the sign to ‘Bournda Lagoon’, following the white fencing. The walk keeps the ocean on the right as it winds down to a grassy lookout on the right of the track (with fantastic views of Bournda Island). The walk then heads down some stairs to a signposted intersection on the beach.
Turn right: From the intersection, this walk follows the sign to ‘Bournda Lagoon’, following the white fencing. The walk keeps the ocean on the right as it winds down to a grassy lookout on the right of the track (with fantastic views of Bournda Island). The walk then heads down some stairs to a signposted intersection on the beach.
(6.79km) Bournda Beach → Bournda Bch Sth
580 m
9 mins
4m
-3m
Moderate track
Continue straight: From the intersection at the southern end of the beach, the walk heads along the beach, keeping the ocean to the right, and the dunes to the left. The walk continues past views of Bournda Lagoon to a spot opposite a set of stairs (going up the taller dunes on the left).
Bournda Beach

Bournda Beach, Bournda National Park, lies between Tathra and Merimbula, and forms the southern end of Wallagoot Beach. The beach provides some good surf conditions with a south-easterly aspect (not patrolled). At the southern end of the beach is Bournda Island, attached to the beach by a rocky headland and tombola (sand joining the island to mainland). The dunes backing the beach are undergoing rehabilitation. Bournda Beach is accessed by Bournda Rd at either Hobart Beach camping area, Bournda Lagoon or Wallagoot Gap parking areas.
(7.36km) Bournda Beach → Wallagoot Beach
2.2 km
34 mins
12m
-12m
Moderate track
Continue straight: From the middle of the beach, opposite a set of erosion control steps, the walk heads along the beach, keeping the ocean to the right. The walk continues along the beach until it comes opposite a set of erosion control steps to the left.
Continue straight: From the middle of the beach, across from a set of erosion control steps, the walk heads along the beach, keeping the ocean to the right. The walk continues along the beach for quite some time to a point opposite a set of erosion control steps going up the dunes to the left.
Continue straight: From the middle of the beach, across from a set of erosion control steps, the walk heads along the beach, keeping the ocean to the right. The walk continues along the beach for quite some time to a point opposite a set of erosion control steps going up the dunes to the left.
Wallagoot Beach
Wallagoot Beach, is located east of Wallagoot Lake in Bournda National Park, between Tathra and Merimbula. The beach is a large expanse of white sand, with surf conditions created by its south easterly aspect. The beach’s northern end sometimes floods, due to Wallagoot Lake breaking through the beach’s sand barrier. Alternative access (instead of Wallagoot Lake Rd) is from Bournda Rd, through Hobart Beach camping area.
(9.53km) Wallagoot Beach → Ocean beaches carpark Trk
300 m
5 mins
7m
-2m
Moderate track
Turn left: From the intersection, this walk heads away from the beach and up the erosion control stairs. The walk then heads down the stairs onto a sandy clear trail which winds through the bush. The track soon meets a signposted intersection.
(9.83km) Ocean beaches carpark Trk → Wallagoot Lake Shore (Hobart Beach)
430 m
6 mins
1m
-2m
Moderate track
Turn left: From the intersection, this walk follows the sign to the ‘Parking Area’[21] along the sandy track, towards the distant hills. The walk winds though the melaleuca, some of which are on the track. The soon comes to a timber boardwalk and a three way intersection with a ‘Ocean Beaches’ sign[22] pointing back along the track.
From the intersection, this walk follows the ‘Hobart Beach camp’ sign[23] off the end of the board walk to the come to a car park a short distance later. A the carpark the walk turns right to find a signposted intersection next to the picnic table.
Turn right: From the intersection, this walk follows the arrow on the sign to ‘Wallagoot Lake’[24], away from the car park and picnic table. The track tends right, down the hill, for approximately 50m to an intersection on the shore of Wallagoot Lake.
Hobart Beach
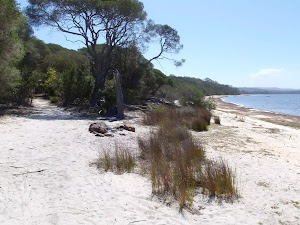
Hobart Beach is located on the southern shores of Wallagoot Lake, between Tathra and Merimbula. Hobart Beach extends from the sand dunes to Scotts Bay, on Wallagoot Lake. The beach is a thin slice of white sand between the treeline and the lake, and provides plenty of opportunity to go for a swim and enjoy the water. Access to the beach is through Hobart Beach camping area, off Bournda Rd in Bournda National Park.
Wallagoot Lake (Lagoon)
Wallagoot Lake, Bournda National Park, is located between Tathra and Merimbula on the Sapphire Coast Drive. Wallagoot Lake is a large expanse of water, although it is only two to three metres deep. The lake’s catchment is found predominantly within Bournda National Park, the main tributary being Moncks Creek. The lake is blocked from the ocean by sand dunes on the eastern end – these dunes are broken intermittently, connecting the lake with the sea. Wallagoot Lake is home to many bird species including Black Swans and a threatened Tern.
The lake is a popular spot for picnics and other recreation. Hobart Beach camping area lies on the southern shore of the lake, and on the northern edge lies the Wallagoot Lake Boat Club, with its parking, and also a picnic area, providing plenty of opportunities to enjoy the lake. Wallagoot Lake can be accessed by Wallagoot Lake Rd off the Sapphire Coast Drive. More info.
The lake is a popular spot for picnics and other recreation. Hobart Beach camping area lies on the southern shore of the lake, and on the northern edge lies the Wallagoot Lake Boat Club, with its parking, and also a picnic area, providing plenty of opportunities to enjoy the lake. Wallagoot Lake can be accessed by Wallagoot Lake Rd off the Sapphire Coast Drive. More info.
(10.26km) Wallagoot Lake Shore (Hobart Beach) → Hobart Beach large shelter
330 m
5 mins
1m
0m
Easy track
Turn sharp left: From the intersection, the walk heads away from Wallagoot Lake, keeping it a bit to the right for a short time, passing a post with a red reflective marker[25]. The track tends right, away from the lake and the beach, to come into view of a clearing, the campsite, on the left. The track continues to an area with cut logs on the ground. The walk passes these logs, continuing to the main road, to the right of large triangular shelter where there is a signpost.
Maps for the Hobart Beach, Bournda Lagoon and Beach loop walk
You can download the PDF for this walk to print a map.
These maps below cover the walk and the wider area around the walk, they are worth carrying for safety reasons.
| Wolumla | 1:25 000 Map Series | 88242N WOLUMLA | NSW-88242N |
| Bega | 1:100 000 Map Series | 8824 BEGA | 8824 |
Cross sectional view of the Hobart Beach, Bournda Lagoon and Beach loop bushwalking track
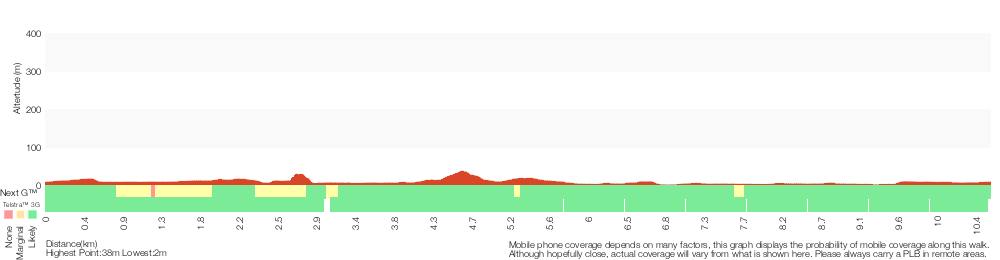
Analysis and summary of the altitude variation on the Hobart Beach, Bournda Lagoon and Beach loop
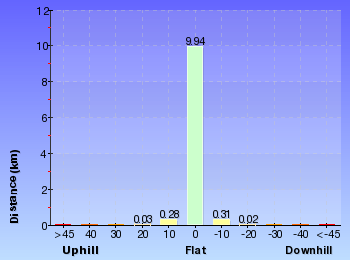
Overview of this walks grade – based on the AS 2156.1 – 2001
Under this standard, a walk is graded based on the most difficult section of the walk.
| Length | 10.6 km | ||
| Time | 3 hrs 45 mins | ||
| . | |||
| Grade 4/6 Hard track |
AS 2156.1 | Gradient | Very steep (4/6) |
| Quality of track | Rough track, where fallen trees and other obstacles are likely (4/6) | ||
| Signs | Directional signs along the way (3/6) | ||
| Experience Required | No experience required (1/6) | ||
| Weather | Storms may impact on navigation and safety (3/6) | ||
| Infrastructure | Limited facilities (such as cliffs not fenced, significant creeks not bridged) (4/6) |
Some more details of this walks Grading
Here is a bit more details explaining grading looking at sections of the walk
Gradient
4km of this walk has gentle hills with occasional steps and another 3.5km is flat with no steps. Whilst another 1.6km is very steep and the remaining 1.5km has short steep hills.
Quality of track
6km of this walk follows a formed track, with some branches and other obstacles and another 2.3km follows a rough track, where fallen trees and other obstacles are likely. The remaining (2.2km) follows a clear and well formed track or trail.
Signs
Around 10km of this walk has directional signs at most intersection, whilst the remaining 890m is clearly signposted.
Experience Required
This whole walk, 11km requires no previous bushwalking experience.
weather
Around 9km of this walk is not usually affected by severe weather events (that would unexpectedly impact safety and navigation), whilst the remaining 1.3km is affected by storms that may impact your navigation and safety.
Infrastructure
7km of this walk has limited facilities (such as not all cliffs fenced) and another 2.6km is close to useful facilities (such as fenced cliffs and seats). The remaining (1.4km) has limited facilities (such as cliffs not fenced, significant creeks not bridged).
Similar walks
A list of walks that share part of the track with the Hobart Beach, Bournda Lagoon and Beach loop walk.
124 m Return
5 mins
Very easy
316 m Return
10 mins
Moderate track
464 m Return
10 mins
Moderate track
471 m Circuit
15 mins
Moderate track
482 m Return
12 mins
Hard track
1.2 km Circuit
45 mins
Moderate track
1.8 km One way
45 mins
Moderate track
2.1 km Return
45 mins
Hard track
2.3 km Return
45 mins
Hard track
3.5 km One way
1 hr 15 mins
Hard track
5 km Return
1 hr 30 mins
Moderate track
5 km Return
1 hr 45 mins
Experienced only
5.2 km Circuit
2 hrs
Hard track
6 km Return
1 hr 45 mins
Moderate track
7.6 km Circuit
2 hrs 15 mins
Hard track
8 km Circuit
3 hrs 30 mins
Experienced only
10.5 km Return
3 hrs 30 mins
Hard track
11.5 km One way
4 hrs 30 mins
Hard track
Other Nearby walks
A list of walks that start near the Hobart Beach, Bournda Lagoon and Beach loop walk.
3.6 km Return
1 hr 15 mins
Easy track
286 m Return
5 mins
Moderate track
1 km Return
30 mins
Moderate track
5.2 km Return
2 hrs
Hard track
648 m Return
15 mins
Easy track
9 km Return
3 hrs 30 mins
Hard track
194 m Circuit
10 mins
Hard track
416 m Return
15 mins
Hard track
3.5 km Return
2 hrs
Hard track
1.8 km Return
1 Hr
Hard track
8.8 km One way
4 hrs
Hard track
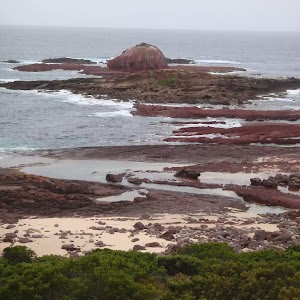
4.8 km Return
2 hrs
Hard track
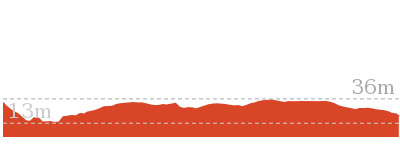
Plan your trip to and from the walk here
The Hobart Beach, Bournda Lagoon and Beach loop walk starts and ends at the Hobart Beach large shelter (gps: -36.797001, 149.93998)
Your main transport option to Hobart Beach large shelter is by;
![]() Car. A park entry fee is required for driving into the park.
Car. A park entry fee is required for driving into the park.
(get details)
Short URL = http://wild.tl/hbblabl
Gallery images
There are other downloads I am still working on.
You will probably need to login to access these — still all free.
* KML (google earth file)
* GPX (GPS file)
Special Maps/ brochures
* A3 topo maps
* PDF with Lands Topo map base
* PDF with arial image (and map overlay)
I wanted to get the main site live first, this extra stuff will come in time.
Happy walking
Matt 🙂
Comments