This is a very short walk to a spectacular lookout. If you are in the area heading to Green Cape, then you really must stop off and soak up the view. Disaster Bay is named in memory of all the ships that have run aground in the region. On a sunny day, the views of the ocean, long beach and Nadgee Nature Reserve are remarkable – such a contrast to the memory of the lost ships and lives.
Disaster Bay Lookout
And Walk
Disaster Bay Lookout

10 mins

11 m
Easy track
NPWS Sponsored

Disaster Bay LO car park

(0km) Disaster Bay LO car park → Disaster Bay Lookout

30 m
1 mins
0m
-11m
Easy track
then comes to the timber boardwalk. The walk follows the fenced timber board walk to come to the lookout, a seat
and spectacular views.
Disaster Bay Lookout

and a 1.1m high fence[5] around the lookout. Midway along Disaster Bay beach is the mouth of Wonboyn River and Bay Cliff. On the far side, you can also see the mouth of Merrica River. There have been at least 27 ships that have been lost from Merimbula to Disaster Bay , suggesting the name is apt. The ‘City of Sydney’ is the first recorded ship to run aground in this bay (at City Rocks). It was an iron steamer, built at Glasgow,
hit the shoreline in fog whilst under steam from Melbourne to Sydney on 6 October 1862.
Maps for the Disaster Bay Lookout walk
You can download the PDF for this walk to print a map.
These maps below cover the walk and the wider area around the walk, they are worth carrying for safety reasons.
| Sydney Heads | 1:25 000 Map Series | 91302N SYDNEY HEADS | NSW-91302N |
| Kiah | 1:25 000 Map Series | 88231S KIAH | NSW-88231S |
| Sydney | 1:100 000 Map Series | 9130 SYDNEY | 9130 |
| Eden | 1:100 000 Map Series | 8823 EDEN | 8823 |
Cross sectional view of the Disaster Bay Lookout bushwalking track

Analysis and summary of the altitude variation on the Disaster Bay Lookout
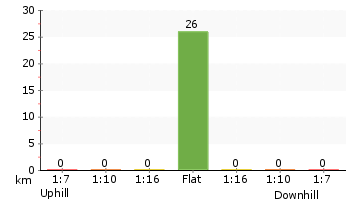
Accessibility summary information for the Disaster Bay Lookout
Toilets: There are 0 designated accessible toilets on this walk.
Seats: There are 1 places to sit on this walk.
Hazards: There are 1 specific noteable accessability related hazards on this walk.
Trip Hazard Two tree root trip hazards with a 7cm step. There is an 80cm gap between the end of the roots and edge of the track. Found about 10m into the walk.
Accessibility Details
Overview of this walks grade – based on the AS 2156.1 – 2001
Under this standard, a walk is graded based on the most difficult section of the walk.
| Length | 52 m | ||
| Time | 10 mins | ||
| . | |||
| Grade 2/6 Easy track |
AS 2156.1 | Gradient | Flat, no steps (1/6) |
| Quality of track | Clear and well formed track or trail (2/6) | ||
| Signs | Clearly signposted (1/6) | ||
| Experience Required | No experience required (1/6) | ||
| Weather | Weather generally has little impact on safety (1/6) | ||
| Infrastructure | Generally useful facilities (such as fenced cliffs and seats) (1/6) |
Some more details of this walks Grading
Here is a bit more details explaining grading looking at sections of the walk
Gradient
This whole walk, 25m is flat with no steps.
Quality of track
This whole walk, 25m follows a clear and well formed track or trail.
Signs
This whole walk, 25m is clearly signposted.
Experience Required
This whole walk, 25m requires no previous bushwalking experience.
weather
This whole walk, 25m is not usually affected by severe weather events (that would unexpectedly impact safety and navigation).
Infrastructure
This whole walk, 25m is close to useful facilities (such as fenced cliffs and seats).
Similar walks
A list of walks that share part of the track with the Disaster Bay Lookout walk.
Other Nearby walks
A list of walks that start near the Disaster Bay Lookout walk.
Plan your trip to and from the walk here
The Disaster Bay Lookout walk starts and ends at the Disaster Bay LO car park (gps: -37.23571, 149.99435)
Your main transport option to Disaster Bay LO car park is by;
![]() Car. Parking fees apply in the area.
Car. Parking fees apply in the area.
(get details)
Fire Danger
Each park may have its own fire ban, this rating is only valid for today and is based on information from the RFS Please check the RFS Website for more information.
Weather Forest
This walk starts in the South Coast weather district always check the formal BOM forecast or pdf before starting your walk.
Forecast snapshot
Park Information & Alerts
Short URL = http://wild.tl/dbl
Gallery images
There are other downloads I am still working on.
You will probably need to login to access these — still all free.
* KML (google earth file)
* GPX (GPS file)
Special Maps/ brochures
* A3 topo maps
* PDF with Lands Topo map base
* PDF with arial image (and map overlay)
I wanted to get the main site live first, this extra stuff will come in time.
Happy walking
Matt 🙂
Saltwater Creek campsite to Mowarry Point

3 hrs

193 m
Hard track
This walk is a great way to spend a morning or afternoon out from Saltwater Creek camping area. The walk passes the red cliffs that create a dramatic contrast against the intense blue of the sea and green of the heath. The walk also passes through a bay with a large red rock platform which is a great place for exploring the rock pools and shallows. Mowarry Point provides scenic views north up the coast.
Saltwater Creek campground
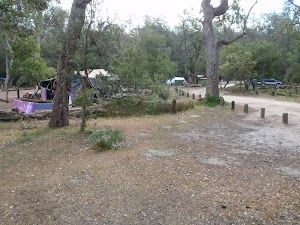
(0km) Saltwater Creek Campsite Information Sign → Saltwater Creek Beach Nth

180 m
3 mins
0m
-2m
Moderate track
Saltwater Creek Beach
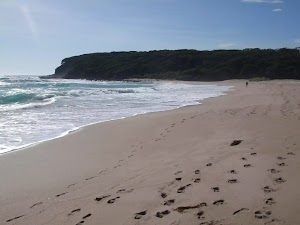
(0.18km) Saltwater Creek Beach Nth → Red Rocks

1.5 km
27 mins
36m
-29m
Moderate track
Red Cliffs
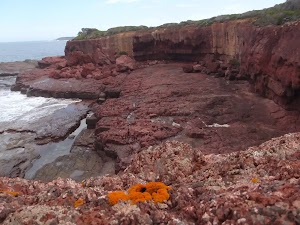
(1.67km) Red rocks → Mowarry Lookout

2.6 km
48 mins
66m
-60m
Hard track
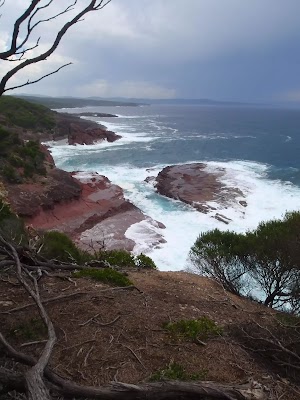
Veer left: From the signpost, the walk heads away from the ocean (which is on the right) into the clearing just inside the tree line, following either the white arrow painted on the rock or the arrow sign. The track winds up the hill, passing a clearing with a fire place. The track passes through sections of eucalypt bush and low and tall heath, keeping the coast to the right. The track then comes to an clearing with views towards Boyd Tower and waves crashing on rocks below.
Mowarry Point lookout
Maps for the Saltwater Creek campsite to Mowarry Point walk
You can download the PDF for this walk to print a map.
These maps below cover the walk and the wider area around the walk, they are worth carrying for safety reasons.
| Kiah | 1:25 000 Map Series | 88231S KIAH | NSW-88231S |
| Green Cape | 1:100 000 Map Series | 8923 GREEN CAPE | 8923 |
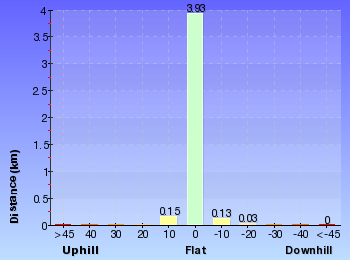
Cross sectional view of the Saltwater Creek campsite to Mowarry Point bushwalking track

Analysis and summary of the altitude variation on the Saltwater Creek campsite to Mowarry Point
Overview of this walks grade – based on the AS 2156.1 – 2001
Under this standard, a walk is graded based on the most difficult section of the walk.
| Length | 8.5 km | ||
| Time | 3 hrs | ||
| . | |||
| Grade 4/6 Hard track |
AS 2156.1 | Gradient | Short steep hills (3/6) |
| Quality of track | Rough track, where fallen trees and other obstacles are likely (4/6) | ||
| Signs | Minimal directional signs (4/6) | ||
| Experience Required | No experience required (1/6) | ||
| Weather | Storms may impact on navigation and safety (3/6) | ||
| Infrastructure | Limited facilities (such as cliffs not fenced, significant creeks not bridged) (4/6) |
Some more details of this walks Grading
Here is a bit more details explaining grading looking at sections of the walk
Gradient
This whole walk, 4.2km has short steep hills.
Quality of track
Around 2.6km of this walk follows a rough track, where fallen trees and other obstacles are likely, whilst the remaining 1.7km follows a formed track, with some branches and other obstacles.
Signs
Around 2.6km of this walk has minimal directional signs, whilst the remaining 1.7km has directional signs at most intersection.
Experience Required
This whole walk, 4.2km requires no previous bushwalking experience.
weather
Around 2.6km of this walk is not usually affected by severe weather events (that would unexpectedly impact safety and navigation), whilst the remaining 1.7km is affected by storms that may impact your navigation and safety.
Infrastructure
2.6km of this walk has limited facilities (such as cliffs not fenced, significant creeks not bridged) and another 1.5km has limited facilities (such as not all cliffs fenced). The remaining (180m) is close to useful facilities (such as fenced cliffs and seats).
Similar walks
A list of walks that share part of the track with the Saltwater Creek campsite to Mowarry Point walk.
Other Nearby walks
A list of walks that start near the Saltwater Creek campsite to Mowarry Point walk.
Plan your trip to and from the walk here
The Saltwater Creek campsite to Mowarry Point walk starts and ends at the Saltwater Creek Campsite Information Sign (gps: -37.169036, 150.00069)
Your main transport option to Saltwater Creek Campsite Information Sign is by;
![]() Car. A park entry fee is required for driving into the park.
Car. A park entry fee is required for driving into the park.
(get details)
Fire Danger
Each park may have its own fire ban, this rating is only valid for today and is based on information from the RFS Please check the RFS Website for more information.
Weather Forest
This walk starts in the South Coast weather district always check the formal BOM forecast or pdf before starting your walk.
Forecast snapshot
Park Information & Alerts
Comments
Short URL = http://wild.tl/scctmp
Gallery images
There are other downloads I am still working on.
You will probably need to login to access these — still all free.
* KML (google earth file)
* GPX (GPS file)
Special Maps/ brochures
* A3 topo maps
* PDF with Lands Topo map base
* PDF with arial image (and map overlay)
I wanted to get the main site live first, this extra stuff will come in time.
Happy walking
Matt 🙂
Mowarry Bay to Red Cliffs
And Walk
Mowarry Bay to Red Cliffs

3 hrs 30 mins

232 m
Hard track
The walk from Mowarry Point to Red Cliffs is an interesting trip through quite a few distinct vegetation types, with a few money shots of the coast line. The grass, heaths, and melaleuca along the way break up the walk to Red Cliffs, which are absolutely stunning. Spend time at the Red Cliffs to see all the different rock formations and inlets that have been created by erosion. Be mindful to keep a safe distance from the edge. The road to the start of this walk is 4wd track only.
(0km) Mowarry Bay car park → Mowarry Creek Sth bank

80 m
1 mins
1m
-2m
Hard track
Turn right: From the intersection, this walk follows the track marker down the stairs and upstream of the creek, to turn left across the rocky creek bed. The walk heads up the stairs, leading to a service trail.
(0.08km) Mowarry Creek Sth bank → Mowarry lookout

1.8 km
34 mins
56m
-47m
Hard track
Continue straight: From the intersection, this walk heads up the hill, keeping the ocean below on the left. The track winds up the hillside to a large signpost ‘Mowarry Point’. This walk follows the arrow to ‘Saltwater Creek 5.4km’ into an open grassland, following numerous track markers through the open grass area and patches of heath. The walk soon turns right, up the hill, keeping the ocean well below to the left of the track. The track then enters and winds through an area of heath. Many trees cover the tracks and trodden paths in this part of the walk. The track passes through these trees to a clearing with views towards Boyd Tower and waves crashing below.
Mowarry Point lookout

(1.83km) Mowarry Lookout → Red rocks

2.6 km
48 mins
60m
-66m
Hard track
Veer right: From the signpost, the walk heads towards the next arrow sign within sight, keeping the ocean on the left. The walk crosses the pebbly beach to the arrow marker, where another can be seen further along the coast on the red rock shelf. The walk meanders across the rock shelf to the track marker, which points into the bush. The walk follows this arrow away from the coast and up the stairs into the heath, where the track winds for quite some time through the heath and then bush. The track then heads back through the bush, down onto a red rock platform above the sea. The walk continues down the rock platform following the arrow signs, with the sea on the left of the track, coming to be opposite a set of stairs (on the right of the track).
Red Cliffs

Maps for the Mowarry Bay to Red Cliffs walk
You can download the PDF for this walk to print a map.
These maps below cover the walk and the wider area around the walk, they are worth carrying for safety reasons.
| Kiah | 1:25 000 Map Series | 88231S KIAH | NSW-88231S |
| Green Cape | 1:100 000 Map Series | 8923 GREEN CAPE | 8923 |
| Eden | 1:100 000 Map Series | 8823 EDEN | 8823 |
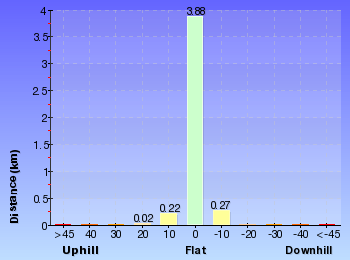
Cross sectional view of the Mowarry Bay to Red Cliffs bushwalking track

Analysis and summary of the altitude variation on the Mowarry Bay to Red Cliffs
Overview of this walks grade – based on the AS 2156.1 – 2001
Under this standard, a walk is graded based on the most difficult section of the walk.
| Length | 8.8 km | ||
| Time | 3 hrs 30 mins | ||
| . | |||
| Grade 4/6 Hard track |
AS 2156.1 | Gradient | Very steep (4/6) |
| Quality of track | Rough track, where fallen trees and other obstacles are likely (4/6) | ||
| Signs | Minimal directional signs (4/6) | ||
| Experience Required | No experience required (1/6) | ||
| Weather | Storms may impact on navigation and safety (3/6) | ||
| Infrastructure | Limited facilities (such as cliffs not fenced, significant creeks not bridged) (4/6) |
Some more details of this walks Grading
Here is a bit more details explaining grading looking at sections of the walk
Gradient
Around 4.3km of this walk has short steep hills, whilst the remaining 130m is very steep.
Quality of track
Around 2.6km of this walk follows a rough track, where fallen trees and other obstacles are likely, whilst the remaining 1.8km follows a formed track, with some branches and other obstacles.
Signs
Around 4.2km of this walk has minimal directional signs, whilst the remaining 190m has directional signs at most intersection.
Experience Required
This whole walk, 4.4km requires no previous bushwalking experience.
weather
Around 4.4km of this walk is not usually affected by severe weather events (that would unexpectedly impact safety and navigation), whilst the remaining 15m is affected by storms that may impact your navigation and safety.
Infrastructure
Around 4.4km of this walk has limited facilities (such as cliffs not fenced, significant creeks not bridged), whilst the remaining 60m has limited facilities (such as not all cliffs fenced).
Similar walks
A list of walks that share part of the track with the Mowarry Bay to Red Cliffs walk.
Other Nearby walks
A list of walks that start near the Mowarry Bay to Red Cliffs walk.
Plan your trip to and from the walk here
The Mowarry Bay to Red Cliffs walk starts and ends at the Mowarry Bay car park (gps: -37.14254, 149.98513)
Your main transport option to Mowarry Bay car park is by;
![]() Car. A park entry fee is required for driving into the park.
Car. A park entry fee is required for driving into the park.
(get details)
Fire Danger
Each park may have its own fire ban, this rating is only valid for today and is based on information from the RFS Please check the RFS Website for more information.
Weather Forest
This walk starts in the South Coast weather district always check the formal BOM forecast or pdf before starting your walk.
Forecast snapshot
Park Information & Alerts
Comments
Short URL = http://wild.tl/mbtrc
Gallery images
There are other downloads I am still working on.
You will probably need to login to access these — still all free.
* KML (google earth file)
* GPX (GPS file)
Special Maps/ brochures
* A3 topo maps
* PDF with Lands Topo map base
* PDF with arial image (and map overlay)
I wanted to get the main site live first, this extra stuff will come in time.
Happy walking
Matt 🙂
Saltwater Creek to Bittangabee Bay
And Walk
Saltwater Creek to Bittangabee Bay

3 hrs 30 mins

223 m
Hard track
This walk follows the second main section of the Light to Light walk. The walk joins the two main camping areas of Ben Boyd National Park, by walking along the coast from Saltwater Creek to Bittangabee Bay. The walk explores a few bays, beaches and stunning rock formations on its journey. About half this walk is through open heath or grass lands, allowing plenty of great views out to sea and down the coast. Parts of the walk pass through the taller melaleuca forests providing some shade and interest in the diverse flora of the coast environment.
Saltwater Creek campground

(0km) Saltwater Creek Campsite Information Sign → Saltwater Creek Beach Nth

180 m
3 mins
0m
-2m
Moderate track
Saltwater Creek Beach

(0.18km) Saltwater Creek Beach Nth → Hegartys Bay Camp

4.7 km
1 hr 26 mins
109m
-102m
Hard track
Continue straight: From the intersection, this walk follows the sign to ‘Green Cape Lighthouse’ across the hill, keeping the creek below on the right. The track soon turns left up the hill, away from the beach and creek, and then heads up the hill to an open grassland. The track meanders for a considerable time through different vegetation types – grasslands then heath, then melaleuca, and eucalypts/scrub, before reversing the order up the hill to continue around the flat of the grassy headland. The track continues in this way, passing views of Green Cape Lighthouse to the south and the cliffs, to wind down the hill onto Hegartys Bay beach.
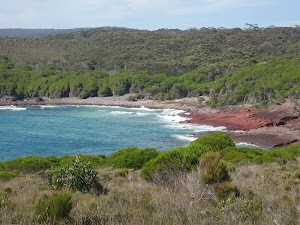
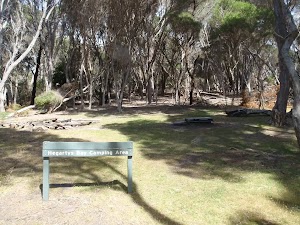
Continue straight: From the beach, this walk heads along the rock platform following the arrow markers. The walk winds around the rock features, then turns away from the ocean and lead up stairs into the bush behind the bay. The track winds above the bay (below on the left) for a short time, to then pass a fireplace and seats, before coming to a signposted clearing ‘Hegartys Bay Camping Area’ with bench seats and a fireplace.
Hegartys Bay
Hegartys Bay camping area
(4.89km) Hegartys Bay Camp → Black cliffs north

1.7 km
30 mins
33m
-28m
Hard track
(6.54km) Black cliffs north → Black cliffs south

280 m
5 mins
5m
-12m
Hard track
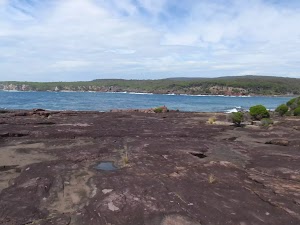
Black cliffs
(6.82km) Black cliffs south → Bittangabee Creek

1.4 km
29 mins
50m
-51m
Moderate track
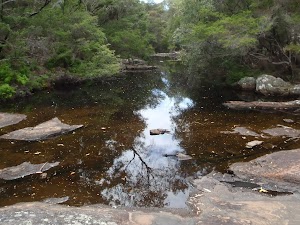
Bittangabee Creek
(8.25km) Bittangabee Creek → Imlay House Ruins

580 m
12 mins
23m
-10m
Moderate track
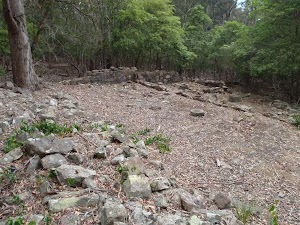
Veer right: From the intersection, the walk follows the sign ‘Via Ruins’ up the hill. The track tends right as it climbs, soon winding up to a large black wooden platform. This platform overlooks the ruins.
Imlay House
(8.84km) Imlay House Ruins → Bittangabee Bay Picnic area

300 m
6 mins
3m
-15m
Moderate track
Veer right: From the intersection, the walk heads down the hill towards the water. The track goes across a rocky creek bed to rise up the other side of the gully. The walk continues up the hill to soon find formed log road barriers on the right and then a signposted intersection and picnic area.
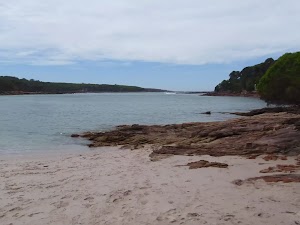
Bittangabee Bay Beach
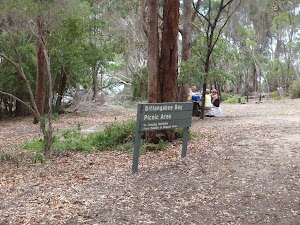
Bittangabee Bay Picnic Area
Maps for the Saltwater Creek to Bittangabee Bay walk
You can download the PDF for this walk to print a map.
These maps below cover the walk and the wider area around the walk, they are worth carrying for safety reasons.
| Kiah | 1:25 000 Map Series | 88231S KIAH | NSW-88231S |
| Green Cape | 1:100 000 Map Series | 8923 GREEN CAPE | 8923 |
Cross sectional view of the Saltwater Creek to Bittangabee Bay bushwalking track

Analysis and summary of the altitude variation on the Saltwater Creek to Bittangabee Bay

Overview of this walks grade – based on the AS 2156.1 – 2001
Under this standard, a walk is graded based on the most difficult section of the walk.
| Length | 9.1 km | ||
| Time | 3 hrs 30 mins | ||
| . | |||
| Grade 4/6 Hard track |
AS 2156.1 | Gradient | Very steep (4/6) |
| Quality of track | Rough track, where fallen trees and other obstacles are likely (4/6) | ||
| Signs | Minimal directional signs (4/6) | ||
| Experience Required | No experience required (1/6) | ||
| Weather | Storms may impact on navigation and safety (3/6) | ||
| Infrastructure | Limited facilities (such as cliffs not fenced, significant creeks not bridged) (4/6) |
Some more details of this walks Grading
Here is a bit more details explaining grading looking at sections of the walk
Gradient
7km of this walk has short steep hills and another 1.7km is very steep. The remaining (770m) has gentle hills with occasional steps.
Quality of track
Around 6km of this walk follows a rough track, where fallen trees and other obstacles are likely, whilst the remaining 3km follows a formed track, with some branches and other obstacles.
Signs
6km of this walk has minimal directional signs and another 2.9km has directional signs at most intersection. The remaining (380m) is clearly signposted.
Experience Required
This whole walk, 9km requires no previous bushwalking experience.
weather
Around 9km of this walk is not usually affected by severe weather events (that would unexpectedly impact safety and navigation), whilst the remaining 470m is affected by storms that may impact your navigation and safety.
Infrastructure
6km of this walk has limited facilities (such as cliffs not fenced, significant creeks not bridged) and another 1.9km has limited facilities (such as not all cliffs fenced). The remaining (1.1km) is close to useful facilities (such as fenced cliffs and seats).
Similar walks
A list of walks that share part of the track with the Saltwater Creek to Bittangabee Bay walk.
Other Nearby walks
A list of walks that start near the Saltwater Creek to Bittangabee Bay walk.
Plan your trip to and from the walk here
The Saltwater Creek to Bittangabee Bay walk starts at the Saltwater Creek Campsite Information Sign (gps: -37.169036, 150.00069)
Your main transport option to Saltwater Creek Campsite Information Sign is by;
![]() Car. A park entry fee is required for driving into the park.
Car. A park entry fee is required for driving into the park.
(get details)
The Saltwater Creek to Bittangabee Bay ends at the Bittangabee Bay Picnic area (gps: -37.21682, 150.01486)
Your main transport option to Bittangabee Bay Picnic area is by;
![]() Car. A park entry fee is required for driving into the park.
Car. A park entry fee is required for driving into the park.
(get details)
Fire Danger
Each park may have its own fire ban, this rating is only valid for today and is based on information from the RFS Please check the RFS Website for more information.
Weather Forest
This walk starts in the South Coast weather district always check the formal BOM forecast or pdf before starting your walk.
Forecast snapshot
Park Information & Alerts
Comments
Short URL = http://wild.tl/sctbb
Gallery images
There are other downloads I am still working on.
You will probably need to login to access these — still all free.
* KML (google earth file)
* GPX (GPS file)
Special Maps/ brochures
* A3 topo maps
* PDF with Lands Topo map base
* PDF with arial image (and map overlay)
I wanted to get the main site live first, this extra stuff will come in time.
Happy walking
Matt 🙂
Bittangabee Bay to Hegartys Bay
And Walk
Bittangabee Bay to Hegartys Bay

3 hrs 30 mins

248 m
Hard track
This is a pleasant walk which wanders around the coast from Bittangabee Bay to the rocky Hegartys Bay. The walk is an excellent outing from Bittangabee Bay camping and picnic areas, and it passes a few good places for a swim. The walk is well marked and explores the coast north of Bittangabee Bay. The red coast at Hegartys bay is fantastic. If you want, there is a bush camp at Hegartys Bay, making this into an overnight walk.
Bittangabee Bay Picnic Area

(0km) Bittangabee Bay Picnic area → Bittangabee Beach

90 m
2 mins
0m
-6m
Moderate track
Bittangabee Bay Beach

(0km) Bittangabee Bay Picnic area → Int. Coast and Ruins Trks Sth

150 m
3 mins
5m
-1m
Moderate track
(0.15km) Int. Coast and Ruins Trks Sth → Int. Coast and Ruins Trks Nth

420 m
8 mins
10m
-11m
Moderate track
(0.15km) Int. Coast and Ruins Trks Sth → Imlay House Ruins

140 m
3 mins
10m
-2m
Moderate track
Imlay House

(0.3km) Imlay House Ruins → Bittangabee Creek

580 m
12 mins
10m
-23m
Moderate track
Veer left: From the intersection, the walk follows neither arrows on the sign but heads away from the face of the sign, keeping the bay below on the right. The bay becomes narrower as the track tends left into a gully. Soon, the track comes to be above a creek.
Bittangabee Creek

(0.88km) Bittangabee Creek → Black cliffs south

1.4 km
29 mins
51m
-50m
Moderate track
Black cliffs

(2.31km) Black cliffs south → Hegartys Bay Camp

1.9 km
35 mins
40m
-38m
Hard track
Continue straight: From the rock platform, this walk heads up the stairs away from the ocean and rock platform. The track winds through the heath for some time, tending right and then parallel to the sea, which is on the far right of the track. The track continues across this headland, to then drop down into a creek, which it passes over to head up the hill to a signposted clearing, ‘Hegartys Bay Camping Area’.
Hegartys Bay camping area

Hegartys Bay

(4.25km) Hegartys Bay Camp → Hegartys Bay Beach

320 m
6 mins
8m
-10m
Hard track
Maps for the Bittangabee Bay to Hegartys Bay walk
You can download the PDF for this walk to print a map.
These maps below cover the walk and the wider area around the walk, they are worth carrying for safety reasons.
| Kiah | 1:25 000 Map Series | 88231S KIAH | NSW-88231S |
| Green Cape | 1:100 000 Map Series | 8923 GREEN CAPE | 8923 |
Cross sectional view of the Bittangabee Bay to Hegartys Bay bushwalking track

Analysis and summary of the altitude variation on the Bittangabee Bay to Hegartys Bay
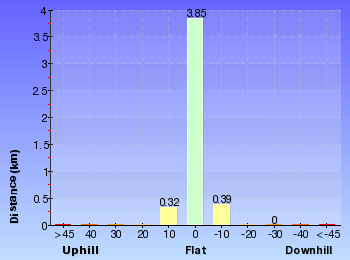
Overview of this walks grade – based on the AS 2156.1 – 2001
Under this standard, a walk is graded based on the most difficult section of the walk.
| Length | 9.1 km | ||
| Time | 3 hrs 30 mins | ||
| . | |||
| Grade 4/6 Hard track |
AS 2156.1 | Gradient | Very steep (4/6) |
| Quality of track | Rough track, where fallen trees and other obstacles are likely (4/6) | ||
| Signs | Minimal directional signs (4/6) | ||
| Experience Required | No experience required (1/6) | ||
| Weather | Storms may impact on navigation and safety (3/6) | ||
| Infrastructure | Limited facilities (such as cliffs not fenced, significant creeks not bridged) (4/6) |
Some more details of this walks Grading
Here is a bit more details explaining grading looking at sections of the walk
Gradient
2.6km of this walk has short steep hills and another 1.7km is very steep. The remaining (280m) has gentle hills with occasional steps.
Quality of track
Around 2.3km of this walk follows a formed track, with some branches and other obstacles, whilst the remaining 2.3km follows a rough track, where fallen trees and other obstacles are likely.
Signs
2.3km of this walk has directional signs at most intersection and another 1.9km has minimal directional signs. The remaining (380m) is clearly signposted.
Experience Required
This whole walk, 4.6km requires no previous bushwalking experience.
weather
Around 4.3km of this walk is not usually affected by severe weather events (that would unexpectedly impact safety and navigation), whilst the remaining 280m is affected by storms that may impact your navigation and safety.
Infrastructure
2.3km of this walk has limited facilities (such as cliffs not fenced, significant creeks not bridged) and another 1.9km has limited facilities (such as not all cliffs fenced). The remaining (380m) is close to useful facilities (such as fenced cliffs and seats).
Similar walks
A list of walks that share part of the track with the Bittangabee Bay to Hegartys Bay walk.
Other Nearby walks
A list of walks that start near the Bittangabee Bay to Hegartys Bay walk.
Plan your trip to and from the walk here
The Bittangabee Bay to Hegartys Bay walk starts and ends at the Bittangabee Bay Picnic area (gps: -37.21682, 150.01486)
Your main transport option to Bittangabee Bay Picnic area is by;
![]() Car. A park entry fee is required for driving into the park.
Car. A park entry fee is required for driving into the park.
(get details)
Fire Danger
Each park may have its own fire ban, this rating is only valid for today and is based on information from the RFS Please check the RFS Website for more information.
Weather Forest
This walk starts in the South Coast weather district always check the formal BOM forecast or pdf before starting your walk.
Forecast snapshot
Park Information & Alerts
Comments
Short URL = http://wild.tl/bbthb
Gallery images
There are other downloads I am still working on.
You will probably need to login to access these — still all free.
* KML (google earth file)
* GPX (GPS file)
Special Maps/ brochures
* A3 topo maps
* PDF with Lands Topo map base
* PDF with arial image (and map overlay)
I wanted to get the main site live first, this extra stuff will come in time.
Happy walking
Matt 🙂
Boyd Tower to Leather Jacket Bay
And Walk
Boyd Tower to Leather Jacket Bay

3 hrs 30 mins

274 m
Hard track
Leather Jacket Bay is a rocky and wonderful bay. The walk through Ben Boyd National Park starts at Boyd Tower car park and passes through Red Sands bay with its stunning contrast of colour. The walk not only passes some beautiful coast line to Leather Jacket Bay but some superb examples of geological processes with rock folding and banding. There is a small clearing at Leather Jacket bay with some shade, making it a nice place for lunch before heading back.
(0km) Ben Boyd Car park information sign → Boyd Tower Lookout Point

1.3 km
27 mins
40m
-59m
Moderate track
(1.34km) Boyd Tower Lookout Point → Red sands bay

1.1 km
21 mins
31m
-40m
Hard track
Red sands bay
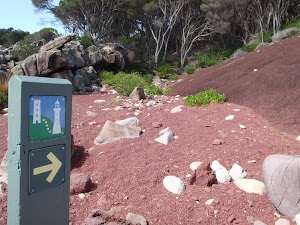
(2.44km) Red sands bay → Int. Light to Light and Leather Jacket Pt Trks

410 m
8 mins
21m
-3m
Hard track
(2.84km) Int. Light to Light and Leather Jacket Pt Trks → Int. Light to Light and Leather Jacket View Trks

740 m
13 mins
16m
-19m
Moderate track
Turn left: From the intersection, this walk follows track marker down the hill, towards the ocean. The track leads downhill to a signposted intersection.
Veer right: From the intersection, this walk follows the track marker past a white post, keeping the ocean and the other service trail to the left of the track. The walk continues along the service trail for a short time to a signposted intersection.
Continue straight: From the intersection, this walk follows the track marker, leaving the fork in the trails behind and heading down the slight hill towards the ocean. The track continues down the hill to a signposted intersection.
(3.58km) Int. Light to Light and Leather Jacket View Trks → Leatherjacket Bay

1.1 km
19 mins
13m
-32m
Hard track
Leather Jacket Bay
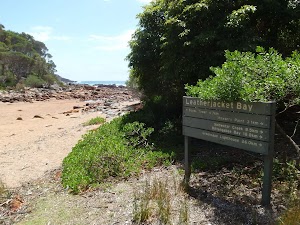
Maps for the Boyd Tower to Leather Jacket Bay walk
You can download the PDF for this walk to print a map.
These maps below cover the walk and the wider area around the walk, they are worth carrying for safety reasons.
| Kiah | 1:25 000 Map Series | 88231S KIAH | NSW-88231S |
| Eden | 1:25 000 Map Series | 88231N EDEN | NSW-88231N |
| Eden | 1:100 000 Map Series | 8823 EDEN | 8823 |
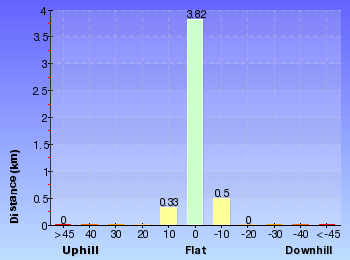
Cross sectional view of the Boyd Tower to Leather Jacket Bay bushwalking track

Analysis and summary of the altitude variation on the Boyd Tower to Leather Jacket Bay
Overview of this walks grade – based on the AS 2156.1 – 2001
Under this standard, a walk is graded based on the most difficult section of the walk.
| Length | 9.3 km | ||
| Time | 3 hrs 30 mins | ||
| . | |||
| Grade 4/6 Hard track |
AS 2156.1 | Gradient | Very steep (4/6) |
| Quality of track | Rough track, where fallen trees and other obstacles are likely (4/6) | ||
| Signs | Minimal directional signs (4/6) | ||
| Experience Required | No experience required (1/6) | ||
| Weather | Storms may impact on navigation and safety (3/6) | ||
| Infrastructure | Limited facilities (such as cliffs not fenced, significant creeks not bridged) (4/6) |
Some more details of this walks Grading
Here is a bit more details explaining grading looking at sections of the walk
Gradient
2.4km of this walk has short steep hills and another 1.5km is very steep. The remaining (740m) is flat with no steps.
Quality of track
Around 2.5km of this walk follows a formed track, with some branches and other obstacles, whilst the remaining 2.2km follows a rough track, where fallen trees and other obstacles are likely.
Signs
2.9km of this walk has directional signs at most intersection and another 1.3km is clearly signposted. The remaining (410m) has minimal directional signs.
Experience Required
This whole walk, 4.7km requires no previous bushwalking experience.
weather
Around 3.6km of this walk is not usually affected by severe weather events (that would unexpectedly impact safety and navigation), whilst the remaining 1.1km is affected by storms that may impact your navigation and safety.
Infrastructure
Around 2.6km of this walk has limited facilities (such as cliffs not fenced, significant creeks not bridged), whilst the remaining 2.1km has limited facilities (such as not all cliffs fenced).
Similar walks
A list of walks that share part of the track with the Boyd Tower to Leather Jacket Bay walk.
Other Nearby walks
A list of walks that start near the Boyd Tower to Leather Jacket Bay walk.
Plan your trip to and from the walk here
The Boyd Tower to Leather Jacket Bay walk starts and ends at the Ben Boyd Car park information sign (gps: -37.104513, 149.95119)
Your main transport option to Ben Boyd Car park information sign is by;
![]() Car. A park entry fee is required for driving into the park.
Car. A park entry fee is required for driving into the park.
(get details)
Fire Danger
Each park may have its own fire ban, this rating is only valid for today and is based on information from the RFS Please check the RFS Website for more information.
Weather Forest
This walk starts in the South Coast weather district always check the formal BOM forecast or pdf before starting your walk.
Forecast snapshot
Park Information & Alerts
Comments
Short URL = http://wild.tl/ljb
Gallery images
There are other downloads I am still working on.
You will probably need to login to access these — still all free.
* KML (google earth file)
* GPX (GPS file)
Special Maps/ brochures
* A3 topo maps
* PDF with Lands Topo map base
* PDF with arial image (and map overlay)
I wanted to get the main site live first, this extra stuff will come in time.
Happy walking
Matt 🙂
Saltwater Creek to Hegartys Bay
And Walk
Saltwater Creek to Hegartys Bay

3 hrs 30 mins

213 m
Hard track
This return walk, from Saltwater Creek camping area, heads south along the coast and around the headlands to Hegartys Bay. The walk passes over a large expanse of low heath along the headland between the bays, providing great panoramic views of the coast. There is a small campsite at Hegartys Bay with some shade and a fascinating red rock platform on the waters edge.
Saltwater Creek campground

(0km) Saltwater Creek Campsite Information Sign → Saltwater Creek Beach Nth

180 m
3 mins
0m
-2m
Moderate track
Saltwater Creek Beach

(0.18km) Saltwater Creek Beach Nth → Saltwater Creek Beach Sth

490 m
8 mins
5m
-2m
Moderate track
(0.67km) Saltwater Creek Beach Sth → Hegartys Bay Camp

4.2 km
1 hr 18 mins
104m
-100m
Hard track
Continue straight: From the beach, this walk heads along the rock platform following the arrow markers. The walk winds around the rock features, then turns away from the ocean and lead up stairs into the bush behind the bay. The track winds above the bay (below on the left) for a short time, to then pass a fireplace and seats, before coming to a signposted clearing ‘Hegartys Bay Camping Area’ with bench seats and a fireplace.
Hegartys Bay camping area

Hegartys Bay

Maps for the Saltwater Creek to Hegartys Bay walk
You can download the PDF for this walk to print a map.
These maps below cover the walk and the wider area around the walk, they are worth carrying for safety reasons.
| Kiah | 1:25 000 Map Series | 88231S KIAH | NSW-88231S |
| Green Cape | 1:100 000 Map Series | 8923 GREEN CAPE | 8923 |
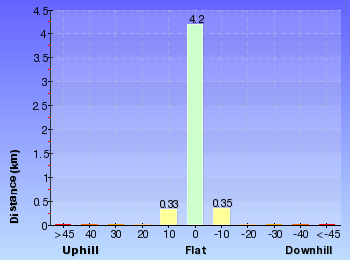
Cross sectional view of the Saltwater Creek to Hegartys Bay bushwalking track

Analysis and summary of the altitude variation on the Saltwater Creek to Hegartys Bay
Overview of this walks grade – based on the AS 2156.1 – 2001
Under this standard, a walk is graded based on the most difficult section of the walk.
| Length | 9.8 km | ||
| Time | 3 hrs 30 mins | ||
| . | |||
| Grade 4/6 Hard track |
AS 2156.1 | Gradient | Short steep hills (3/6) |
| Quality of track | Rough track, where fallen trees and other obstacles are likely (4/6) | ||
| Signs | Minimal directional signs (4/6) | ||
| Experience Required | No experience required (1/6) | ||
| Weather | Storms may impact on navigation and safety (3/6) | ||
| Infrastructure | Limited facilities (such as cliffs not fenced, significant creeks not bridged) (4/6) |
Some more details of this walks Grading
Here is a bit more details explaining grading looking at sections of the walk
Gradient
Around 4.4km of this walk has short steep hills, whilst the remaining 490m has gentle hills with occasional steps.
Quality of track
Around 4.2km of this walk follows a rough track, where fallen trees and other obstacles are likely, whilst the remaining 670m follows a formed track, with some branches and other obstacles.
Signs
Around 3.9km of this walk has minimal directional signs, whilst the remaining 990m has directional signs at most intersection.
Experience Required
This whole walk, 4.9km requires no previous bushwalking experience.
weather
Around 4.7km of this walk is not usually affected by severe weather events (that would unexpectedly impact safety and navigation), whilst the remaining 180m is affected by storms that may impact your navigation and safety.
Infrastructure
Around 4.2km of this walk has limited facilities (such as cliffs not fenced, significant creeks not bridged), whilst the remaining 670m is close to useful facilities (such as fenced cliffs and seats).
Similar walks
A list of walks that share part of the track with the Saltwater Creek to Hegartys Bay walk.
Other Nearby walks
A list of walks that start near the Saltwater Creek to Hegartys Bay walk.
Plan your trip to and from the walk here
The Saltwater Creek to Hegartys Bay walk starts and ends at the Saltwater Creek Campsite Information Sign (gps: -37.169036, 150.00069)
Your main transport option to Saltwater Creek Campsite Information Sign is by;
![]() Car. A park entry fee is required for driving into the park.
Car. A park entry fee is required for driving into the park.
(get details)
Fire Danger
Each park may have its own fire ban, this rating is only valid for today and is based on information from the RFS Please check the RFS Website for more information.
Weather Forest
This walk starts in the South Coast weather district always check the formal BOM forecast or pdf before starting your walk.
Forecast snapshot
Park Information & Alerts
Comments
Short URL = http://wild.tl/scthb
Gallery images
There are other downloads I am still working on.
You will probably need to login to access these — still all free.
* KML (google earth file)
* GPX (GPS file)
Special Maps/ brochures
* A3 topo maps
* PDF with Lands Topo map base
* PDF with arial image (and map overlay)
I wanted to get the main site live first, this extra stuff will come in time.
Happy walking
Matt 🙂
Boyd Tower to Saltwater Creek
And Walk
Boyd Tower to Saltwater Creek

5 hrs

382 m
Hard track
This is the first of the three main sections that form the Light to Light walk. You can start the walk with an optional sidetrip to the historic and interesting Boyd Tower. From here, the walk starts its southward journey to Saltwater Creek. The walk explores a number of picturesque bays with bright red rocks and imposing sea cliffs. Leather Jacket Bay, about halfway along, makes a nice place to relax, with beaches, bays and headlands to explore. The last half of this walk includes a few open grassland sections, providing some panoramic views.
(0km) Ben Boyd car park → Boyd Tower Intersection

280 m
5 mins
0m
-15m
Very easy
to pass the information sign[3][4] (and parking pay station, on the left). The path leads gently downhill for 45m to pass a ‘Welcome to Ben Boyd NP and Boyd’s Tower’ information sign[5]
then the path meanders for 150m through the melaleuca forest to find a seat
and the ‘Gambling on the Future’[6] & ‘Boyd’s Folly?’[7] information signs. Just 35m further along the path you pass another seat
with pleasant coastline view[8]. From here the path starts to lead gently uphill for 50m to come to a clear 3-way intersection[9] (with a timber path and Boyd Tower on the left).
Boyds Tower
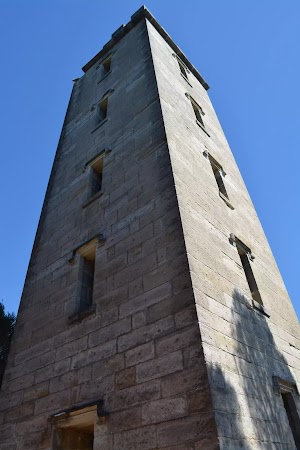
Built in 1847, Boyds Tower is a large sandstone tower on the southern head of Twofold Bay in Ben Boyd National Park. The top of the tower bears the BOYD title, and boast several viewing points. The ground floor of the tower is open to the public and is well worth exploring.
Boyd was declared bankrupt soon after completing the tower and left Australia for the Californian goldfields. Boyd died in the Solomon Islands in 1851 whilst hunting game.
“Ben Boyd’s Tower is watching –
Watching o’er the sea
Ben Boyd’s Tower is waiting
For her and me.” Henry Lawson (1910)
The bottom floor of the tower is open to the public via a 1.2m wide sandstone door frame[13].
(0km) Ben Boyd Car park information sign → Red sands bay

2.4 km
48 mins
71m
-99m
Hard track
Continue straight: From the intersection, this walk heads along the track, keeping the the coast to the left. The track soon leads out of the heath and winds along the hillside, tending away from the coast (which disappears below the trees on the left). The walk then winds down into a gully with access to the rocks (below on your left). Rising up and out of the gully, the track winds across the hillside and then down into a rocky bay with an arrow marker. The walk continues across the red flat rock at the back of the bay, coming to the arrow marker[14] pointing inland, in the middle of the bay.
Red sands bay

(2.44km) Red sands bay → Int. Light to Light and Leather Jacket Pt Trks

410 m
8 mins
21m
-3m
Hard track
(2.84km) Int. Light to Light and Leather Jacket Pt Trks → Int. Light to Light and Leather Jacket View Trks

740 m
13 mins
16m
-19m
Moderate track
Turn left: From the intersection, this walk follows track marker down the hill, towards the ocean. The track leads downhill to a signposted intersection.
Veer right: From the intersection, this walk follows the track marker past a white post, keeping the ocean and the other service trail to the left of the track. The walk continues along the service trail for a short time to a signposted intersection.
Continue straight: From the intersection, this walk follows the track marker, leaving the fork in the trails behind and heading down the slight hill towards the ocean. The track continues down the hill to a signposted intersection.
(3.58km) Int. Light to Light and Leather Jacket View Trks → Leatherjacket Bay

1.1 km
19 mins
13m
-32m
Hard track
Leather Jacket Bay

(4.66km) Leatherjacket Bay → Mowarry Bay car park

2.7 km
57 mins
113m
-108m
Hard track
Turn left: From the intersection, this walk follows the sign to ‘Mowarry Point’ up the hill. The track winds up the hill to continue across the ridge, with the track soon heading down the hill over large speed bumps. The walk comes to a small bridge over a creek bed, after which it leads up a hill, tending left to head across the flat to an unsignposted intersection on the left.
Continue straight: From the intersection, this walk heads down the hill, leaving a track behind on the left. This walk leads down into a saddle, to rise up again along a section of yellow dirt service trail. The track continues to undulate and wind for some time, with views of the ocean appearing on the left of the track under the trees. The track then leads down the hill, tending right for some time to the signposted cul-de-sac at Mowarry car park.
(7.32km) Mowarry Bay car park → Mowarry Creek Sth bank

80 m
1 mins
1m
-2m
Hard track
Turn right: From the intersection, this walk follows the track marker down the stairs and upstream of the creek, to turn left across the rocky creek bed. The walk heads up the stairs, leading to a service trail.
(7.4km) Mowarry Creek Sth bank → Mowarry lookout

1.8 km
34 mins
56m
-47m
Hard track
Continue straight: From the intersection, this walk heads up the hill, keeping the ocean below on the left. The track winds up the hillside to a large signpost ‘Mowarry Point’. This walk follows the arrow to ‘Saltwater Creek 5.4km’ into an open grassland, following numerous track markers through the open grass area and patches of heath. The walk soon turns right, up the hill, keeping the ocean well below to the left of the track. The track then enters and winds through an area of heath. Many trees cover the tracks and trodden paths in this part of the walk. The track passes through these trees to a clearing with views towards Boyd Tower and waves crashing below.
Mowarry Point lookout

(9.15km) Mowarry Lookout → Red rocks

2.6 km
48 mins
60m
-66m
Hard track
Veer right: From the signpost, the walk heads towards the next arrow sign within sight, keeping the ocean on the left. The walk crosses the pebbly beach to the arrow marker, where another can be seen further along the coast on the red rock shelf. The walk meanders across the rock shelf to the track marker, which points into the bush. The walk follows this arrow away from the coast and up the stairs into the heath, where the track winds for quite some time through the heath and then bush. The track then heads back through the bush, down onto a red rock platform above the sea. The walk continues down the rock platform following the arrow signs, with the sea on the left of the track, coming to be opposite a set of stairs (on the right of the track).
Red Cliffs

(11.74km) Red Rocks → Saltwater Creek Beach Nth

1.5 km
27 mins
29m
-36m
Moderate track
Saltwater Creek Beach

(13.22km) Saltwater Creek Beach Nth → Saltwater Creek Campsite Information Sign

180 m
3 mins
2m
0m
Moderate track
Saltwater Creek campground

Maps for the Boyd Tower to Saltwater Creek walk
You can download the PDF for this walk to print a map.
These maps below cover the walk and the wider area around the walk, they are worth carrying for safety reasons.
| Kiah | 1:25 000 Map Series | 88231S KIAH | NSW-88231S |
| Eden | 1:25 000 Map Series | 88231N EDEN | NSW-88231N |
| Green Cape | 1:100 000 Map Series | 8923 GREEN CAPE | 8923 |
| Eden | 1:100 000 Map Series | 8823 EDEN | 8823 |
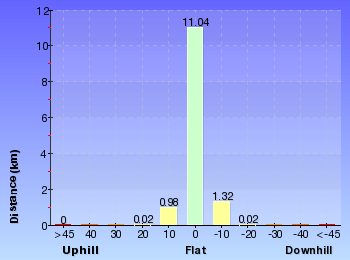
Cross sectional view of the Boyd Tower to Saltwater Creek bushwalking track

Analysis and summary of the altitude variation on the Boyd Tower to Saltwater Creek
Overview of this walks grade – based on the AS 2156.1 – 2001
Under this standard, a walk is graded based on the most difficult section of the walk.
| Length | 13.4 km | ||
| Time | 5 hrs | ||
| . | |||
| Grade 4/6 Hard track |
AS 2156.1 | Gradient | Very steep (4/6) |
| Quality of track | Rough track, where fallen trees and other obstacles are likely (4/6) | ||
| Signs | Minimal directional signs (4/6) | ||
| Experience Required | No experience required (1/6) | ||
| Weather | Storms may impact on navigation and safety (3/6) | ||
| Infrastructure | Limited facilities (such as cliffs not fenced, significant creeks not bridged) (4/6) |
Some more details of this walks Grading
Here is a bit more details explaining grading looking at sections of the walk
Gradient
10km of this walk has short steep hills and another 3km is very steep. The remaining (740m) is flat with no steps.
Quality of track
Around 9km of this walk follows a formed track, with some branches and other obstacles, whilst the remaining 4.8km follows a rough track, where fallen trees and other obstacles are likely.
Signs
7km of this walk has directional signs at most intersection and another 4.6km has minimal directional signs. The remaining (1.3km) is clearly signposted.
Experience Required
This whole walk, 13km requires no previous bushwalking experience.
weather
Around 11km of this walk is not usually affected by severe weather events (that would unexpectedly impact safety and navigation), whilst the remaining 2.8km is affected by storms that may impact your navigation and safety.
Infrastructure
7km of this walk has limited facilities (such as cliffs not fenced, significant creeks not bridged) and another 6km has limited facilities (such as not all cliffs fenced). The remaining (180m) is close to useful facilities (such as fenced cliffs and seats).
Similar walks
A list of walks that share part of the track with the Boyd Tower to Saltwater Creek walk.
Other Nearby walks
A list of walks that start near the Boyd Tower to Saltwater Creek walk.
Plan your trip to and from the walk here
The Boyd Tower to Saltwater Creek walk starts at the Ben Boyd Car park information sign (gps: -37.104513, 149.95119)
Your main transport option to Ben Boyd Car park information sign is by;
![]() Car. A park entry fee is required for driving into the park.
Car. A park entry fee is required for driving into the park.
(get details)
The Boyd Tower to Saltwater Creek ends at the Saltwater Creek Campsite Information Sign (gps: -37.169036, 150.00069)
Your main transport option to Saltwater Creek Campsite Information Sign is by;
![]() Car. A park entry fee is required for driving into the park.
Car. A park entry fee is required for driving into the park.
(get details)
Fire Danger
Each park may have its own fire ban, this rating is only valid for today and is based on information from the RFS Please check the RFS Website for more information.
Weather Forest
This walk starts in the South Coast weather district always check the formal BOM forecast or pdf before starting your walk.
Forecast snapshot
Park Information & Alerts
Comments
Short URL = http://wild.tl/bttsc
Gallery images
There are other downloads I am still working on.
You will probably need to login to access these — still all free.
* KML (google earth file)
* GPX (GPS file)
Special Maps/ brochures
* A3 topo maps
* PDF with Lands Topo map base
* PDF with arial image (and map overlay)
I wanted to get the main site live first, this extra stuff will come in time.
Happy walking
Matt 🙂
Boyd Tower to Mowarry Point Lookout
And Walk
Boyd Tower to Mowarry Point Lookout

7 hrs

601 m
Hard track
This longer day walk starts near Boyd Tower and heads to Mowarry Point, meandering down the coast of Ben Boyd National Park. On the way there are plenty of picturesque coastline views, with the stark red rock forming a great contrast. Views of Boyd Tower and of the coastal rocks are common along the walk as it passes through Red Sands and Leather Jacket bays. Approaching Mowarry Point is an open grass land giving a perspective of how far you have walked (and need to walk back) from Boyd tower car park. A great way of exploring the first stage of the famous Light to Light walk in a day.
(0km) Ben Boyd Car park information sign → Boyd Tower Lookout Point

1.3 km
27 mins
40m
-59m
Moderate track
(1.34km) Boyd Tower Lookout Point → Red sands bay

1.1 km
21 mins
31m
-40m
Hard track
Red sands bay

(2.44km) Red sands bay → Int. Light to Light and Leather Jacket Pt Trks

410 m
8 mins
21m
-3m
Hard track
(2.84km) Int. Light to Light and Leather Jacket Pt Trks → Int. Light to Light and Leather Jacket View Trks

740 m
13 mins
16m
-19m
Moderate track
Turn left: From the intersection, this walk follows track marker down the hill, towards the ocean. The track leads downhill to a signposted intersection.
Veer right: From the intersection, this walk follows the track marker past a white post, keeping the ocean and the other service trail to the left of the track. The walk continues along the service trail for a short time to a signposted intersection.
Continue straight: From the intersection, this walk follows the track marker, leaving the fork in the trails behind and heading down the slight hill towards the ocean. The track continues down the hill to a signposted intersection.
(3.58km) Int. Light to Light and Leather Jacket View Trks → Leatherjacket Bay

1.1 km
19 mins
13m
-32m
Hard track
Leather Jacket Bay

(4.66km) Leatherjacket Bay → Mowarry Bay car park

2.7 km
57 mins
113m
-108m
Hard track
Turn left: From the intersection, this walk follows the sign to ‘Mowarry Point’ up the hill. The track winds up the hill to continue across the ridge, with the track soon heading down the hill over large speed bumps. The walk comes to a small bridge over a creek bed, after which it leads up a hill, tending left to head across the flat to an unsignposted intersection on the left.
Continue straight: From the intersection, this walk heads down the hill, leaving a track behind on the left. This walk leads down into a saddle, to rise up again along a section of yellow dirt service trail. The track continues to undulate and wind for some time, with views of the ocean appearing on the left of the track under the trees. The track then leads down the hill, tending right for some time to the signposted cul-de-sac at Mowarry car park.
(7.32km) Mowarry Bay car park → Mowarry Creek Sth bank

80 m
1 mins
1m
-2m
Hard track
Turn right: From the intersection, this walk follows the track marker down the stairs and upstream of the creek, to turn left across the rocky creek bed. The walk heads up the stairs, leading to a service trail.
(7.4km) Mowarry Creek Sth bank → Mowarry lookout

1.8 km
34 mins
56m
-47m
Hard track
Continue straight: From the intersection, this walk heads up the hill, keeping the ocean below on the left. The track winds up the hillside to a large signpost ‘Mowarry Point’. This walk follows the arrow to ‘Saltwater Creek 5.4km’ into an open grassland, following numerous track markers through the open grass area and patches of heath. The walk soon turns right, up the hill, keeping the ocean well below to the left of the track. The track then enters and winds through an area of heath. Many trees cover the tracks and trodden paths in this part of the walk. The track passes through these trees to a clearing with views towards Boyd Tower and waves crashing below.
Mowarry Point lookout

Maps for the Boyd Tower to Mowarry Point Lookout walk
You can download the PDF for this walk to print a map.
These maps below cover the walk and the wider area around the walk, they are worth carrying for safety reasons.
| Kiah | 1:25 000 Map Series | 88231S KIAH | NSW-88231S |
| Eden | 1:25 000 Map Series | 88231N EDEN | NSW-88231N |
| Green Cape | 1:100 000 Map Series | 8923 GREEN CAPE | 8923 |
| Eden | 1:100 000 Map Series | 8823 EDEN | 8823 |
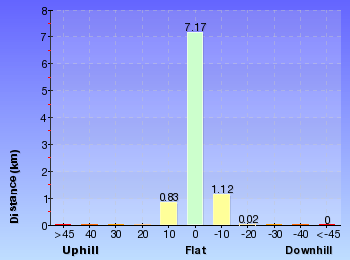
Cross sectional view of the Boyd Tower to Mowarry Point Lookout bushwalking track

Analysis and summary of the altitude variation on the Boyd Tower to Mowarry Point Lookout
Overview of this walks grade – based on the AS 2156.1 – 2001
Under this standard, a walk is graded based on the most difficult section of the walk.
| Length | 18.3 km | ||
| Time | 7 hrs | ||
| . | |||
| Grade 4/6 Hard track |
AS 2156.1 | Gradient | Very steep (4/6) |
| Quality of track | Rough track, where fallen trees and other obstacles are likely (4/6) | ||
| Signs | Minimal directional signs (4/6) | ||
| Experience Required | No experience required (1/6) | ||
| Weather | Storms may impact on navigation and safety (3/6) | ||
| Infrastructure | Limited facilities (such as cliffs not fenced, significant creeks not bridged) (4/6) |
Some more details of this walks Grading
Here is a bit more details explaining grading looking at sections of the walk
Gradient
5km of this walk has short steep hills and another 3km is very steep. The remaining (740m) is flat with no steps.
Quality of track
Around 7km of this walk follows a formed track, with some branches and other obstacles, whilst the remaining 2.2km follows a rough track, where fallen trees and other obstacles are likely.
Signs
6km of this walk has directional signs at most intersection and another 2km has minimal directional signs. The remaining (1.3km) is clearly signposted.
Experience Required
This whole walk, 9km requires no previous bushwalking experience.
weather
Around 8km of this walk is not usually affected by severe weather events (that would unexpectedly impact safety and navigation), whilst the remaining 1.1km is affected by storms that may impact your navigation and safety.
Infrastructure
Around 4.8km of this walk has limited facilities (such as not all cliffs fenced), whilst the remaining 4.3km has limited facilities (such as cliffs not fenced, significant creeks not bridged).
Similar walks
A list of walks that share part of the track with the Boyd Tower to Mowarry Point Lookout walk.
Other Nearby walks
A list of walks that start near the Boyd Tower to Mowarry Point Lookout walk.
Plan your trip to and from the walk here
The Boyd Tower to Mowarry Point Lookout walk starts and ends at the Ben Boyd Car park information sign (gps: -37.104513, 149.95119)
Your main transport option to Ben Boyd Car park information sign is by;
![]() Car. A park entry fee is required for driving into the park.
Car. A park entry fee is required for driving into the park.
(get details)
Fire Danger
Each park may have its own fire ban, this rating is only valid for today and is based on information from the RFS Please check the RFS Website for more information.
Weather Forest
This walk starts in the South Coast weather district always check the formal BOM forecast or pdf before starting your walk.
Forecast snapshot
Park Information & Alerts
Comments
Short URL = http://wild.tl/1x
Gallery images
There are other downloads I am still working on.
You will probably need to login to access these — still all free.
* KML (google earth file)
* GPX (GPS file)
Special Maps/ brochures
* A3 topo maps
* PDF with Lands Topo map base
* PDF with arial image (and map overlay)
I wanted to get the main site live first, this extra stuff will come in time.
Happy walking
Matt 🙂
Light to Light Walk 2 days
And Walk
Light to Light Walk 2 days

2 Days

794 m
Hard track
Over two days, this classic walk explores the coast from Boyd Tower to the Green Cape Lighthouse in the south. Hegartys Bay Camp is over halfway and is the quietest campsite in the park (alternative camp at Saltwater creek). The walk explores many of the scenic and historic highlights of Ben Boyd National Park. It is worth taking the time to enjoy the many bays and vantage points along the way.
(0km) Ben Boyd car park → Boyd Tower Intersection

280 m
5 mins
0m
-15m
Very easy
to pass the information sign[3][4] (and parking pay station, on the left). The path leads gently downhill for 45m to pass a ‘Welcome to Ben Boyd NP and Boyd’s Tower’ information sign[5]
then the path meanders for 150m through the melaleuca forest to find a seat
and the ‘Gambling on the Future’[6] & ‘Boyd’s Folly?’[7] information signs. Just 35m further along the path you pass another seat
with pleasant coastline view[8]. From here the path starts to lead gently uphill for 50m to come to a clear 3-way intersection[9] (with a timber path and Boyd Tower on the left).
Boyds Tower

Built in 1847, Boyds Tower is a large sandstone tower on the southern head of Twofold Bay in Ben Boyd National Park. The top of the tower bears the BOYD title, and boast several viewing points. The ground floor of the tower is open to the public and is well worth exploring.
Boyd was declared bankrupt soon after completing the tower and left Australia for the Californian goldfields. Boyd died in the Solomon Islands in 1851 whilst hunting game.
“Ben Boyd’s Tower is watching –
Watching o’er the sea
Ben Boyd’s Tower is waiting
For her and me.” Henry Lawson (1910)
The bottom floor of the tower is open to the public via a 1.2m wide sandstone door frame[13].
(0km) Ben Boyd Car park information sign → Red sands bay

2.4 km
48 mins
71m
-99m
Hard track
Continue straight: From the intersection, this walk heads along the track, keeping the the coast to the left. The track soon leads out of the heath and winds along the hillside, tending away from the coast (which disappears below the trees on the left). The walk then winds down into a gully with access to the rocks (below on your left). Rising up and out of the gully, the track winds across the hillside and then down into a rocky bay with an arrow marker. The walk continues across the red flat rock at the back of the bay, coming to the arrow marker[14] pointing inland, in the middle of the bay.
Red sands bay

(2.44km) Red sands bay → Int. Light to Light and Leather Jacket Pt Trks

410 m
8 mins
21m
-3m
Hard track
(2.84km) Int. Light to Light and Leather Jacket Pt Trks → Int. Light to Light and Leather Jacket View Trks

740 m
13 mins
16m
-19m
Moderate track
Turn left: From the intersection, this walk follows track marker down the hill, towards the ocean. The track leads downhill to a signposted intersection.
Veer right: From the intersection, this walk follows the track marker past a white post, keeping the ocean and the other service trail to the left of the track. The walk continues along the service trail for a short time to a signposted intersection.
Continue straight: From the intersection, this walk follows the track marker, leaving the fork in the trails behind and heading down the slight hill towards the ocean. The track continues down the hill to a signposted intersection.
(3.58km) Int. Light to Light and Leather Jacket View Trks → Leatherjacket Bay

1.1 km
19 mins
13m
-32m
Hard track
Leather Jacket Bay

(4.66km) Leatherjacket Bay → Mowarry Bay car park

2.7 km
57 mins
113m
-108m
Hard track
Turn left: From the intersection, this walk follows the sign to ‘Mowarry Point’ up the hill. The track winds up the hill to continue across the ridge, with the track soon heading down the hill over large speed bumps. The walk comes to a small bridge over a creek bed, after which it leads up a hill, tending left to head across the flat to an unsignposted intersection on the left.
Continue straight: From the intersection, this walk heads down the hill, leaving a track behind on the left. This walk leads down into a saddle, to rise up again along a section of yellow dirt service trail. The track continues to undulate and wind for some time, with views of the ocean appearing on the left of the track under the trees. The track then leads down the hill, tending right for some time to the signposted cul-de-sac at Mowarry car park.
(7.32km) Mowarry Bay car park → Mowarry Creek Sth bank

80 m
1 mins
1m
-2m
Hard track
Turn right: From the intersection, this walk follows the track marker down the stairs and upstream of the creek, to turn left across the rocky creek bed. The walk heads up the stairs, leading to a service trail.
(7.4km) Mowarry Creek Sth bank → Mowarry lookout

1.8 km
34 mins
56m
-47m
Hard track
Continue straight: From the intersection, this walk heads up the hill, keeping the ocean below on the left. The track winds up the hillside to a large signpost ‘Mowarry Point’. This walk follows the arrow to ‘Saltwater Creek 5.4km’ into an open grassland, following numerous track markers through the open grass area and patches of heath. The walk soon turns right, up the hill, keeping the ocean well below to the left of the track. The track then enters and winds through an area of heath. Many trees cover the tracks and trodden paths in this part of the walk. The track passes through these trees to a clearing with views towards Boyd Tower and waves crashing below.
Mowarry Point lookout

(9.15km) Mowarry Lookout → Red rocks

2.6 km
48 mins
60m
-66m
Hard track
Veer right: From the signpost, the walk heads towards the next arrow sign within sight, keeping the ocean on the left. The walk crosses the pebbly beach to the arrow marker, where another can be seen further along the coast on the red rock shelf. The walk meanders across the rock shelf to the track marker, which points into the bush. The walk follows this arrow away from the coast and up the stairs into the heath, where the track winds for quite some time through the heath and then bush. The track then heads back through the bush, down onto a red rock platform above the sea. The walk continues down the rock platform following the arrow signs, with the sea on the left of the track, coming to be opposite a set of stairs (on the right of the track).
Red Cliffs

(11.74km) Red Rocks → Saltwater Creek Beach Nth

1.5 km
27 mins
29m
-36m
Moderate track
Saltwater Creek Beach

(13.22km) Saltwater Creek Beach Nth → Saltwater Creek Campsite Information Sign

180 m
3 mins
2m
0m
Moderate track
Saltwater Creek campground

(13.4km) Saltwater Creek Campsite Information Sign → Saltwater Creek Beach Nth

180 m
3 mins
0m
-2m
Moderate track
(13.58km) Saltwater Creek Beach Nth → Saltwater Creek Beach Sth

490 m
8 mins
5m
-2m
Moderate track
(14.07km) Saltwater Creek Beach Sth → Hegartys Bay Camp

4.2 km
1 hr 18 mins
104m
-100m
Hard track
Continue straight: From the beach, this walk heads along the rock platform following the arrow markers. The walk winds around the rock features, then turns away from the ocean and lead up stairs into the bush behind the bay. The track winds above the bay (below on the left) for a short time, to then pass a fireplace and seats, before coming to a signposted clearing ‘Hegartys Bay Camping Area’ with bench seats and a fireplace.
Hegartys Bay

Hegartys Bay camping area

End of day 1
(18.29km) Hegartys Bay Camp → Black cliffs south

1.9 km
35 mins
38m
-40m
Hard track
Continue straight: From the intersection, this walk follows the cairns and track markers along the rock, with the ocean to the left. The walk follows the rockshelf down to an area where it starts to slope down into the sea – this is marked by numerous cairns and an arrow on a boulder.
Black cliffs

(20.22km) Black cliffs south → Bittangabee Creek

1.4 km
29 mins
50m
-51m
Moderate track
Bittangabee Creek

(21.65km) Bittangabee Creek → Imlay House Ruins

580 m
12 mins
23m
-10m
Moderate track
Veer right: From the intersection, the walk follows the sign ‘Via Ruins’ up the hill. The track tends right as it climbs, soon winding up to a large black wooden platform. This platform overlooks the ruins.
Imlay House

(22.24km) Imlay House Ruins → Bittangabee Bay Picnic area

300 m
6 mins
3m
-15m
Moderate track
Veer right: From the intersection, the walk heads down the hill towards the water. The track goes across a rocky creek bed to rise up the other side of the gully. The walk continues up the hill to soon find formed log road barriers on the right and then a signposted intersection and picnic area.
(22.53km) Bittangabee Bay Picnic area → Bittangabee Beach

90 m
2 mins
0m
-6m
Moderate track
Bittangabee Bay Beach

(22.53km) Bittangabee Bay Picnic Area → Int. Light to Light Trk and Bittangabee Storehouse Trk

240 m
6 mins
13m
-9m
Moderate track
Turn left: From the intersection, the walk follows the sign for ‘Walking Track’ (not the same direction as the ‘Beach’ arrow) down the hill. The track leads down the hill a short way to an arrow track marker.
(22.77km) Int. Light to Light Trk and Bittangabee Storehouse Trk → Int. Light to Light Trk and Bittangabee Storehouse Trail

150 m
3 mins
2m
-10m
Hard track
Turn right: From the intersection, the walk leads up the hill, keeping the bay on your left and the storehouse ruins behind on the right. The track veers right, up the hill to a signposted intersection. At the end of this side trip, retrace your steps back to the main walk then Turn left .
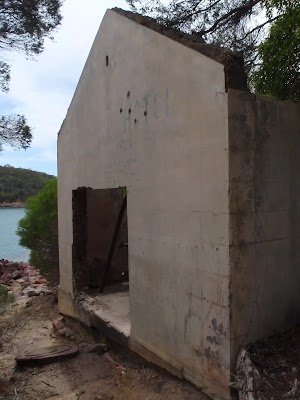
Bittangabee Storehouse ruins
(22.77km) Int. Light to Light Trk and Bittangabee Storehouse Trk → Int. Light to Light Trk and Bittangabee Storehouse Trail

90 m
2 mins
0m
-8m
Moderate track
(22.86km) Int. Light to Light Trk and Bittangabee Storehouse Trail → Bittangabee Sth Headland Lookout

150 m
3 mins
6m
0m
Moderate track
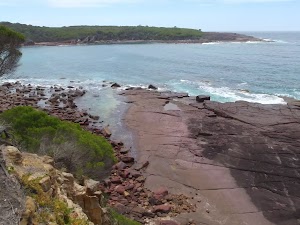
Southern Bittangabee Point lookout
(23.01km) Bittangabee Sth Headland Lookout → Int. Light to Light Walk and Pulpit Rock Rd Access

3.8 km
1 hr 10 mins
99m
-62m
Moderate track
Continue straight: From the top of the stairs, this walk leads upstream of the creek, which is below on the right. The track follows this creek for some time, tending left away from it into the bush at times. The track winds slightly uphill for a while, then winds downhill to cross the rocky surface of another creek. The track heads up the hill and over the ridge before heading down to another creek bed. The track then leads up the hill to the cul-de-sac of a service trail.
(26.83km) Int. Light to Light Walk and Pulpit Rock Rd Access → Int. Light to Light Trk and Pulpit Rock Rd

260 m
4 mins
6m
-2m
Moderate track
Veer right: From the intersection, this walk follows the track marker along the hillside, keeping the ocean on the left of the track. The track passes a few overgrown service trails on either side, as it continues on to the signposted intersection with the main service trail.
(27.09km) Int. Light to Light Trk and Pulpit Rock Rd → Pulpit Rock

700 m
14 mins
3m
-49m
Hard track
Continue straight: From the intersection, the walk heads down the stairs just near the lookout. The stairs lead onto the rock shelf, with stunning views to the north (left) and of waves crashing onto the rocks below. At the end of this side trip, retrace your steps back to the main walk then Turn left.
Pulpit Rock

(27.09km) Int. Light to Light Trk and Pulpit Rock Rd → Ly-ee-moon Graveyard

2.8 km
49 mins
44m
-70m
Moderate track
Continue straight: From the intersection, this walk heads through the heath following the arrow marker, and keeping the ocean on the left of the track. The track leads through the heath and Banksias for a short time, coming to a slightly overgrown service trail.
Continue straight: From the intersection, this walk keeps the ocean on the left of the track as it winds through the heath and the Banksias. The track soon becomes surrounded by melaleuca trees, which have many fallen branches. The track continues to a signposted intersection for ‘Ly-ee-moon Cemetery’.
Ly-ee-moon Graveyard
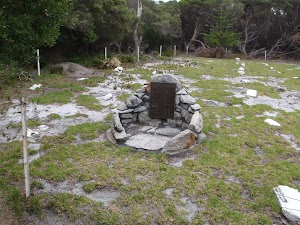
During the dark night, the lighthouse keeper and assistant heroically rescued 16 people from the sea, and were left to listen to cries for help though the night of other people who could not be saved. The mother of Blessed Mary MacKillop, the first Australian to be beatified by the Catholic church, was one of those lost during the night.
The fast and normally reliable ship, operated by the Australian Steam Navigation Company, was a single screw ship converted from a paddle steamer when it was brought to Australia in 1876. The graveyard is about 300m north-west of the Green Cape lighthouse, which was operational at the time the SS Ly-ee-moon struck the reef and sunk. More info.
(29.86km) Ly-ee-moon Graveyard → Green Cape Lighthouse Car park

250 m
4 mins
5m
-3m
Easy track
Green Cape
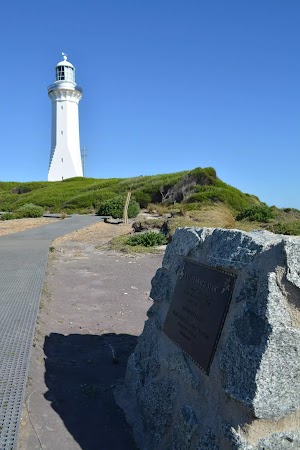
(30.1km) Green Cape Lighthouse Car Park → Enjoying Green Cape int.

50 m
1 mins
0m
-2m
Easy track
(30.15km) Enjoying Green Cape int. → Green Cape Lighthouse Telegraph Station

40 m
1 mins
0m
0m
Easy track
Green Cape Telegraph Station
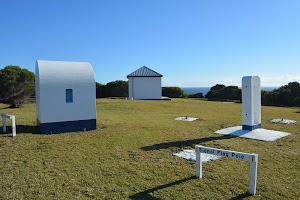
Cape Lighthouse Keepers
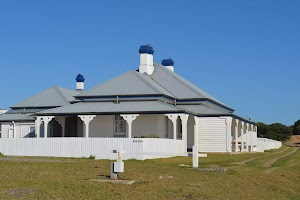
(30.19km) Green Cape Lighthouse Telegraph Station → Green Cape Lighthouse entry gate

180 m
3 mins
0m
-3m
Easy track
Green Cape Lighthouse
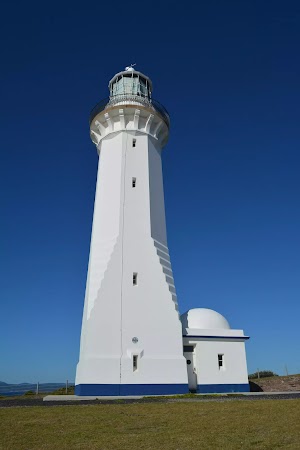
(30.36km) Green Cape Lighthouse entry gate → Green Cape Lookout

150 m
3 mins
0m
-11m
Easy track
. After about 25m the fence leaves the path (there is a picnic table
about 30m over the grass to the left[36]), where the walk continues downhill along the boardwalk[37] for another 45m
to come beside large white metal tower[38]. This tower has been the official lighthouse since 1992 .
Continue straight: From the modern lighthouse tower, this walk follows the boardwalk[40] downhill around the metal tower. Ater about 15m the walk leads past the ‘Wildlife navigates the coast safely’ information sign[41], then continues mostly downhill for another 70m to the fenced lookout.
Green Cape Lookout
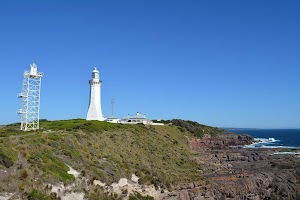
(30.51km) Green Cape Lookout → Green Cape Lighthouse Car Park

410 m
8 mins
16m
0m
Easy track
Continue straight: From the metal lighthouse tower, this walk follows the boardwalk
gently uphill for about 45m to come to the corner of the fence for the original Green Cape Lighthouse tower[47] (there is a picnic table
about 30m over the grass to the right[48] here). The walking continues along the boardwalk for another 25m to the gate[49] beside the Green Cape Lighthouse tower[50].
Continue straight: From the gate, the walk heads up the hill towards the large solar panels[51]. This walk keeps the houses and fence on the right undulates along the fence line to come to the signposted ‘Signal Flag Locker’ building[52] at the old ‘Telegraph Station’.
Continue straight: From the beside the Green Cape Lighthouse Telegraph Station[53], this walk follows the fence (keeping the fence and clearing to the right) along the boardwalk as it winds into the heath to then find a 3-way intersection and a large sheltered ‘Enjoying Green Cape’ information sign[54].
Continue straight: From the intersection, this walk heads gently downhill along the boardwalk with a handrail as it winds down to the dirt car park[55] at the end of Green Cape Lighthouse Rd.
Maps for the Light to Light Walk 2 days walk
You can download the PDF for this walk to print a map.
These maps below cover the walk and the wider area around the walk, they are worth carrying for safety reasons.
| Narrabarba | 1:25 000 Map Series | 88232N NARRABARBA | NSW-88232N |
| Kiah | 1:25 000 Map Series | 88231S KIAH | NSW-88231S |
| Eden | 1:25 000 Map Series | 88231N EDEN | NSW-88231N |
| Green Cape | 1:100 000 Map Series | 8923 GREEN CAPE | 8923 |
| Eden | 1:100 000 Map Series | 8823 EDEN | 8823 |
Cross sectional view of the Light to Light Walk 2 days bushwalking track

Analysis and summary of the altitude variation on the Light to Light Walk 2 days
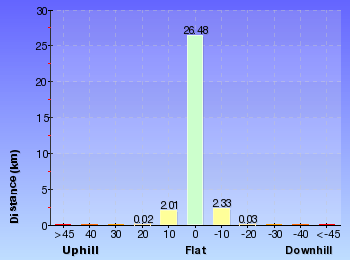
Daily actual walking time estimates
| Day | Walking Time | Length |
|---|---|---|
| 1 | 5 hrs 52 mins | 18.6 km |
| 2 | 4 hrs 15 mins | 13.6 km |
Overview of this walks grade – based on the AS 2156.1 – 2001
Under this standard, a walk is graded based on the most difficult section of the walk.
| Length | 30.9 km | ||
| Time | 2 Days | ||
| . | |||
| Grade 4/6 Hard track |
AS 2156.1 | Gradient | Very steep (4/6) |
| Quality of track | Rough track, where fallen trees and other obstacles are likely (4/6) | ||
| Signs | Minimal directional signs (4/6) | ||
| Experience Required | No experience required (1/6) | ||
| Weather | Storms may impact on navigation and safety (3/6) | ||
| Infrastructure | Limited facilities (such as cliffs not fenced, significant creeks not bridged) (4/6) |
Some more details of this walks Grading
Here is a bit more details explaining grading looking at sections of the walk
Gradient
20km of this walk has short steep hills and another 4.8km has gentle hills with occasional steps. Whilst another 4.7km is very steep and the remaining 1.3km is flat with no steps.
Quality of track
19km of this walk follows a formed track, with some branches and other obstacles and another 11km follows a rough track, where fallen trees and other obstacles are likely. Whilst another 550m follows a clear and well formed track or trail and the remaining 520m follows a smooth and hardened path.
Signs
17km of this walk has directional signs at most intersection and another 10km has minimal directional signs. The remaining (3.9km) is clearly signposted.
Experience Required
This whole walk, 31km requires no previous bushwalking experience.
weather
Around 28km of this walk is not usually affected by severe weather events (that would unexpectedly impact safety and navigation), whilst the remaining 3.2km is affected by storms that may impact your navigation and safety.
Infrastructure
15km of this walk has limited facilities (such as not all cliffs fenced) and another 13km has limited facilities (such as cliffs not fenced, significant creeks not bridged). The remaining (3km) is close to useful facilities (such as fenced cliffs and seats).
Similar walks
A list of walks that share part of the track with the Light to Light Walk 2 days walk.
Other Nearby walks
A list of walks that start near the Light to Light Walk 2 days walk.
Plan your trip to and from the walk here
The Light to Light Walk 2 days walk starts at the Ben Boyd Car park information sign (gps: -37.104513, 149.95119)
Your main transport option to Ben Boyd Car park information sign is by;
![]() Car. A park entry fee is required for driving into the park.
Car. A park entry fee is required for driving into the park.
(get details)
The Light to Light Walk 2 days ends at the Green Cape Lighthouse Car Park (gps: -37.259525, 150.04796)
Your main transport option to Green Cape Lighthouse Car Park is by;
![]() Car. A park entry fee is required for driving into the park.
Car. A park entry fee is required for driving into the park.
(get details)
Fire Danger
Each park may have its own fire ban, this rating is only valid for today and is based on information from the RFS Please check the RFS Website for more information.
Weather Forest
This walk starts in the South Coast weather district always check the formal BOM forecast or pdf before starting your walk.
Forecast snapshot
Park Information & Alerts
Comments
Short URL = http://wild.tl/ltlw2d
Gallery images
There are other downloads I am still working on.
You will probably need to login to access these — still all free.
* KML (google earth file)
* GPX (GPS file)
Special Maps/ brochures
* A3 topo maps
* PDF with Lands Topo map base
* PDF with arial image (and map overlay)
I wanted to get the main site live first, this extra stuff will come in time.
Happy walking
Matt 🙂


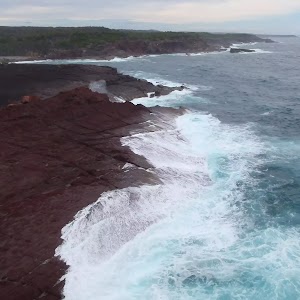
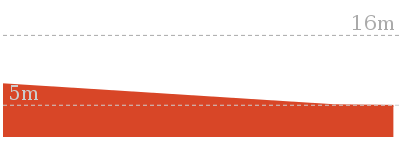
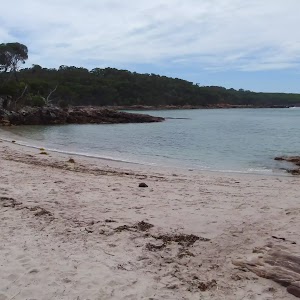
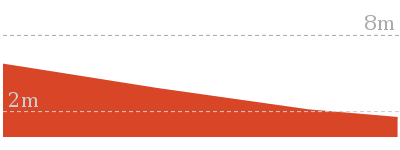
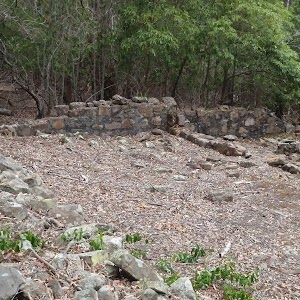
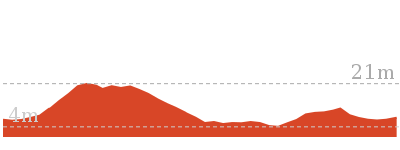
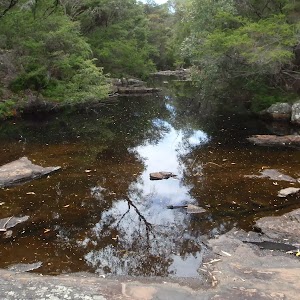
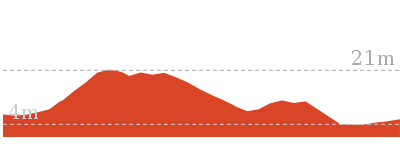
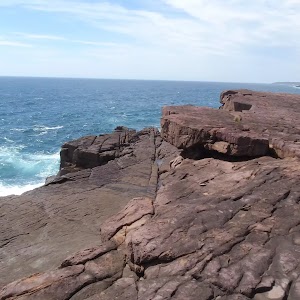
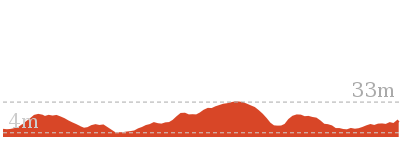

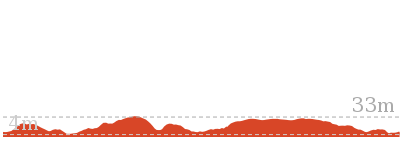

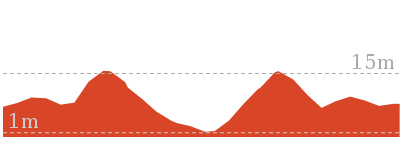
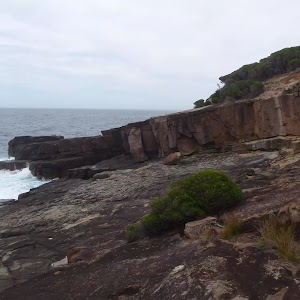
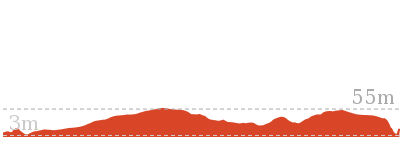
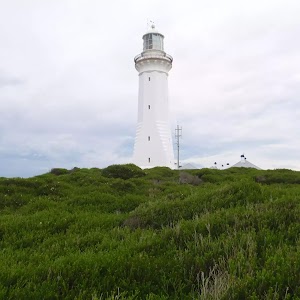
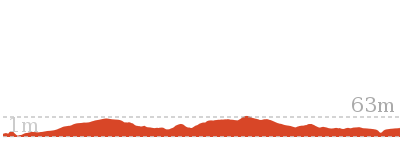
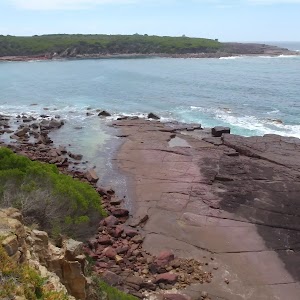
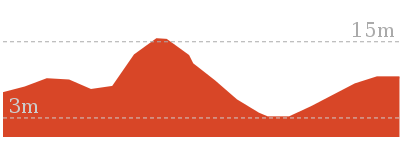
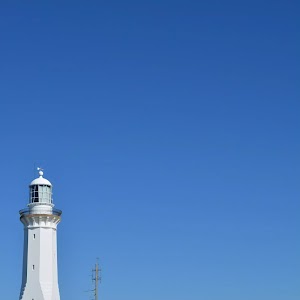

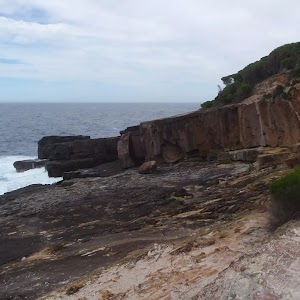
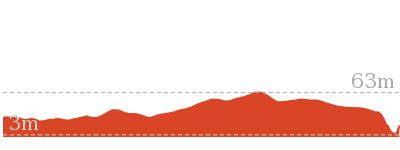


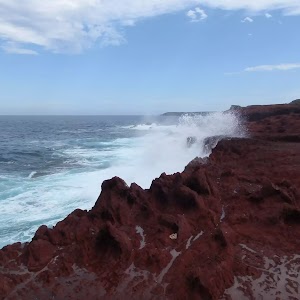
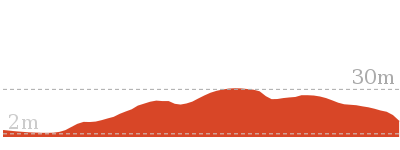
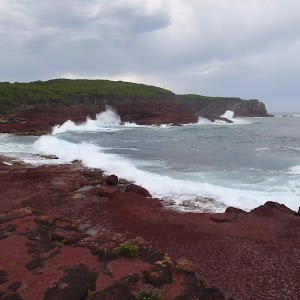
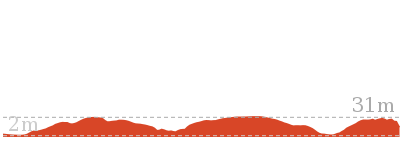
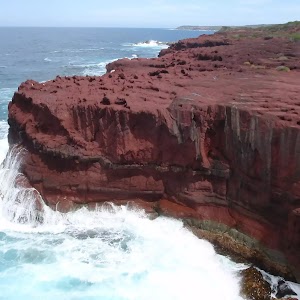
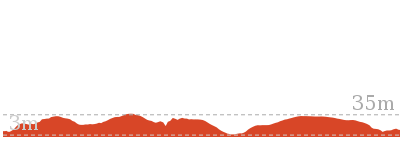
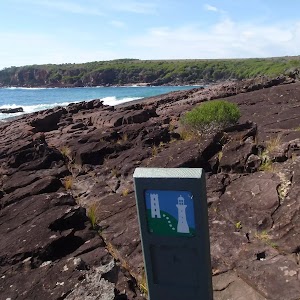
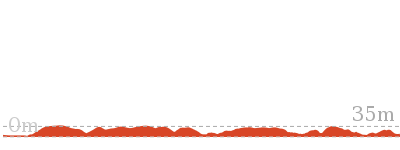
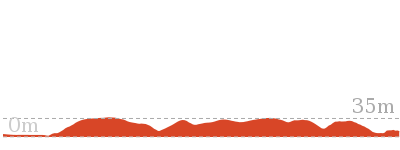
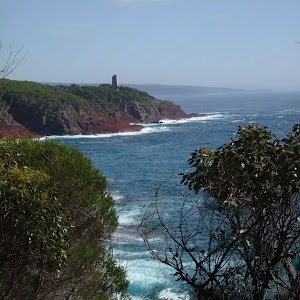
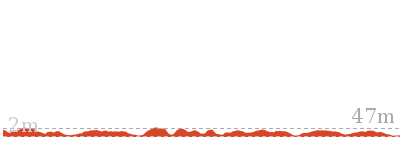
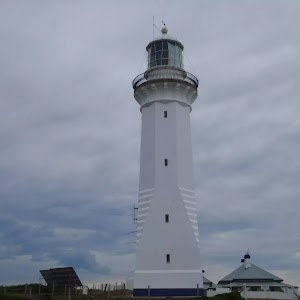


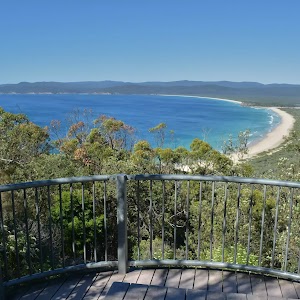

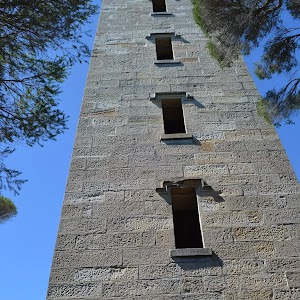
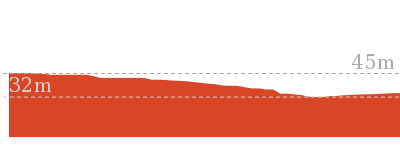
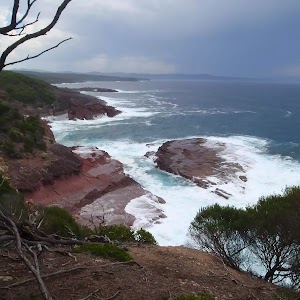

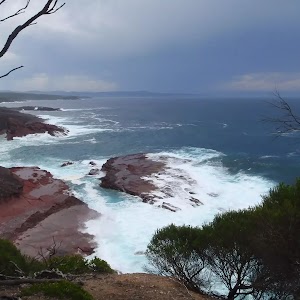
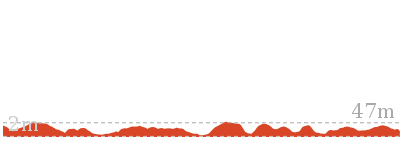
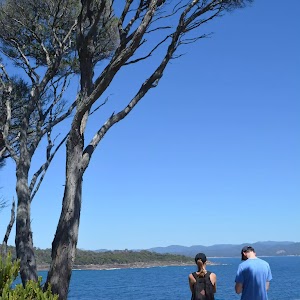
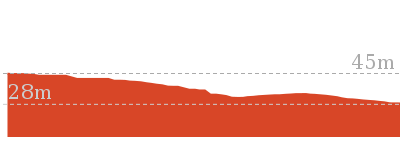
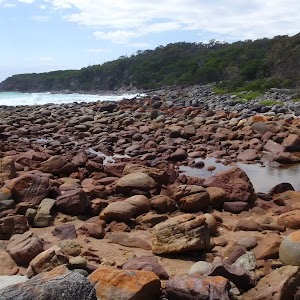
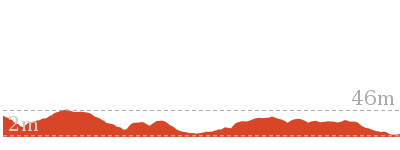
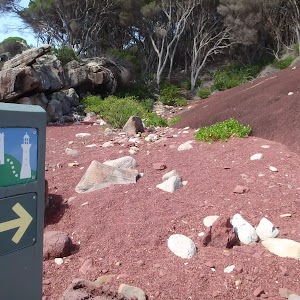
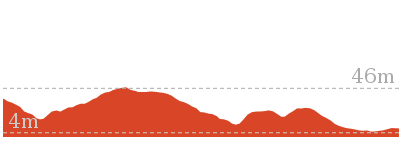
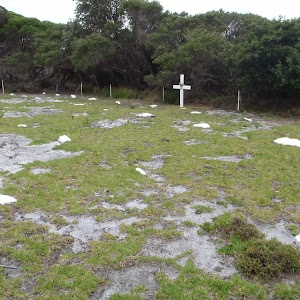
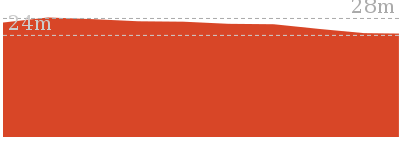
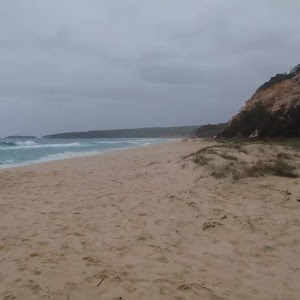
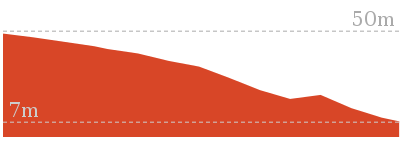
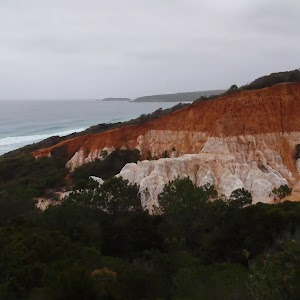
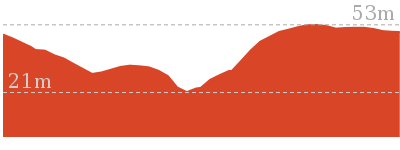
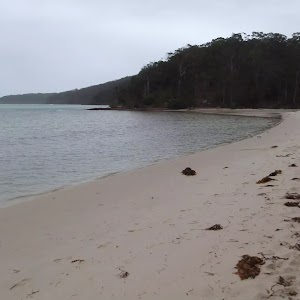
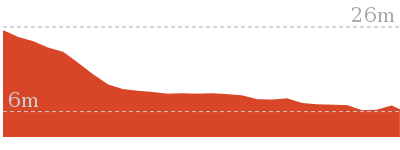
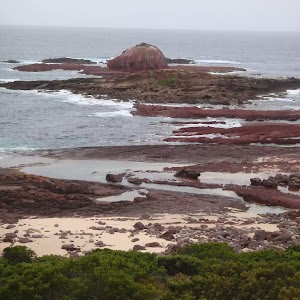
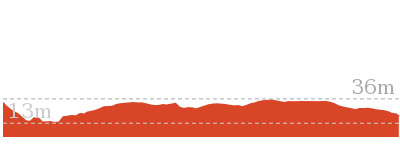
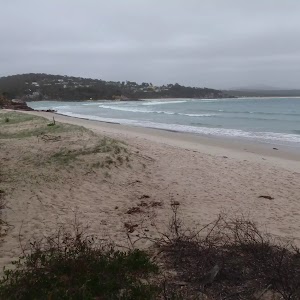
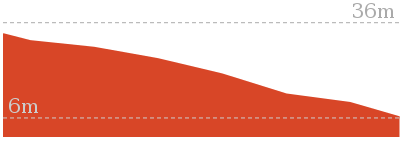
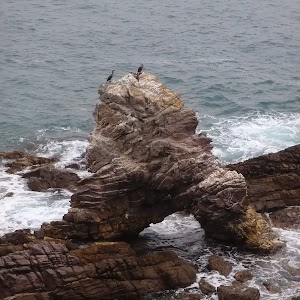
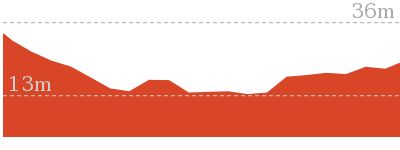
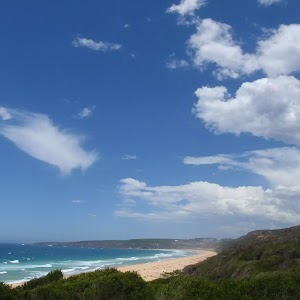
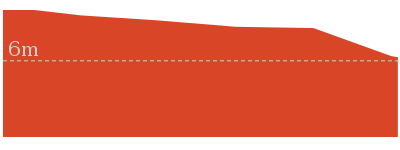
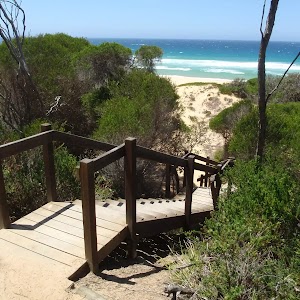
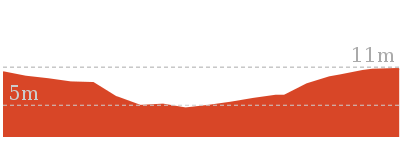
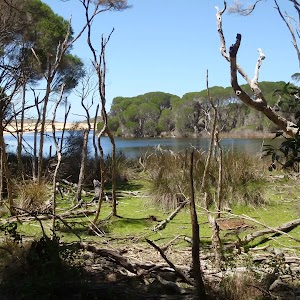
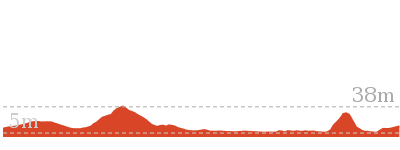
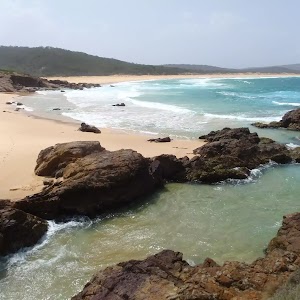
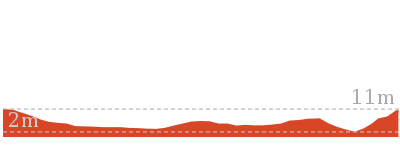
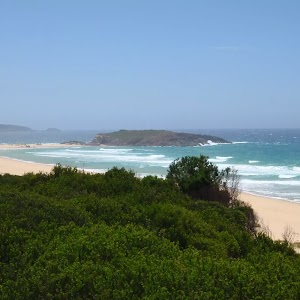
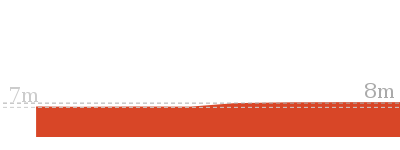
Comments