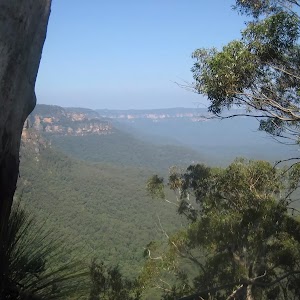
This walk leads from the information center at Echo Point down through the Blue Mountains National Park to Oreades Lookout. It is a popular walk and follows a smooth concreted path the whole way. There are no steps but sections do get steep in places. The short side trip to Spooners lookout is well worth the extra effort. A lovely walk suitable for the whole family.
The Three Sisters Walk
And Walk
The Three Sisters Walk


30 mins
872 m Return

48 m
Easy track
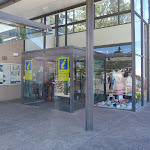


Echo Point Information Centre

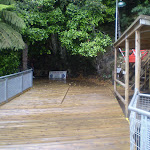
This modern building at Echo Point is a great source of information. It is open daily from 9am-5pm (except Christmas Day). There is a large range of books, maps and information about the area (and ice creams). There are toilets opposite the entrance

, and mobility parking opposite

. For more information, phone 1300 653 408. More info.
(0km) Echo Point Information Center → Echo Point

90 m
4 mins
3m
-22m
Very easy
From the front of the Echo Point Visitor Center[1] and mobility car parking area
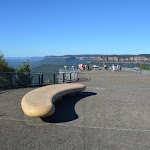
, this walk heads downhill following the ‘Echo point’ sign[2] across the wide open concrete area[3]. After about 30m the walk leads past a large concrete seat
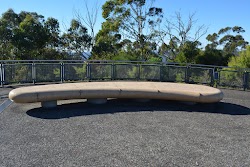
(on the left) then passes a similar seat

after another 20m. Continue gently downhill towards the view for another 30m to the stunning views at the formal Echo Point lookout[4].
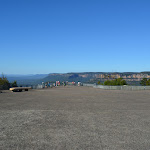
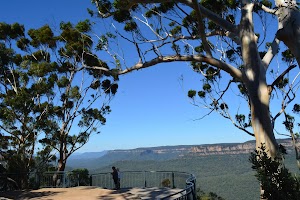
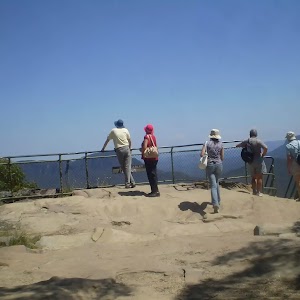
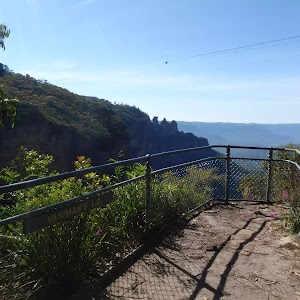
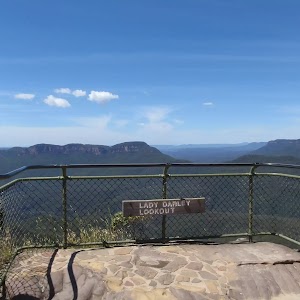
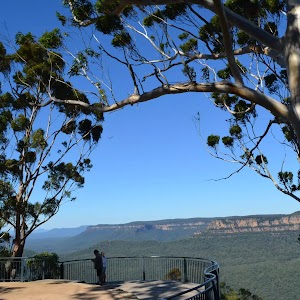
Echo Point
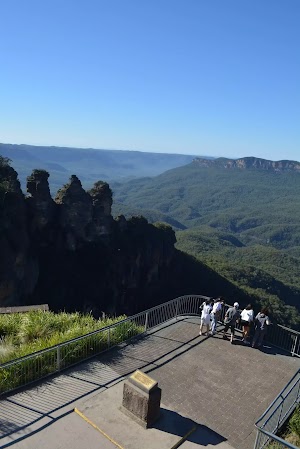
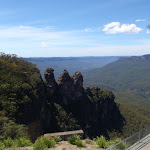
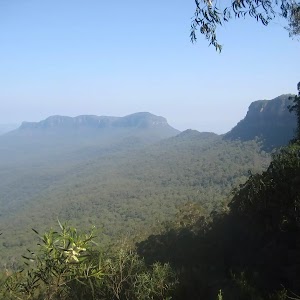
Echo Point is the Blue Mountains’ most famous and popular lookout, home to one of the best photo opportunities for the Three Sisters[5]. Visited by over two million tourists each year, this popular spot also serves as the starting point for many great walks in the area. The lookout is well fenced[6], has information signs[7][8] and stunning views across the valley to the Three Sisters[9] and Mount Solitary[10]. There are mounted binoculars and seats nearby.
(0km) Echo Point Information Center → Int of Three Sisters Walkway and Spooners Lookout path
130 m
3 mins
0m
-5m
Very easy
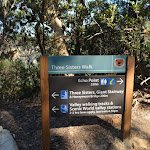
Turn sharp left: From the front of the visitor center[11], this walk heads gently uphill, following the ‘Three Sister walk’ sign[12]. The walk soon passes the toilet block
[13] and veers right to pass under the stone archway[14] and come to an intersection[15] with a path (on the right) just past the ‘Blue Mountains National Park’ sign[16].
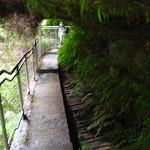
Continue straight: From the intersection, this walk heads along the ‘Three Sisters walkway’[17] footpath, initially keeping the metal fence to the right. The smooth concrete path leads up and over a rise then leads gently downhill for about 80m to a signposted three-way intersection[18].
(0.13km) Int of the Three Sisters Footpath and Spooners Lookout Footpath → Spooners Lookout
110 m
4 mins
0m
-31m
Easy track
Turn sharp right: From the intersection[19], this walk follows the ‘Spooners Lookout’ sign down along the concrete path, initially keeping the fence to the left. The path leads gently downhill to a signposted three-way intersection[20].
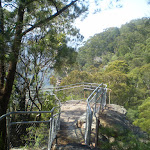
Continue straight: From the intersection, this walk follows the ‘Spooners Lookout’ arrow[21] gently downhill along concrete path. The path leads towards the view for just over 50m to come to the fenced Spooners Lookout platform[22]. At the end of this side trip, retrace your steps back to the main walk then Continue straight.
Continue straight: From the intersection, this walk follows the ‘Spooners Lookout’ arrow[21] gently downhill along concrete path. The path leads towards the view for just over 50m to come to the fenced Spooners Lookout platform[22]. At the end of this side trip, retrace your steps back to the main walk then Continue straight.

(0.13km) Int of the Three Sisters Pathway and Spooners Lookout path → Int of Prince Henry Cliff Track and the Three Sisters Pathway
200 m
5 mins
8m
-15m
Easy track
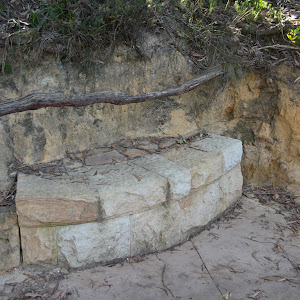
Continue straight: From the intersection, this walk follows the ‘Three Sisters 400m’ arrow[27] downhill along the concrete path, keeping the valley to the right. After about 15m the walk leads past a stone seat

(on the left), with a blue tongue lizard sculpture[28]. The walk continues gently downhill for another 60m to pass another sandstone seat (on the left)

. From here the path winds gently downhill for another 70m to find yet another sandstone seat (on the left)

. The path continues downhill for another 45m to find a clear intersection marked with a large ‘Three Sisters Walk’ sign[29]. On the right is a small flat loose gravel area with two seats

.
(0.33km) Int of Prince Henry Cliff Track and the Three Sisters Footpath → Oreades Lookout
110 m
3 mins
2m
-18m
Easy track
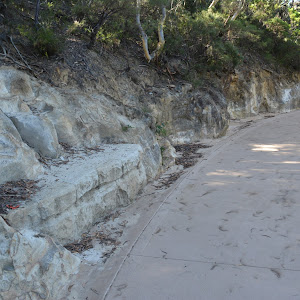
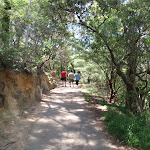
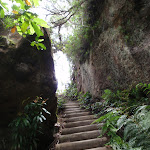
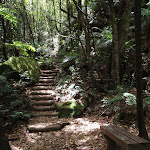
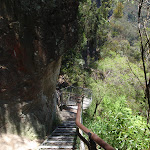
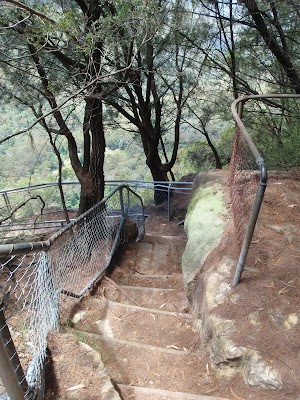
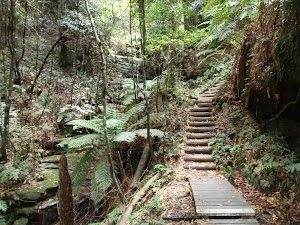
Continue straight: From the intersection, this walk follows the ‘Three Sisters, Giant Stairway’ sign[30] moderately steeply downhill

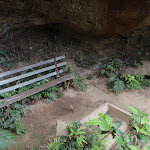
along the smooth concrete path[31]. After about about 90m[32] this path leads past stone seat

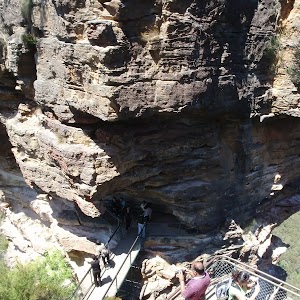
(on the left) in a small sandstone overhang[33]. Check the miniature cicada sculptures[34] above the overhang. From here this walk continues downhill along the path for about 30m to find the fenced Oreades Lookout[35] (on the right).
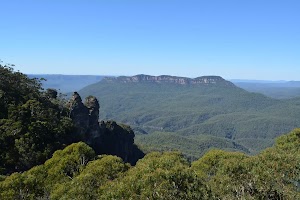
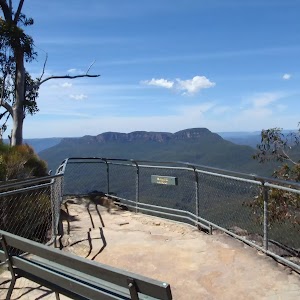
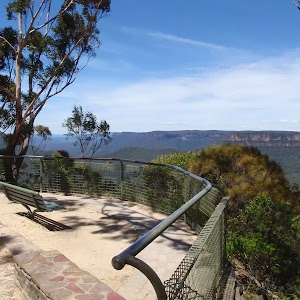
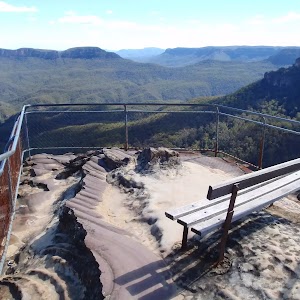
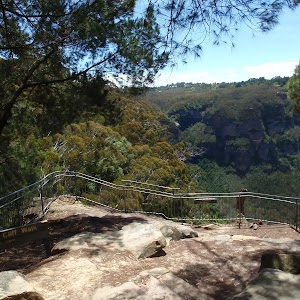
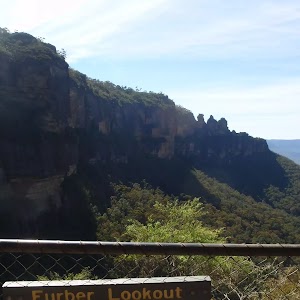
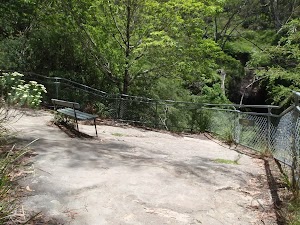
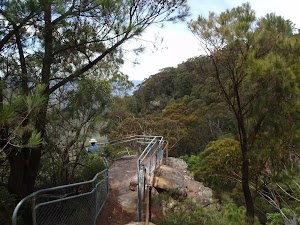
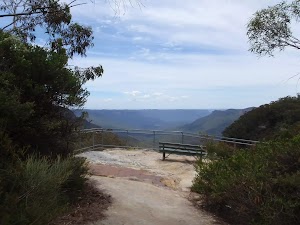
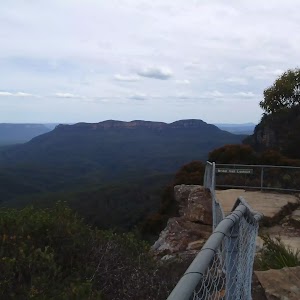
Oreades Lookout
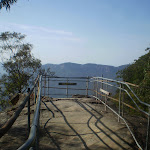
Oreades Lookout[36] is a fenced[37] timber platform[38] lookout beside the Three Sisters walk. There are great views of Mount Solitary and the Jamison Valley[39]. There are filtered views to the Three Sisters, if you are sitting in a wheelchair, or if shorter then the handrails the views are limited[40].
Maps for the The Three Sisters Walk walk
You can download the PDF for this walk to print a map.
These maps below cover the walk and the wider area around the walk, they are worth carrying for safety reasons.
| Six Foot Track | 1:50 000 Map Series | Six Foot Track | NSW-six-foot-track |
| Katoomba | 1:25 000 Map Series | 89301S KATOOMBA | NSW-89301S |
| Katoomba | 1:100 000 Map Series | 8930 KATOOMBA | 8930 |
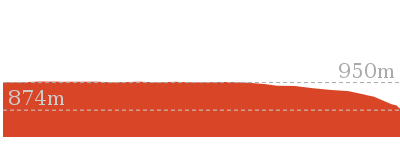
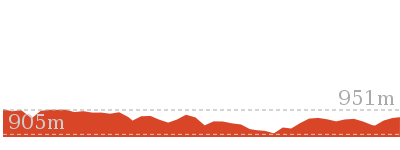
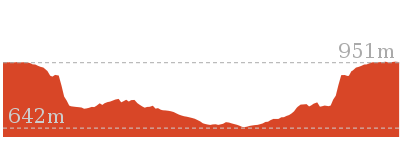
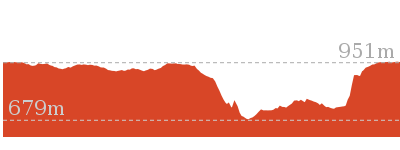
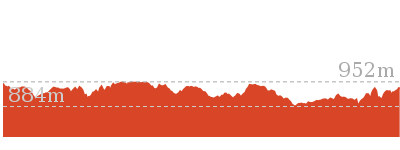
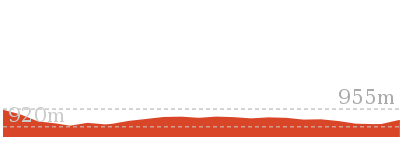
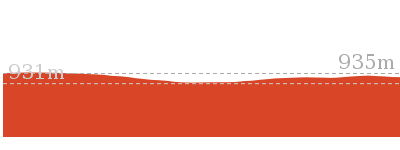
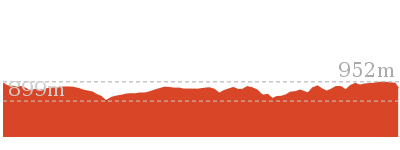
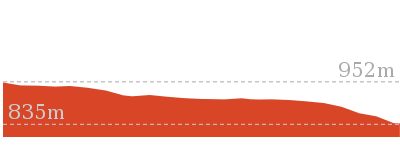
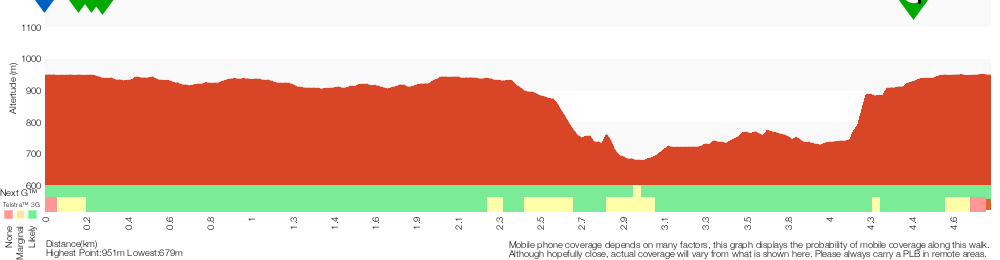
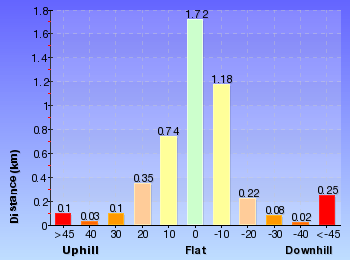
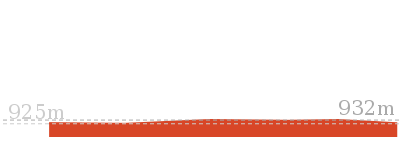
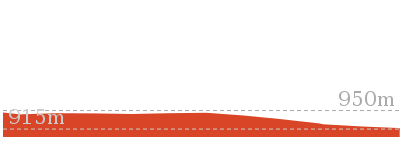
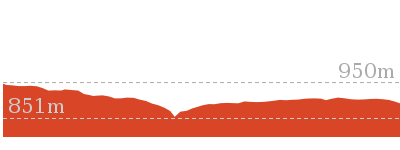
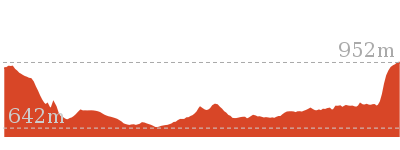
Cross sectional view of the The Three Sisters Walk bushwalking track
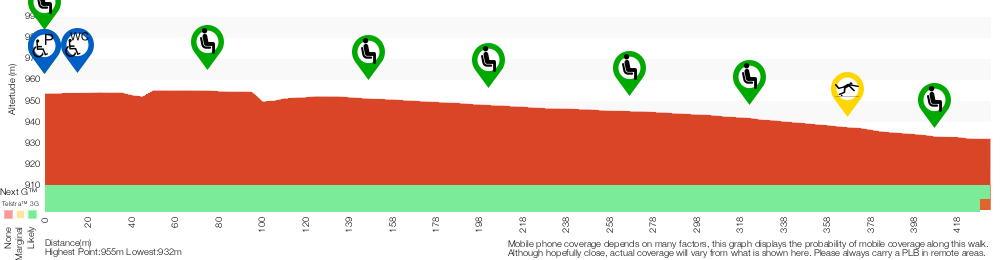
Analysis and summary of the altitude variation on the The Three Sisters Walk

Accessibility summary information for the The Three Sisters Walk
Parking: There are 1 designated accessible parking areas on this walk.
Toilets: There are 1 designated accessible toilets on this walk.
Seats: There are 5 places to sit on this walk.
They are on average 100m apart, with a maximum gap of 150m.
Hazards: There are 1 specific noteable accessability related hazards on this walk.
Trip Hazard A particularly steep section of path greater than 6% (less than 1:12) approximately 25m long. Found about 370m into the walk.
Accessibility Details


Found 20m into this walk

Found 70m into this walk

Found 150m into this walk
Found 200m into this walk
Found 270m into this walk

Found 320m into this walk


Found 410m into this walk
Overview of this walks grade – based on the AS 2156.1 – 2001
Under this standard, a walk is graded based on the most difficult section of the walk.
| Length | 872 m | ||
| Time | 30 mins | ||
| . | |||
| Grade 2/6 Easy track |
AS 2156.1 | Gradient | Gentle hills with occasional steps (2/6) |
| Quality of track | Smooth and hardened path (1/6) | ||
| Signs | Clearly signposted (1/6) | ||
| Experience Required | No experience required (1/6) | ||
| Weather | Weather generally has little impact on safety (1/6) | ||
| Infrastructure | Generally useful facilities (such as fenced cliffs and seats) (1/6) |
Some more details of this walks Grading
Here is a bit more details explaining grading looking at sections of the walk
Gradient
Around 300m of this walk has gentle hills with occasional steps, whilst the remaining 130m is flat with no steps.
Quality of track
This whole walk, 440m follows a smooth and hardened path.
Signs
This whole walk, 440m is clearly signposted.
Experience Required
This whole walk, 440m requires no previous bushwalking experience.
weather
This whole walk, 440m is not usually affected by severe weather events (that would unexpectedly impact safety and navigation).
Infrastructure
This whole walk, 440m is close to useful facilities (such as fenced cliffs and seats).
Similar walks
A list of walks that share part of the track with the The Three Sisters Walk walk.

1.1 km Return
45 mins
Hard track
1.8 km One way
1 Hr
Moderate track
2.2 km Return
1 hr 30 mins
Moderate track
3.1 km One way
3 hrs
Hard track

3.1 km One way
3 hrs
Hard track


3.2 km One way
1 hr 45 mins
Moderate track
3.8 km Circuit
3 hrs
Hard track
4 km Return
2 hrs
Moderate track

4.8 km Circuit
3 hrs
Hard track
4.8 km Circuit
3 hrs
Hard track

5.8 km Circuit
5 hrs 30 mins
Hard track
6.8 km One way
3 hrs 30 mins
Moderate track
9.4 km Circuit
5 hrs 30 mins
Hard track
33.8 km Circuit
3 Days
Experienced only
Other Nearby walks
A list of walks that start near the The Three Sisters Walk walk.
3.1 km Return
1 hr 30 mins
Moderate track
595 m One way
30 mins
Moderate track
218 m Return
20 mins
Moderate track


254 m Return
15 mins
Moderate track

556 m Return
20 mins
Very easy
869 m Circuit
1 hr 15 mins
Hard track

1.5 km Circuit
1 hr 45 mins
Hard track
6.8 km Circuit
5 hrs
Hard track

1.7 km Return
3 hrs 45 mins
Hard track

2.1 km One way
1 hr 15 mins
Moderate track
1.2 km Return
2 hrs
Hard track
1.1 km Circuit
2 hrs
Hard track
Plan your trip to and from the walk here
The The Three Sisters Walk walk starts and ends at the Echo Point Information Center (gps: -33.732069, 150.31242)
Your transport options to Echo Point Information Center are by;
![]() Bus. (get details)
Bus. (get details)
![]() Car. Parking fees apply in the area.
Car. Parking fees apply in the area.
(get details)


Short URL = http://wild.tl/ttsw
Gallery images
There are other downloads I am still working on.
You will probably need to login to access these — still all free.
* KML (google earth file)
* GPX (GPS file)
Special Maps/ brochures
* A3 topo maps
* PDF with Lands Topo map base
* PDF with arial image (and map overlay)
I wanted to get the main site live first, this extra stuff will come in time.
Happy walking
Matt 🙂
Echo Point to Leura Forest Circuit
And Walk
Echo Point to Leura Forest Circuit

3 hrs
4.8 km Circuit
588 m
Hard track
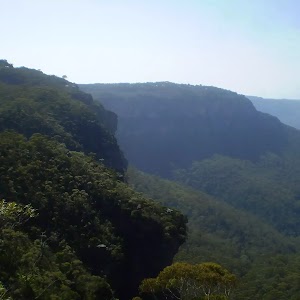
Forming a circuit around the cliffs and then the valley floor, this is a walk more then capable of convincing a walker of the beauty of the Blue Mountains National Park. There are plenty of fantastic views including Echo Point, Tallawarra Lookout and Honeymoon Point. Leura Forest is a great spot to break for lunch, and there is even an opportunity to cross a bridge to one of the Three Sisters. This walk has it all.


Echo Point Information Centre
This modern building at Echo Point is a great source of information. It is open daily from 9am-5pm (except Christmas Day). There is a large range of books, maps and information about the area (and ice creams). There are toilets opposite the entrance
, and mobility parking opposite
. For more information, phone 1300 653 408. More info.
(0km) Echo Point Archway Intersection → Int of Prince Henry Cliff Walk and Lady Carrington Lookout Tracks
610 m
14 mins
25m
-43m
Moderate track
From the intersection, this walk heads along the ‘Three Sisters walkway’[1] footpath, initially keeping the metal fence to the right. The smooth concrete path leads up and over a rise then leads gently downhill for about 80m to a signposted three-way intersection[2].
Continue straight: From the intersection, this walk follows the ‘Three Sisters 400m’ arrow[3] downhill along the concrete path, keeping the valley to the right. After about 15m the walk leads past a stone seat
Continue straight: From the intersection, this walk follows the ‘Three Sisters 400m’ arrow[3] downhill along the concrete path, keeping the valley to the right. After about 15m the walk leads past a stone seat
(on the left), with a blue tongue lizard sculpture[4]. The walk continues gently downhill for another 60m to pass another sandstone seat (on the left)
. From here the path winds gently downhill for another 70m to find yet another sandstone seat (on the left)
. The path continues downhill for another 45m to find a clear intersection marked with a large ‘Three Sisters Walk’ sign[5]. On the right is a small flat loose gravel area with two seats
.
Veer left: From the intersection, this walk follows the track winding up the hill and through the bush, away from the cliffs and the valley, for about 50m before coming to the intersection of the Lady Game track.
Turn left : From the intersection, the walk follows the ‘Leura Cascades’ sign along the bush track, winding around through the bush and following the cliffs (further down the hill to the right) around the valley until coming to the intersection with the Lady Carrington Lookout track.
(0.61km) Int of Prince Henry Cliff and Lady Carrington Lookout Tracks → Lady Carrington Lookout
20 m
1 mins
0m
-12m
Easy track
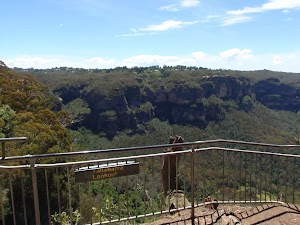
Turn right: From the intersection, this walk heads out to the cliffs, going down a small flight of stairs and following the metal railing. Shortly after, the walk breaks out onto a fenced-off rockshelf, signposted as Lady Carrington Lookout. At the end of this side trip, retrace your steps back to the main walk then Veer right.
Lady Carrington Lookout
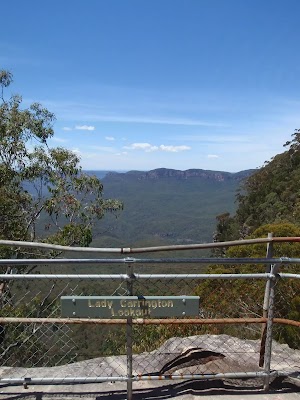
Lady (Cecelia) Carrington was wife of Lord (Charles Robert Wynne) Carrington. The couple explored parts of the Blue mountains in the late 1800’s and had a number of places named in their honour. Lady Carrington Lookout is long, narrow and fenced (twice). The lookout is perched up on a sandstone block and provides views over Jamison Valley.
(0.61km) Int of Prince Henry Cliff and Lady Carrington Lookout Tracks → Tallawarra Lookout
170 m
4 mins
6m
-17m
Easy track
Veer left: From the intersection, the walk follows the ‘Leura Cascades’ sign along the bush track which winds through the forest, gradually climbing up a long gentle hill. The track then flattens out and follows a metal fence-line to the ‘Tallawarra Lookout’ shortly after (marked on some maps as ‘Tallawalla Lookout’).
Tallawarra Lookout
Tallawarra Lookout[6] is a small, fenced lookout near Silver Mist Picnic Area, along Prince Henry Cliff walk. The lookout provides an excellent view of Sublime Point and Kings Tableland. Leura Falls and Gordon Creek both flow through the valley below. There are a few bench seats just near the lookout. (Note: the lookout is marked as ‘Tallawalla Lookout’ on some maps.)
(0.78km) Tallawarra Lookout → Millamurra Lookout
60 m
2 mins
6m
-3m
Moderate track
Veer left: From the lookout, this walk follows the ‘Leura Cascades’ sign along the bush track winding around the edge of the valley for a short while before coming to the fenced-off rock platform signposted as ‘Millamurra Lookout’.
Millamurra Lookout
Millamurra Lookout is on a fenced, elevated rock platform on the side of the Prince Henry Cliff Walk. There are views of the Jamison Valley, including the Leura Falls Creek and Sublime Point. There is also a great view along the Kings Tableland escarpment to the right.
(0.84km) Millamurra Lookout → Int of Prince Henry Cliff and Honeymoon Lookout Tracks
390 m
10 mins
26m
-26m
Moderate track
Continue straight: From the intersection, this walk follows the bush track, keeping the valley down to the right, as it continues along for a short while before coming to the Honeymoon Lookout, which is up the hill on the left-hand side of the track. The track passes the lookout and comes to the intersection of the bush track heading up to the lookout straight after.
(1.22km) Int of Prince Henry Cliff and Honeymoon Lookout Tracks → Honeymoon Lookout
30 m
1 mins
8m
0m
Easy track
Turn left : From the intersection, this walk heads up the short hill to the concrete platform just off Cliff Drive, signposted as ‘Honeymoon Lookout’. At the end of this side trip, retrace your steps back to the main walk then Turn left.
Honeymoon Lookout
Honeymoon Lookout is a fenced lookout on Cliff Drive, just north of Katoomba High School. There is a short track that links this lookout to Prince Henry Cliff Walk. There is a bus stop at the lookout. The area is shaded by a few trees and provides views out to Sublime Point and Kings Tableland.
(1.22km) Int of Prince Henry Cliff Walk and Honeymoon Lookout Tracks → Honeymoon Point
100 m
2 mins
1m
-16m
Easy track
Continue straight: From the intersection, the walk follows the bush track, keeping the valley and the cliffs down the hill to the right as it winds through the forest, until it comes to the signposted ‘Honeymoon Point’, shortly after the metal fence starts of the right.
(1.33km) Honeymoon Point → Banksia Lookout
30 m
2 mins
0m
-36m
Easy track
Turn right: From the intersection, this walk heads out to the cliffs along the track, until coming to an intersection signposted as ‘Banksia Lookout’. The view is largely blocked by trees. At the end of this side trip, retrace your steps back to the main walk then Turn sharp right.
Banksia Lookout
Banksia Lookout is a fenced lookout along the Prince Henry Cliff Walk, down a few steps from Honeymoon Point. The lookout provides views of Sublime Point and Kings Tableland. The clearing for the old sewage treatment plant, down in the valley on the Sublime Point Trail, is still visible from this lookout.
(1.33km) Honeymoon Point → Banksia Streamlet
70 m
2 mins
3m
-4m
Easy track
Veer left: From the intersection, this walk follows the bush track heading away from the lookout, keeping the valley down the hill to the right as it winds down a set of wooden steps to the signposted Banksia Streamlet.
(1.39km) Banksia Streamlet → Lomandra Lookout
190 m
1 mins
19m
-6m
Moderate track
Continue straight: Keeping the valley down the hill to the right, the walk crosses the streamlet at the wooden bridge. The track continues up the wooden steps on the other side to the top of the hill, where the track flattens out and continues past a picnic chair and along the side of the hill to the Lomandra Lookout.
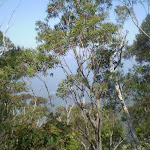
Lomandra Lookout
Lomandra Lookout is a fenced lookout along Prince Henry Cliff Walk, near Katoomba. Unlike other lookouts in the area, there are no sweeping distant views, but atop this cliff there is a great close-up view of the canopy of the surrounding bush. There is a bench seat on the rock platform, making a nice place for a rest.
(1.59km) Lomandra Lookout → Int of Prince Henry Cliff Walk and Burrabarroo Lookout Tracks
330 m
9 mins
25m
-23m
Easy track
Continue straight: From the Lomandra Lookout, this walk follows the bush track, keeping the valley down to the right, as it winds through thick forest along the side of the hill, winding all the way around and up a set of wooden steps to the signposted intersection of the ‘Burrabarroo Lookout’ track.
(1.92km) Int of Prince Henry Cliff Walk and Burrabarroo Lookout Tracks → Burrabarroo Lookout
50 m
1 mins
0m
-8m
Moderate track
Turn sharp right: From the intersection, this walk follows the ‘Burrabarroo’ sign along the track, passing a picnic seat and climbing up a short set of rock steps to the top of a rock platform. The walk continues down the steps on the other side, around the base of a rock platform and along the bush track for a short while longer, to the Burrabarroo lookout. At the end of this side trip, retrace your steps back to the main walk then Continue straight.
Burrabarroo Lookout
This small, fenced lookout is just off the Prince Henry Cliff Walk, near Carrington Park. The view looks over the valley and out to Sublime Point and Kings Tablelands in the distance. The lookout is perched on the top of a rocky buttress at the end of a small point, giving great views.
(1.92km) Int of Prince Henry Cliff Walk and Burrabarroo Lookout Tracks → Int of Prince Henry Cliff Walk and Leura Forest Track
350 m
9 mins
29m
-18m
Moderate track
Veer left: From the intersection, the walk follows the ‘Leura Cascades’ sign, climbing up the wooden steps and continuing along the bush track that winds through the forest, until coming to the intersection with the Carrington Park track.
Continue straight: From the intersection, this walk follows the ‘Leura Cascades 1km’ sign down the wooden steps and along the bush track, winding through the forest until coming to the signposted intersection of the ‘Leura Forest’ Track.
Continue straight: From the intersection, this walk follows the ‘Leura Cascades 1km’ sign down the wooden steps and along the bush track, winding through the forest until coming to the signposted intersection of the ‘Leura Forest’ Track.
(2.27km) Int of Prince Henry Cliff Walk and Leura Forest Track → Int of Federal Pass and Jamieson Lookout Tracks
40 m
1 mins
3m
-3m
Moderate track
Turn right: From the intersection, this walk follows the ‘Leura Forest’ sign along the bush track, winding down the hill for a short while before dropping down a set of wooden steps, to the signposted intersection with the ‘Jamieson Lookout’ track.
(2.31km) Int of Federal Pass and Jamieson Lookout Tracks → Jamieson Lookout
20 m
1 mins
0m
-6m
Easy track
Turn sharp left: From the intersection, this walk follows the ‘Jamieson Lookout’ sign along the short bush track to the rock shelf at the Jamieson Lookout. At the end of this side trip, retrace your steps back to the main walk then Veer left.
Jamieson Lookout
Jamieson Lookout is a fenced lookout at the east end of the Federal Pass track, and just off Prince Henry Cliff Walk. The lookout has a bench seat and provides great views up the Jamison Valley, along Kings Tableland escarpment and past Mount Solitary. The lookout is perched up on a large rock buttress, giving views unobscured by trees.
(2.31km) Int of Federal Pass and Jamieson Lookout Tracks → Fern Bower
90 m
3 mins
0m
-36m
Hard track
Continue straight: From the intersection, this walk follows the dirt path, heading down the long set of wooden and rocky steps. The walk winds down past a picnic chair under a cliff overhang, and continues down the steps into the valley and through the forest to the Fern Bower information sign.
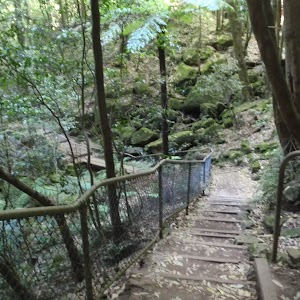
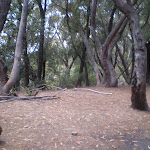
Fern Bower
Fern Bower is an especially pleasant part of the Blue Mountains National Park, protected from heat and providing a great environment for fern trees, bracken ferns and moss to thrive. Fern Bower is a signposted area along the Federal Pass walking track, just below Jamieson Lookout and next to Linda Creek. This is a nice place to stop, rest and enjoy the bird noises.
(2.41km) Fern Bower → Int of Federal Pass and the Amphitheatre track
320 m
13 mins
10m
-150m
Hard track
Continue straight: From the information sign, the walk follows the track down the steps, passing a ‘Rich History’ information sign before coming down to the signposted intersection with the Amphitheatre track, at the top of a metal staircase.
(2.73km) Int of Federal Pass and the Amphitheatre track → Lila falls crossing
20 m
1 mins
0m
-18m
Moderate track
Turn right: From the intersection, this walk follows the ‘Federal Pass Leura Forest’ sign down the long metal staircase, to cross the bridge over Linda Creek in front of Lila Falls.
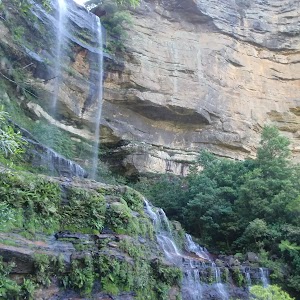
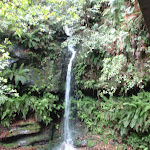
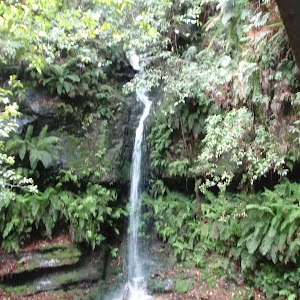
Lila Falls
Lila Falls is a thin waterfall on Linda Creek. The Federal Pass crosses the creek (on a bridge) in front of these falls, just below the intersection with the amphitheatre. The waterfall is not the most spectacular one in this valley, but it is a nice cool spot to catch your breath.
(2.75km) Lila Falls crossing → Marguerite Cascades
180 m
11 mins
37m
-90m
Hard track
Continue straight: From the Lila Falls, this walk follows the track heading down the hill, winding down a wooden walkway keeping the creek to the left. The track hugs the rock wall and passes under a shallow overhang. The walk continues down a staircase, then turns back down into the gully where it come to the taller and slender Linda Falls.
After passing Linda Falls the walk follows the wooden steps down through the gulley, crossing the creek again before heading down to the Marguerite Cascades.
After passing Linda Falls the walk follows the wooden steps down through the gulley, crossing the creek again before heading down to the Marguerite Cascades.
Marguerite Cascades
Marguerite Cascades are a series of small cascades finishing with a taller waterfall of a few metres height, dropping into a shallow sandy pool. The cascades are on Linda Creek and a small bridge crosses the creek at the base of the falls as part of the Federal Pass walking track. The cascades are a nice place to sit and listen to the water running and the local birds in this cool shady area.
(2.92km) Marguerite Cascades → Leura Forest
320 m
11 mins
50m
-14m
Hard track
Continue straight: From the ‘Marguerite Cascades’[7], this walk follows the timber steps downhill, winding steeply for a short while until coming to an intersection with a faint track, marked with a timber ‘Federal Pass’ sign[8], just beside a foot bridge[9].
Veer right: From the intersection, this walk crosses Linda Creek just below a pleasant cascade[10] using the foot bridge with a handrail[11]. This walk then continues along the bush track that winds along the valley floor, to the signposted ‘Leura Forest’. From here, the walk continues along the wide bush track, passing a few picnic tables, and winding through the forest to an open area with a large gazebo and an information sign at the intersection of the Federal Pass and the Dardenelles tracks.
Veer right: From the intersection, this walk crosses Linda Creek just below a pleasant cascade[10] using the foot bridge with a handrail[11]. This walk then continues along the bush track that winds along the valley floor, to the signposted ‘Leura Forest’. From here, the walk continues along the wide bush track, passing a few picnic tables, and winding through the forest to an open area with a large gazebo and an information sign at the intersection of the Federal Pass and the Dardenelles tracks.
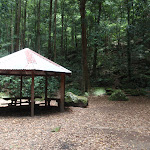
Leura Forest

Leura Forest is a great picnic area in the Jamison Valley at the junction of the Federal Pass and Dardenelles Tracks. This place was home to a popular tea house (also known as ‘Lady Carrington Dining Hall’) from the late 1800’s[12]. Today walkers can still enjoy the historic rotunda and the foundations of the original tea house[13]. The picnic area provides a great rest spot under the shade of the lilli pilli and coachwood forest.
(3.24km) Leura Forest (Int of Federal Pass and Dardenelles Tracks) → Bottom of Giant Staircase
870 m
27 mins
108m
-89m
Hard track
Turn right: From the pergola at Leura Forest, this walk follows the ‘Dardenelles Track’ sign (the sign is up the hill behind the pergola) which heads up the stairs towards the cliff face, before turning left behind Leura Forest. The walk then leaves the shade of the forest, along a track with many fallen logs, until coming to the base of the Giant Staircase (signposted).
(4.12km) Bottom of Giant Staircase → The Three Sisters Bridge intersection
200 m
19 mins
151m
-20m
Hard track
Turn right: From the intersection, the walk follows the sign up the ‘Giant Staircase’. This climbs steeply (with handrails) until coming to an intersection with a bridge that goes across to the First of the three Sisters. Along the way, there are chairs in which to rest from the climb and enjoy the magnificent views of the valley.
(4.32km) The Three Sisters Bridge Intersection → The Three Sisters
10 m
0m
0m
Very easy
Veer left: From the intersection, the walk crosses the bridge over to the Three Sisters. At the end of this side trip, retrace your steps back to the main walk then Turn left .
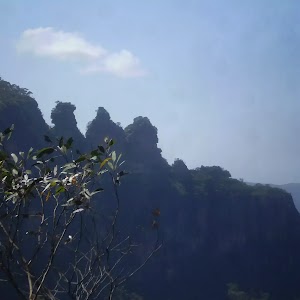
The Three Sisters
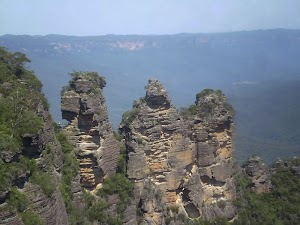
This well-known rock formation can be found just south of Katoomba, and can be viewed from many of the cliffside lookouts, from Narrow Neck all the way around to Sublime Point. Historically, this formation appears in Aboriginal ‘Dream Time’ stories, where three sisters were transformed into stone. This iconic rock formation is popular amongst tourists and bushwalkers alike. More info.
(4.32km) The Three Sisters Bridge Intersection → Top of the Giant Staircase
40 m
4 mins
31m
0m
Hard track
Veer right: From the bridge, the walk heads up the staircase steeply to the top. The stairs have handrails and climb up the side of the cliffs to the intersection with the Lady Game Lookout track.
(4.36km) Top of the Giant Staircase → Lady Game Lookout
10 m
1 mins
0m
-12m
Very easy
Turn left : From the intersection, the walk follows the footpath down the hill towards the Three Sisters for about 10m before coming to the Lady Game Lookout. At the end of this side trip, retrace your steps back to the main walk then Continue straight.
Lady Game Lookout

Lady Game Lookout is a narrow, fenced lookout above the Three Sisters. The track to this lookout starts just near the archway which marks the start of the Giant Staircase. Lady Game Lookout provides a bird’s-eye view over the Three Sisters and is a popular stop whilst exploring the area.
(4.36km) Top of the Giant Staircase → Int of Lady Game Lookout Track and the Three Sisters Footpath
20 m
1 mins
10m
0m
Easy track
Turn right: From the intersection, the walk follows the footpath up and away from the lookout, passing under a rock archway and continuing up the gentle hill to the intersection with the Cliff Drive access track.
(4.38km) Int of Prince Henry Cliff Track and the Three Sisters Footpath → Oreades Lookout
20 m
1 mins
11m
0m
Easy track
Continue straight: From the intersection, this walk heads up the stone/concrete steps on the main path to almost immediatly find an unnamed, fenced lookout platform[15] (on the left).
(4.4km) Oreades Lookout → Int of Prince Henry Cliff Track and the Three Sisters Footpath
110 m
3 mins
18m
-2m
Easy track
Continue straight: From Oreades Lookout, this walk heads uphill along the path for about 30m to pass a stone seat
(on the right), in a small sandstone overhang[16]. Check the miniature cicada sculptures[17] above the overhang. From here the walk leads moderately steeply
uphill along the smooth concrete path[18] for about 90m[19], to come to a clear intersection marked with a large ‘Three Sisters Walk’ sign[20]. On the left is a small flat loose gravel area with two seats
.
(4.51km) Int of Prince Henry Cliff Track and the Three Sisters Pathway → Int of the Three Sisters Pathway and Spooners Lookout path
200 m
5 mins
15m
-8m
Easy track
Continue straight: From the intersection, this walk follows the large ‘Echo Point’ sign[21] uphill along the smooth concrete path. The path leads uphill for about 45m
to find a sandstone seat (on the right)
to find a sandstone seat (on the right)
. From here the path continues winding gently uphill for another 70m to pass another sandstone seat (on the right)
. From this seat the path continues gently uphill for another 60m past yet another similar stone seat
(on the right), this seat has a blue tongue lizard sculpture[22]. After another 15m
this walk comes to a clear signposted Y-intersection[23].
(4.7km) Int of Three Sisters Walkway and Spooners Lookout path → Echo Point Archway Intersection
100 m
2 mins
4m
0m
Very easy
Continue straight: From the intersection, this walk follows the ‘Katoomba & Echo point’ arrow [24] uphill along the concrete path, initially keeping the metal fence to the left. The path leads uphill for about 80m then over a rise to head downhill for short distance to an intersection with a track[25] (on the left) just before the stone archway[26] near Echo Point.
Maps for the Echo Point to Leura Forest Circuit walk
You can download the PDF for this walk to print a map.
These maps below cover the walk and the wider area around the walk, they are worth carrying for safety reasons.
| Six Foot Track | 1:50 000 Map Series | Six Foot Track | NSW-six-foot-track |
| Katoomba | 1:25 000 Map Series | 89301S KATOOMBA | NSW-89301S |
| Katoomba | 1:100 000 Map Series | 8930 KATOOMBA | 8930 |
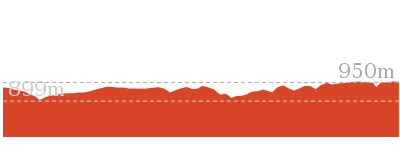
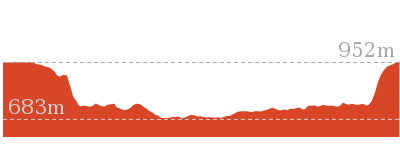
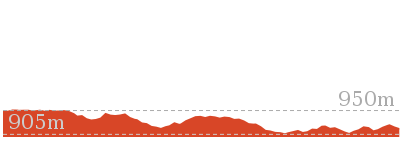
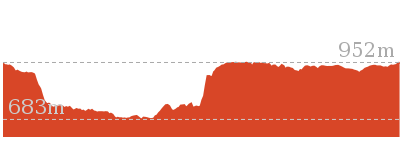
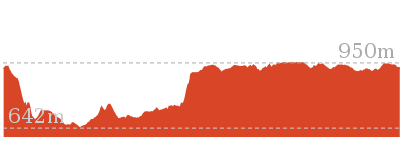
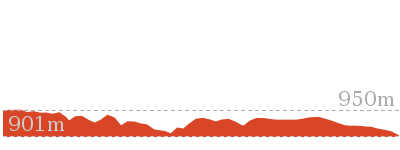
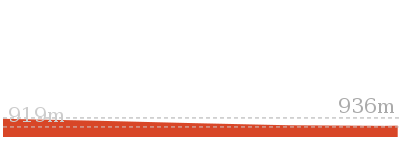
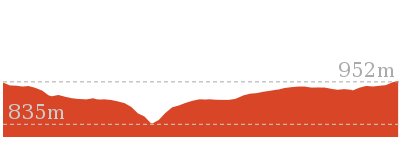
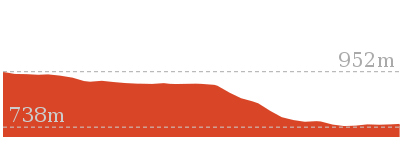
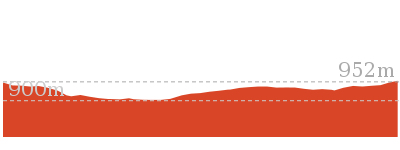
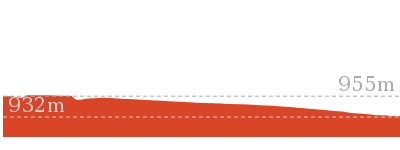
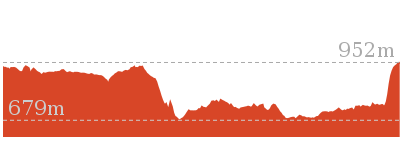
Cross sectional view of the Echo Point to Leura Forest Circuit bushwalking track
Analysis and summary of the altitude variation on the Echo Point to Leura Forest Circuit
Overview of this walks grade – based on the AS 2156.1 – 2001
Under this standard, a walk is graded based on the most difficult section of the walk.
| Length | 4.8 km | ||
| Time | 3 hrs | ||
| . | |||
| Grade 4/6 Hard track |
AS 2156.1 | Gradient | Very steep (4/6) |
| Quality of track | Rough track, where fallen trees and other obstacles are likely (4/6) | ||
| Signs | Directional signs along the way (3/6) | ||
| Experience Required | Some bushwalking experience recommended (3/6) | ||
| Weather | Storms may impact on navigation and safety (3/6) | ||
| Infrastructure | Limited facilities, not all cliffs are fenced (3/6) |
Some more details of this walks Grading
Here is a bit more details explaining grading looking at sections of the walk
Gradient
2.9km of this walk has gentle hills with occasional steps and another 940m has short steep hills. Whilst another 510m is flat with no steps and the remaining 440m is very steep.
Quality of track
2.2km of this walk follows a clear and well formed track or trail and another 1.3km follows a smooth and hardened path. Whilst another 1.3km follows a rough track, where fallen trees and other obstacles are likely and the remaining 20m follows a formed track, with some branches and other obstacles.
Signs
Around 3.7km of this walk is clearly signposted, whilst the remaining 1.1km has directional signs at most intersection.
Experience Required
Around 4.4km of this walk requires no previous bushwalking experience, whilst the remaining 450m requires some bushwalking experience.
weather
Around 4.6km of this walk is not usually affected by severe weather events (that would unexpectedly impact safety and navigation), whilst the remaining 200m is affected by storms that may impact your navigation and safety.
Infrastructure
Around 4.4km of this walk is close to useful facilities (such as fenced cliffs and seats), whilst the remaining 410m has limited facilities (such as not all cliffs fenced).
Similar walks
A list of walks that share part of the track with the Echo Point to Leura Forest Circuit walk.
308 m Return
15 mins
Moderate track
582 m Return
30 mins
Moderate track
595 m One way
30 mins
Moderate track
872 m Return
30 mins
Easy track
892 m Return
30 mins
Moderate track

1.1 km Return
45 mins
Hard track
1.7 km Return
1 hr 15 mins
Hard track


2.3 km Return
1 hr 30 mins
Hard track

3.1 km One way
3 hrs
Hard track
3.1 km One way
3 hrs
Hard track
3.2 km One way
1 hr 45 mins
Moderate track
3.3 km Return
1 hr 30 mins
Moderate track
3.8 km Circuit
3 hrs
Hard track
4 km Return
2 hrs
Moderate track
4.4 km One way
3 hrs 45 mins
Hard track
4.8 km Circuit
3 hrs
Hard track

4.8 km Circuit
3 hrs
Hard track
5.8 km Circuit
5 hrs 30 mins
Hard track
6.6 km One way
4 hrs
Hard track
6.8 km One way
3 hrs 30 mins
Moderate track
8 km One way
5 hrs
Hard track

9.4 km Circuit
5 hrs 30 mins
Hard track
33.8 km Circuit
3 Days
Experienced only
Other Nearby walks
A list of walks that start near the Echo Point to Leura Forest Circuit walk.
2.2 km Return
1 hr 30 mins
Moderate track
3.1 km Return
1 hr 30 mins
Moderate track
218 m Return
20 mins
Moderate track
254 m Return
15 mins
Moderate track
556 m Return
20 mins
Very easy
869 m Circuit
1 hr 15 mins
Hard track
1.5 km Circuit
1 hr 45 mins
Hard track
6.8 km Circuit
5 hrs
Hard track
1.7 km Return
3 hrs 45 mins
Hard track
2.1 km One way
1 hr 15 mins
Moderate track
1.2 km Return
2 hrs
Hard track
1.1 km Circuit
2 hrs
Hard track
Plan your trip to and from the walk here
The Echo Point to Leura Forest Circuit walk starts and ends at the Echo Point Archway Intersection (gps: -33.731963, 150.3127)
Your transport options to Echo Point Archway Intersection are by;
![]() Bus. (get details)
Bus. (get details)
![]() Car. Parking fees apply in the area.
Car. Parking fees apply in the area.
(get details)
Short URL = http://wild.tl/eptlfc
Gallery images
There are other downloads I am still working on.
You will probably need to login to access these — still all free.
* KML (google earth file)
* GPX (GPS file)
Special Maps/ brochures
* A3 topo maps
* PDF with Lands Topo map base
* PDF with arial image (and map overlay)
I wanted to get the main site live first, this extra stuff will come in time.
Happy walking
Matt 🙂
Scenic Railway – Ruined Castle – Mt Solitary – Kedumba River – Wentworth Falls

3 Days
29.3 km One way
2147 m
Experienced only
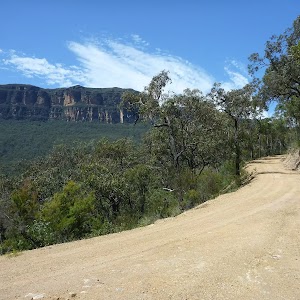
Circling the Jamison Valley, this spectacular three day walk is packed with great views and beautiful scenery. From Scenic World the walk heads around the base of the cliffs before climbing up to the Ruined Castle and then Mt Solitary. Walkers can rest in the sheltered Chinaman’s Gully campsite overnight (don’t expect water). Day two takes a rough track across Solitary and down to the Kedumba River. On the third day, the walk climbs to King’s Tableland and the beautiful and amazing Wentworth Falls.* This walk passes through very remote areas and sections have no visible track. At least one person in your group should have training and experience in off track walking and navigation. Even with these notes and a GPS these extra skills and equipment are required.


Free Beacon Hire
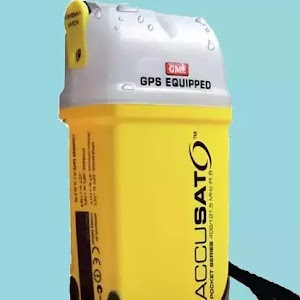
A Personal Locating Beacon (PLB) is a hand-held device that, when triggered, sends a message to the emergency services with your location. The emergency services staff can then look at your trip intention forms and decide how best to help you. In the Blue Mountains, you can borrow these for no charge, just complete this Trip intention form, and a borrowing form. The device can be picked up from:
NPWS Office – Govetts Leap Rd Blackheath – 9am to 4pm 7 days Ph: 02 4787 8877
Katoomba Police Station – 217 Katoomba St Katoomba – Anytime Ph: 02 4782 8199
Springwood Police Station – 4 Jerseywold Avenue Springwood – Anytime Ph: 02 4751 0299
More info.
NPWS Office – Govetts Leap Rd Blackheath – 9am to 4pm 7 days Ph: 02 4787 8877
Katoomba Police Station – 217 Katoomba St Katoomba – Anytime Ph: 02 4782 8199
Springwood Police Station – 4 Jerseywold Avenue Springwood – Anytime Ph: 02 4751 0299
More info.
Scenic World
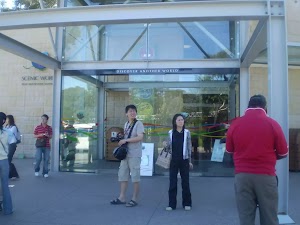
Scenic World is one of the most renowned tourist attractions of Katoomba and the Blue Mountains. Located on the cliffs of the Jamison Valley , visitors can enjoy a ride on the Scenic Railway (the world’s steepest incline railway) or the Scenic Cableway, into the Jamison Valley, and explore the Scenic Walkway from the base. Alternatively, the Scenic Skyway offers a bird’s eye view over the valley, with a glass floor to enhance the experience. Scenic World also features a revolving restaurant, a cafe and a kiosk, in addition to the documentary theatre and souvenir shop. Rides can be purchased, starting from $16 for adults and $10 for children, and combination or family passes are available. More info.
(0km) Scenic World → Scenic Railway (Bottom Platform)
300 m
26 mins
8m
-210m
Very easy
From Scenic World, this walk goes down the cliffs using the Scenic Railway. Hang on tight! This 415m-long journey is the world’s steepest railway. At the bottom, the track comes to a great viewing platform of the valley. Use of the railway costs $10 for adults and $5 for children one-way. Last train normally at 4:45pm (opens at 9am) More info.
(0.3km) Scenic Railway (Bottom Platform) → Landslide
1.3 km
46 mins
175m
-178m
Moderate track
Turn left : From the bridge over the bottom of the Scenic Railway, this walk follows the signs to ‘scenic walkway’, passing a replica of a mining cart, as well as an old mine. Just past this, the walk comes to a pipeline that runs down the hill collecting fresh water, signposted as drinkable. Continuing past the old mine shafts along the boardwalk, this walk comes to an intersection with a bush track going slightly off to the right. This is signposted as the way to the Landslide.
Continue straight: From the intersection, the walk follows the wide track and signposts towards the ‘landslide’[2] (keeping the cliffs on the right). The walk winds along a bush track with small boulders strewn along it. There are a number of old mine shafts just off the track and some interesting historical items. The track continues under Malaita Point before breaking out of the vegetation to a worthy view of the valley, just before the landslide. As the track comes to the old landslide site, it become rougher with plenty of boulders over the track. There are also excellent views of the cliffs above and the landslide as the vegetation is quite sparse here.
Continue straight: From the intersection, the walk follows the wide track and signposts towards the ‘landslide’[2] (keeping the cliffs on the right). The walk winds along a bush track with small boulders strewn along it. There are a number of old mine shafts just off the track and some interesting historical items. The track continues under Malaita Point before breaking out of the vegetation to a worthy view of the valley, just before the landslide. As the track comes to the old landslide site, it become rougher with plenty of boulders over the track. There are also excellent views of the cliffs above and the landslide as the vegetation is quite sparse here.
The Landslide
‘The Landslide’ is a large rockfall going into the valley approximately 100m. There is a good vantage point for the landslide from under the cliffs to the east, and a great but more distant view from Narrow Neck lookout. The landslide occurred in 1931 after a few days of rumbling. There has been much debate as to whether this event was helped along by erosion and coal mining in the area at the time.
(1.64km) Landslide → Miners Campsite
3.8 km
1 hr 33 mins
232m
-252m
Moderate track
Continue straight: From the eastern side of the Landslide, the walk heads across the face of the landslide (keeping the cliff on the right). At this point, the track is quite rough, with frequent boulders making it a slight scramble. On the other side of the landslide, the track narrows and becomes a flat bush track that follows the base of the cliffs. The surrounding trees become quite dense again, adding quite an ambiance to the area. The walk heads along the bottom of the Narrow Neck escarpment, until coming to an intersection with a set of stairs off to the right, signposted as the ‘Golden Staircase’.
Continue straight: From the intersection, this walk follows the ‘Federal Pass – Ruined Castle’ sign[3] along the flat wide track, keeping the valley to your left. This track follows the old horse-drawn coal tram route. The track leads through a tall rainforest filled with fern trees[4] and vines[5], with the occasional lyrebird. After about 1.3km the forest opens up[6], letting in more light and exposing some distant filtered views. After wandering through the more open forest[7] for about 250m, the track passes a small campsite[8] (on the right). This walk continues for another 700m along the main track through the bracken fern forest[9] to find a larger campsite[10] (just up to the right) with a short stone wall on one side[11]).
Continue straight: From the intersection, this walk follows the ‘Federal Pass – Ruined Castle’ sign[3] along the flat wide track, keeping the valley to your left. This track follows the old horse-drawn coal tram route. The track leads through a tall rainforest filled with fern trees[4] and vines[5], with the occasional lyrebird. After about 1.3km the forest opens up[6], letting in more light and exposing some distant filtered views. After wandering through the more open forest[7] for about 250m, the track passes a small campsite[8] (on the right). This walk continues for another 700m along the main track through the bracken fern forest[9] to find a larger campsite[10] (just up to the right) with a short stone wall on one side[11]).
Miners Campsite

This flat campsite beside the Federal Pass walking track about 2.2km south of the intersection at the bottom of the Golden Stairs. There is short constructed stone wall[12] left over from when there area was habited by miners. The campsite is surrounded by a tall forest, bracken ferns and some nice fern trees. There is no water or facilities.
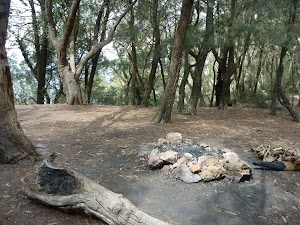
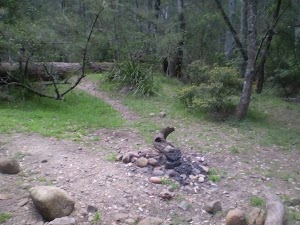
Northern Ruined Castle campsite

A short distance south east of the intersection[13] with the Federal Pass and the northern access track to the Ruined Castle, is a fairly large basic campsite. There are two main flat areas for camping, both with fire scares[14]. The area is surround with tall trees and ferns[15][16][17][18]. There is no water nor any other facilities.
The Ruined Castle
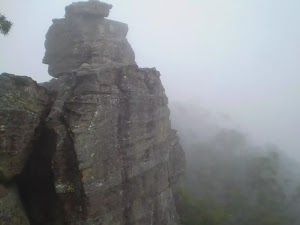
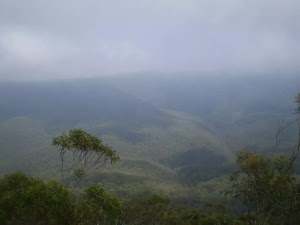
A formation jutting out of the Jamison Valley, the Ruined Castle has great views of the Jamison Valley from Katoomba to Leura. It is also possible to see Mt Solitary to the south-east.
(5.45km) Miners Campsite → Northern Ruined Castle campsite
300 m
7 mins
16m
-11m
Moderate track
Continue straight: From the miners campsite[19], this walk follows the clear track south-west, keeping the valley to your left. The mostly flat track narrows a bit as it leads past a large flat area (on your right) after about 140m[20], then past a smaller campsite[21] a short distance later. The track then winds through the forest for another 100m to come to a clearing and signposted three-way intersection[22], where there is a ‘Federal Pass – Katoomba’ sign[23] pointing back along the track. (There is a campsite a few metres further on and to the the left[24].)
(5.75km) Northern Ruined Castle campsite → Ruined Castle
730 m
20 mins
82m
-17m
Hard track
Turn right: From the intersection, this walk follows the ‘Ruined Castle’[25] sign uphill along the eroded track and soon passes the yellow ‘Warning – Remote area indistinct route steep terrain – Exposed climbing loose surfaces – No reliable water Carry plenty Sterilise any water found on route’ sign[26]. The track winds up the wide valley getting steeper as it goes, climbing up onto the main ridgeline. Here the walk turns left (away from the view of Castle Head[27]) and follows the rocky track more gently uphill for about 220m to pass under the side of a large boulder[28]. The track continues along the narrow ridge for about 280m, with some filtered views past another large boulder to the base of the tall Ruined Castle summit[29]. Here the walk heads gently down a bit (keeping the rock wall to your left), past a crevice[30], then follows the main track to the other (southern) side of the summit. The track then heads up again to find a number of rocky pinnacles[31].
(6.48km) Ruined Castle → Intersection South of Ruined Castle
390 m
12 mins
1m
-123m
Experienced only
Continue straight: From near the summit of Ruined Castle[32], this walk heads south-east along the main ridgeline, initially keeping the rock wall to your left[33]. The track follows the rocky ridgeline gently downhill[34] and after about 70m the track starts to become much steeper[35]. The track winds down, flattening out for a short time[36] before continuing steeply down to a sign posted three-way intersection[37] just beyond the ‘Ruined Castle to Mount Solitary’ map[38]. There is a ‘Ruined Castle’ arrow[39] here, pointing back up the hill.
(6.87km) Intersection South of Ruined Castle → Bottom of Korrowall Knife-edge
1.3 km
35 mins
132m
-38m
Hard track
Turn right: From the intersection, this walk follows the ‘Mount Solitary’ sign[40] gently downhill along the fairly narrow track[41], keeping the main valley to your left. After about 300m, the more eroded and rocky track[42] begins to climb the ridge and after climbing for just shy of 300m, the track flattens out and passes a couple of small clearings[43][44] – the second clearing is just past where the track leads downhill. Just after the second clearing (used as a campsite[45]), the track begins to climb up the ridge again[46]. This track climbs up a few rocky eroded section and soon comes to the base of a tall series of rockwalls – the Korrowall Knife-edge[47].
(8.2km) Bottom of Korrowall Knife-edge → Top of Korrowall Knife-edge
200 m
12 mins
86m
-2m
Experienced only
Continue straight: From the base of the rocks[48], this walk starts the arduous climb up the Korrowall Knife-edge. Ascending the Korrowall Knife-edge is a hard climb, vertical in places and much of the climbing will involve both hands – some people use ropes to help lift heavy packs. This walk initially heads around to the left of the first boulder to head up through the eroded steep valley[49] between the rocks. The walk continues to scramble up the side of the rocks[50], then climbs vertically up a crack in the rock[51] to a small flat area[52], offering the first distant view[53] for this climb. The walk continues by climbing up a 3m rock wall[54], then up the eroded track[55] before climbing up through the obvious gap[56] in the next rock wall. At the top of this climb is another great view[57] and a short distance further up, this faint track passes a rock with a hole/cave[58] (on your right). From here, the walk follows the worn track up through a couple more rock gullies[59], still generally keeping the rock wall to your right (and passing a couple of arrows[60]). This brings the walk to an exposed flat area, with red dirt and fantastic views[61]. The walk continues by climbing up through the next eroded gully[62] to the top of the Korrowall Knife-edge, where there is a large rock wall on your left[63].
(8.4km) Top of Korrowall Knife-edge → Corowal Plateau campsite
450 m
19 mins
119m
-15m
Experienced only
Continue straight: From the top of Korrowall Knife-edge, this walk heads south following a worn track that initially heads steeply down beside the large rock wall[64] (keeping the wall to your left). The track passes a small cave[65] at the base of this cliff then climbs up beside the cliff[66] to the top of the ridge[67], past the rocks[68] to find a view to the left[69]. Here the faint track veers right[70] to follow along the base of another cliff[71]. The walk then heads up a short but steep climb[72], where a short flat walk[73] leads to a fantastic view on your right, looking over Cedar Creek valley to Narrow Neck[74]. After following this faint track a further 60m south along the base of another cliff[75], this walk then climbs up the middle of a steep gully [76] – just past the top of this climb, the track bends sharp left and leads up[77] the hill for about 50m to enter a lovely she oak forest[78], a clearing[79] and the Corowal Plateau campsite[80].
Corowal Plateau campsite
The Corowal Plateau campsite is an informal campsite at the north eastern end of Mount Solitary. The clearing is set among some pleasant casurina forest. There are a few campfire scares, although this is in a fuel stove only area. There is plenty of flat area but there is no water source or any other facilities.
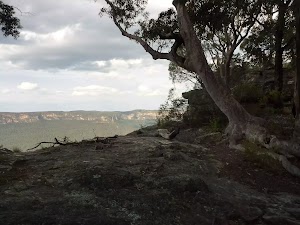
Mt Solitary Lookout
This informal lookout is on top of the ‘Koorowall Knife Edge’ on the western side of Mount Solitary. The lookout boasts some fantastic views over the Jamison Valley and to the west – this is well-worth the scramble to the top. There is some natural shelter and shade to rest amongst, and some people have camped here in the past (although better camping is available in Chinamans Gully).
(8.85km) Corowal Plateau campsite → Chinamans Gully Campsite
820 m
19 mins
8m
-120m
Hard track
Veer right: From the campsite[81], this walk heads south-east, following the mostly flat track along the top of the ridge through the she oak forest[82]. After about 200m, this walk enters a banksia forest[83], and continues along the flat ridge (past a few impromptu campsites) for about 400m, where the track begins to head downhill[84]. The track winds downhill for about 170m (passing a track on your left) and comes to a large flat saddle[85] and clearing with a large rock wall, Chinamans Gully Campsite[86].
Chinamans Gully Campsite

Next to a small creek (often dry) and sheltered from the winds, this campsite is great for those wanting to camp on Mt Solitary. For daywalkers, this spot offers the chance to rest under the overhangs of the cliffs before continuing. Water here is not reliable, please note that in the past water was more reliable, but not so now. Please carry plenty of water. There is a camping area near the beginning of the track and there are also a few spots along the gully where people have camped previously.
(9.67km) Chinamans Gully campsite → Chinamans Gully view
390 m
8 mins
0m
-50m
Experienced only
Turn left : From Chinamans Gully campsite, this walk follows the track north[87], keeping the rock walls to you right[88]. The track soon starts to head gently downhill, keeping the small gully on your left and passing through a number of sandstone camping caves[89][90]. The track then heads left to follow the gully downhill[91] for about 150m, and comes to a small clearing and campsite[92] at the junction of two creeks. The track then crosses the side creek[93] and heads gently up the side of the hill[94], coming to an unfenced filtered view up the Kedumba Valley to Katoomba[95]. At the end of this side trip, retrace your steps back to the main walk then Turn left.
End of day 1
This is the planned overnight stay for the end of day 1, happy camping.
(9.67km) Chinamans Gully campsite → Singa-Jingawell Creek Campsite
1.8 km
55 mins
179m
-206m
Experienced only
Continue straight: From the large campsite at the top of Chinamans Gully, this walk heads east up the gully[96], initially keeping the large main rock to your right (and Chinamans Gully to your left). The track leads up the short gully[97] to the top of the rock, where there is a filtered view[98](to your right). This walk follows the track as it winds up the hill for about 130m, passing another great view[99] (on your right). The track then mostly flattens out, following the top of the ridge for another 500m to pass a small campsite[100]. About 200m past this campsite, the track then passes a short track (on your left that provides great unfenced views over the Kedumba Valley[101]). Over the next 400m, the track continues east, fairly closely to the northern face of Mount Solitary, with the occasional gap in the trees to provide great views. The track alternately rises and falls, and passes the (not very noteworthy) summit[102] of Mount Solitary. From here, the track starts to lead down[103] a ridge, passing a few filtered views over about 500m, then comes to a large campsite[104], with a rock platform[105] (up to the left) that provides even more views[106].
Singa-Jingawell Creek Campsite
Singa-Jingawell Creek Campsite is near the northern wall, partway across the eastern half of Mount Solitary. The informal campsite sits in a pleasant little depression beside the small, usually dry creek. There is a rock platform at the top of the campsite that provides great views[107] up the Kedumba River towards Katoomba. There is a large fire scare[108], but this is in a fuel stove only area, so please avoid lighting any campfires. The creek gets a small amount of water in it after rain, but it does not last long, so always best to bring your own.
(11.48km) Singa-Jingawell Creek Campsite → Solitary Pass
1.2 km
29 mins
61m
-105m
Experienced only
Continue straight: From Singa-Jingawell Creek Campsite, this walk heads south-east, initially keeping the rock wall to your left. After about 80m, this walk stays left (ignoring the track that crosses the creek). Here the track climbs the fairly short hill then follows the ridgeline for just over 100m to climb up the gully[109] beside the large rock formation[110], then climbs up a rock wall[111] (about 2-3m tall). There are some views (to the right) over Singa-Jingawell Creek valley[112]. The rocky track continues east for about 500m and then turns right, coming to a small ridgetop campsite[113] just over 100m later. Shortly after this campsite (just before a large rocky outcrop[114]), the walk turns left and starts to lead down the ridgeline, quite steeply in places[115], for about 250m and finds an intersection in a saddle, with a steep gully[116] on your left and a short climb to a rocky viewpoint[117][118] (and logbook[119][120]) straight ahead.
(12.67km) Solitary Pass → Int of Kedumba Camping and Solitary Tracks
1.2 km
40 mins
11m
-428m
Experienced only
Turn left : From the saddle, this walk follows the eroded track very steeply down the gully[121] to the north. The track soon bends right[122] around the base of the cliff to find the ridge[123]. The walk follows the steep eroded track down the ridge for about 300m to where the track flattens out for a short time[124], then turns left to wind down through the casuarina forest[125]. The track winds down through this casuarina forest, very steeply and slippery in places[126] for about 800m, (turning right at the faint track intersection partway down) heading east to a flat area, campsite[127] and signposted intersection, where a ‘Mount Solitary’ sign[128] points back up the hill.
(13.87km) Int of Kedumba Camping and Solitary Tracks → Kedumba River
1.4 km
31 mins
2m
-206m
Hard track
Continue straight: From the intersection and campsite[129], this walk follows the ‘Kedumba Pass’[130] and ‘Kedumba River’[131] signs west, gently downhill along the ridge. After about 600m, just after passing between some boulders[132], the track starts to steepen[133] and leads down towards the views of the cliff[134] (on the far side of the valley), then mostly flattens out again[135]. This track then steeply descends[136] again, until the track bends right and comes to a beach on the south (western) side of the Kedumba River[137]. Here the walk crosses the river[138] (usually lower-shin deep, this river has a large catchment and may be impassable after rain). Once on the other side, this walk comes to a rocky beach and climbs over a large fallen tree[139] to see the main track continuing ahead and a little to the left (sometimes marked with a cairn[140]). There is a place that has been used as a campsite a short distance upstream[141] (not safe if there is a chance of the river rising), or there are a few alternative places to camp up the embankment[142].
Kedumba River Campsite
This campsite is next to the Kedumba River, along the Mount Solitary walking track. This is a large clearing and basic campsite. Open fires are not permitted so it is necessary to take a fuel stove. There is normally plenty of water in the creek, but it should be treated for drinking. There are no facilities.
End of day 2
This is the planned overnight stay for the end of day 2, happy camping.
(15.27km) Kedumba River → Int of Kedumba River track and Sublime Point trail
2.2 km
1 hr 8 mins
345m
-17m
Hard track
Continue straight: From the Kedumba River crossing, this walk follows the track (sometimes marked with a rock cairn[143]) north, up the embankment and away from the river. The track soon bends left and leads around the side of the flat area with a nice blue gum stand[144]. The track then starts to climb, steeply at first[145], for about 400m (passing some views back to the cliffs of Mount Solitary[146]) before flattening out[147]. The track then leads gently up through the open forest[148] for about 800m, where it then leads gently down to cross a small gully[149][150]. The track continues up the main ridge for another 400m then along the side of a narrow steep gully[151] (on your left). Near the top of this gully, the track turns left to cross the now small gully[152]. The track now leads north for a little while around the ridge and climbs the hill for another 500m, passing through a ferny forest, to find a yellow ‘warning’ sign[153]. From this sign, the track leads left and up the bank, coming to an intersection with the Sublime Point management trail, where a ‘Mount Solitary’ sign[154] points back along the track.
(17.46km) Int of Kedumba River track and Sublime Point trail → Int of Sublime Point trail and Kedumba Valley Rd
430 m
10 mins
38m
-2m
Easy track
Turn right: From the intersection, this walk follows the ‘Wentworth Falls’ sign[155] uphill along the wide management trail as it bends left. The trail leads past a small cave[156] (on your left) and further uphill, the trail bends right. Soon after, the trail leads down a short hill[157] to come to a clear three-way intersection[158] with a ‘Leura via Fern Bower’ sign[159] pointing back along the trail.
(17.88km) Int of Sublime Point and Waterboard Servicetrails → End of Kedumba River Rd
3.2 km
1 hr 26 mins
350m
-73m
Moderate track
Turn left : From the intersection, this walk heads north, uphill along the management trail, following the sign to ‘Wentworth Falls’. After the uphill section, the trail turns to the right and starts heading steeply up between the gap in the cliffs. The walk passes a locked gate and continues steeply up the hill until reaching the top, where the track curves around to the bends again sharply to the left – there are some great views from here. From the top of the cliffs, the track zigzags north along a relatively flat management trail until coming to the end of Kedumba Valley Rd, marked by a large towering gateway with small track around it.
(21.04km) End of Kedumba River Rd → King’s Tableland Intersection
5.2 km
1 hr 41 mins
163m
-102m
Easy track
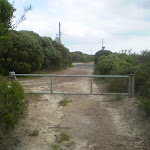
Continue straight: From the end of Kedumba River Rd at the large archway, this walk heads north along the wide dirt road. This gradually curves around left (at the junction with Kings Tableland Rd, unsignposted), becoming Tableland Rd. The walk continues along Tableland Rd for some time, before coming into a more suburban area and turning left into Hordern Rd. At the far end of Hordern Rd, there is a ‘T’ intersection with a dirt road.
Turn right: From the end of Hordern Rd, this walk heads north along the management trail, away from the power lines, and after approximately 100m passes a large wire gate. Another 100m on from here, the trail passes a large green gate and sign saying ‘Kings Tableland Track’. After this, the flat management trail continues until coming to an intersection with another management trail, signposted as the ‘Rocket Point Track.
Turn right: From the end of Hordern Rd, this walk heads north along the management trail, away from the power lines, and after approximately 100m passes a large wire gate. Another 100m on from here, the trail passes a large green gate and sign saying ‘Kings Tableland Track’. After this, the flat management trail continues until coming to an intersection with another management trail, signposted as the ‘Rocket Point Track.
King’s Tableland
The first point of Aboriginal and European contact in the Blue Mountains, King’s Tableland is a significant Aboriginal meeting spot. Historical and cultural sites on the tableland include open campsites, occupation shelters, axe grinding grooves, stone arrangements and art sites, including cave paintings and rock engravings.
(26.21km) King’s Tableland Intersection → The archway intersection
430 m
9 mins
7m
-48m
Moderate track
Veer left: From the intersection, this walk follows the ‘Rocket Point Track’ sign north along the smaller management trail. As the track begins to go downhill, it narrows into a bush track. The track gently winds along until coming to an intersection with another bush track, marked by signs pointing to ‘Rocket Point’ and ‘Wentworth Falls’.
Turn left : From the intersection, this walk follows the ‘Rocket Point’ sign down the narrow track (with the main valley to the right). Soon the track comes to an unfenced rock platform on a right-hand bend in the track, with great views over the valley (but not of the falls). From the view, the walk follows the stone steps down along the rock face to soon come to an intersection just before the large rock archway at the ‘Rocket Point Lookout’ sign.
Turn left : From the intersection, this walk follows the ‘Rocket Point’ sign down the narrow track (with the main valley to the right). Soon the track comes to an unfenced rock platform on a right-hand bend in the track, with great views over the valley (but not of the falls). From the view, the walk follows the stone steps down along the rock face to soon come to an intersection just before the large rock archway at the ‘Rocket Point Lookout’ sign.
(26.64km) The Archway Intersection → Rocket Point Lookout
20 m
1 mins
0m
-13m
Moderate track
Continue straight: From the intersection, this walk follows ‘Rocket Point Lookout’ sign, keeping the rock face to the right. Soon the track leads to the fenced and signposted ‘Rocket Point Lookout’ and its great views of Wentworth Falls and surrounding valley. At the end of this side trip, retrace your steps back to the main walk then Turn left .
Rocket Point Lookout
Rocket Point Lookout is a fenced and signposted lookout, high on the cliff south-west of Wentworth Falls, in the Blue Mountains National Park. The lookout provides a good view down Wentworth Falls and into the valley. There is also a great view of the Sublime Point escarpment. The lookout itself has an interesting sandstone wall and is just down from a natural rock arch.
(26.64km) The archway intersection → Top of Wentworth Falls
140 m
5 mins
12m
-27m
Moderate track
Turn right: From the intersection, this walk heads through the rock arch, away from the face of the ‘Rocket Point Lookout’ sign. The track heads downhill into a valley and then continues around the hill to soon come to an intersection, marked with a ‘Round Walk’ sign (just above another track, small creek and falls).
Turn left : From the intersection, this walk follows the track away from the ‘Round Walk’ sign to zigzag down the hill a short distance to the well-managed and fenced track below (marked with a ‘Rocket Point Circuit’ pointing back up).
Turn right: From the intersection, this walk keeps the handrail on the left and cross a small creek using the stepping stones. The track soon leads to a large pool, Queen’s Cascades and a fenced creek crossing, the top of Wentworth Falls.
Queen’s Cascades

Queen’s Cascades[160] are a lovely set of falls on the Jamison Creek at the top of Wentworth Falls. The creek heads down the wide, two-stage cascades into a sandy pool. From the pool, the water flows between the stepping stones, under the fence and down the very tall Wentworth Falls. There are also great views to Sublime Point across the valley.
(26.78km) Top of Wentworth Falls → Weeping Rock waterfall
100 m
2 mins
10m
-3m
Moderate track
Continue straight: From top of Wentworth Falls, this walk crosses the creek on the stepping stones keeping the view to the left (the creek may be impassable after rain). The walk heads up the log steps (passing some more nice views of Jamison Creek) to soon come to a three-way intersection, with a sign pointing back to ‘Wentworth Falls’ and ‘Wentworth Pass’.
Turn right: From the intersection, this walk follows the ‘Weeping Rock Circuit’ and ‘Darwins walk’ signs up a few steps and between the rocks. The track soon leads to a great view of Weeping Rock, then heads down some steps onto a slippery rock platform, beside a pool at the base of Weeping Rock waterfall.
Turn right: From the intersection, this walk follows the ‘Weeping Rock Circuit’ and ‘Darwins walk’ signs up a few steps and between the rocks. The track soon leads to a great view of Weeping Rock, then heads down some steps onto a slippery rock platform, beside a pool at the base of Weeping Rock waterfall.
Weeping Rock
Weeping Rock is a waterfall on Jamison Creek, upstream of Wentworth Falls in the Blue Mountains National Park. The water falls over the wide circular top overhang, to then cascade down the rocks to a pool below. A staircase beside the falls helps walkers view this waterfall from different angles. This is a nice cool spot on hot days. The rocks are slippery and there are no fences, care is needed.
(26.89km) Weeping Rock waterfall → Int of Charles Darwin and Weeping Rock Tracks
40 m
1 mins
2m
0m
Moderate track
Continue straight: From the bottom of Weeping Rock, this walk heads up the metal staircase (with the falls to the right). At the top of the falls, the track continues upstream, across the slippery rock platform, keeping the lovely view of Jamison Creek to the right. The track soon heads up some steps to an intersection with ‘Darwins Walk’ and a sign pointing back to ‘Weeping Rock Circuit’.
(26.92km) Int of Charles Darwin and Weeping Rock Tracks → Wentworth Falls Railway Station
2.7 km
51 mins
116m
-58m
Moderate track
Veer right: From the intersection, this walk heads alongside Jamison Creek (creek to the right)following the signs along the Charles Darwin Walk. The track soon crosses two small streamlets and continues up the main creek along a mixture of bush track and boardwalk. This passes a great section of overhanging cliff on the other side of the creek. After this, the track rises slightly before going down to an intersection with a track signposted as the way up to Fletcher St, on the left.
Continue straight: From the intersection, this walk heads upstream beside the creek. This track goes along a mixture of boardwalk and bush track until continuing on a long section of boardwalk. The walk crosses the creek and goes up a steep set of stairs, then past a beautiful section of creek where the water cascades down the rocks.
Shortly the cascades, the track crosses the creek using a foot bridge and comes to a signposted intersection with ‘Parkes Street’ track (on the left).
From the intersection, this walk follows the clear track upstream (keeping the creek through the bush, on the right). The track bends right passing a bench seat and crossing the creek on a footbridge. On the other side of the bridge the walk climbs the stairs then gently meanders along the side of the creek till coming to a clearing. On the other side of the clearing the walk comes to an intersection just before the pipe bridge.
Continue straight: From the intersection, this walk follows ‘Village’ sign along the track and under the large pipeline (keeping Jamison Creek on the left). The track meanders alongside the creek over some timber platforms and through a lovely Banksia grove. After a short time the walk passes a ‘Charles Darwin walk’ sign and comes to an intersection with a timber bridge on the left of the track.
Turn right: From the intersection, this walk heads up the stairs (away from the bridge and creek) and turns left. The walk almost immediately comes to an intersection with a set of stairs (heading up to Page Ave on the right) and a sign pointing to ‘Wilson Park’.
Continue straight: From the intersection, this walk follows ‘Wilson Park’ and ‘Village’ signs down some steps and along the track (keeping the creek to the left). The track soon passes a bush regeneration information sign and heads into an open pine forest. The walk then crosses the creek on a small timber bridge and heads up the hill. Soon the track passes under the ‘Charles Darwin Walk’ arch and enters Wilson Park (just next to the tennis courts).
Continue straight: From the the archway in Wilson Park, this walk heads away from the tennis courts, keeping the creek on the right. At the far end of the park, the walk comes to the Great Western Highway and turns right. After about 150m, this walk crosses the highway at the traffic lights and heads up Station St, past the shops and up to Wentworth Falls Railway Station on the right.
Maps for the Scenic Railway – Ruined Castle – Mt Solitary – Kedumba River – Wentworth Falls walk
You can download the PDF for this walk to print a map.
These maps below cover the walk and the wider area around the walk, they are worth carrying for safety reasons.
| Six Foot Track | 1:50 000 Map Series | Six Foot Track | NSW-six-foot-track |
| Jamison | 1:25 000 Map Series | 89302N JAMISON | NSW-89302N |
| Katoomba | 1:25 000 Map Series | 89301S KATOOMBA | NSW-89301S |
| Katoomba | 1:100 000 Map Series | 8930 KATOOMBA | 8930 |
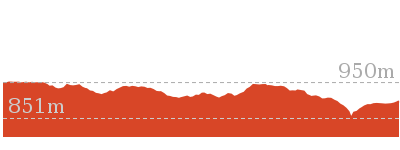
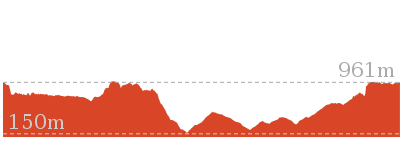
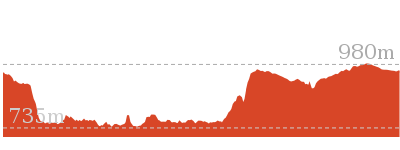
Cross sectional view of the Scenic Railway – Ruined Castle – Mt Solitary – Kedumba River – Wentworth Falls bushwalking track
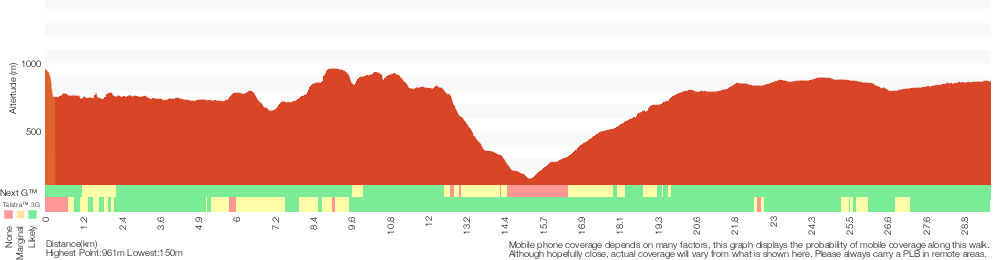
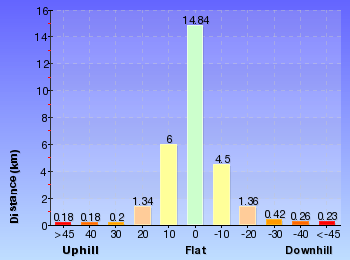
Analysis and summary of the altitude variation on the Scenic Railway – Ruined Castle – Mt Solitary – Kedumba River – Wentworth Falls
Daily actual walking time estimates
| Day | Walking Time | Length |
|---|---|---|
| 1 | 4 hrs 57 mins | 10.1 km |
| 2 | 2 hrs 35 mins | 5.6 km |
| 3 | 5 hrs 34 mins | 14.3 km |
Overview of this walks grade – based on the AS 2156.1 – 2001
Under this standard, a walk is graded based on the most difficult section of the walk.
| Length | 29.3 km | ||
| Time | 3 Days | ||
| . | |||
| Grade 5/6 Experienced only |
AS 2156.1 | Gradient | Very steep and difficult scrambles (5/6) |
| Quality of track | Rough unclear track (5/6) | ||
| Signs | No directional signs (5/6) | ||
| Experience Required | High level of bushwalking experience recommended (5/6) | ||
| Weather | Forecast, unforecast storms and severe weather likely to have an impact on your navigation and safety (5/6) | ||
| Infrastructure | No facilities provided (5/6) |
Some more details of this walks Grading
Here is a bit more details explaining grading looking at sections of the walk
Gradient
8km of this walk is very steep and another 7km has short steep hills. Whilst another 7km has gentle hills with occasional steps and a 5km section is flat with no steps. The remaining 3km is very steep with difficult rock scrambles.
Quality of track
7km of this walk follows a rough track, where fallen trees and other obstacles are likely and another 7km follows a smooth and hardened path. Whilst another 6km follows a formed track, with some branches and other obstacles and a 6km section follows a clear and well formed track or trail. The remaining 3.4km follows a rough unclear track.
Signs
12km of this walk is clearly signposted and another 7km has directional signs at most intersection. Whilst another 7km has minimal directional signs and the remaining 3.6km Has no directional signs.
Experience Required
11km of this walk requires no previous bushwalking experience and another 7km requires some bushwalking experience. Whilst another 7km requires a leader a with moderate level of bushwalking experience and the remaining 4.8km requires a leader with a high level of bushwalking experience.
weather
18km of this walk is not usually affected by severe weather events (that would unexpectedly impact safety and navigation) and another 7km is affected by forecast, unforecast storms and severe weather events that may impact on navigation and safety. Whilst another 4.9km is affected by storms that may impact your navigation and safety and the remaining 450m forecast, unforecast storms and severe weather likely to have an impact on your navigation and safety.
Infrastructure
12km of this walk is close to useful facilities (such as fenced cliffs and seats) and another 7km has limited facilities (such as not all cliffs fenced). Whilst another 6km has limited facilities (such as cliffs not fenced, significant creeks not bridged) and the remaining 4.8km has no facilities provided.
Similar walks
A list of walks that share part of the track with the Scenic Railway – Ruined Castle – Mt Solitary – Kedumba River – Wentworth Falls walk.
869 m Circuit
1 hr 15 mins
Hard track
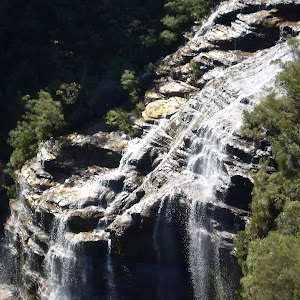
1.3 km Return
1 Hr
Moderate track
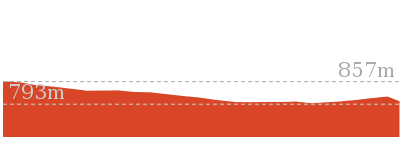
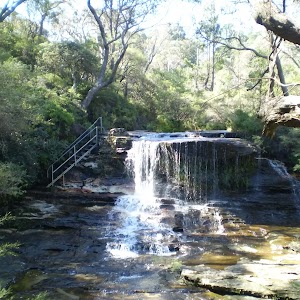
1.4 km Circuit
45 mins
Moderate track
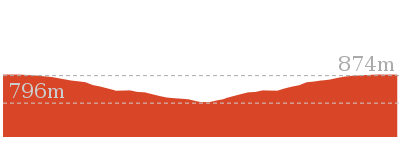
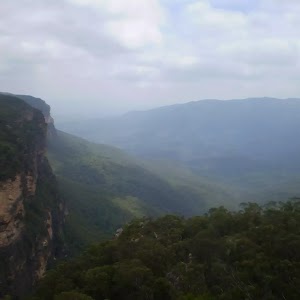
1.5 km Return
45 mins
Moderate track
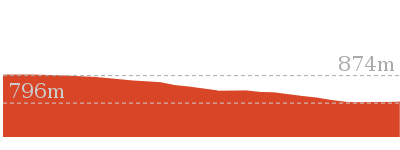
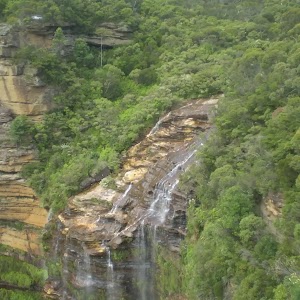
1.6 km One way
45 mins
Easy track

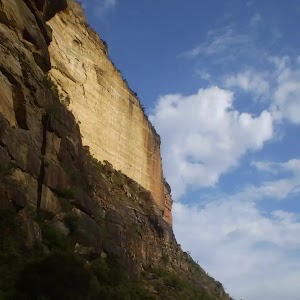
2.7 km Return
2 hrs 30 mins
Moderate track
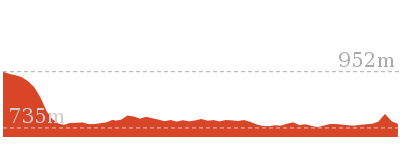
3.1 km One way
3 hrs
Hard track
3.1 km One way
3 hrs
Hard track
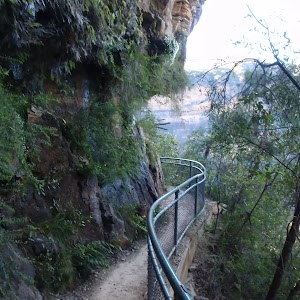
3.6 km One way
3 hrs
Hard track
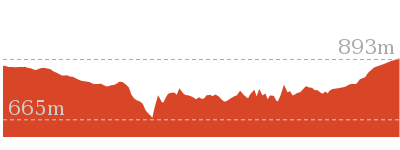

4 km Circuit
2 hrs
Moderate track
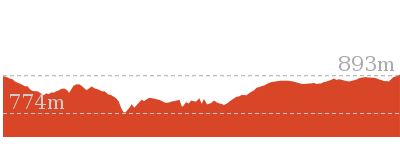
4.4 km One way
3 hrs 45 mins
Hard track
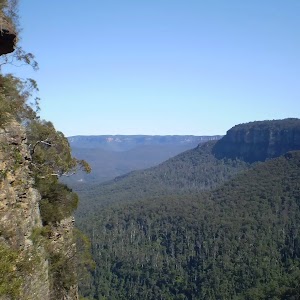
4.6 km Circuit
3 hrs 30 mins
Hard track
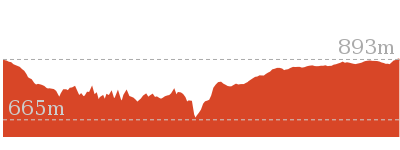

5 km Circuit
4 hrs
Hard track
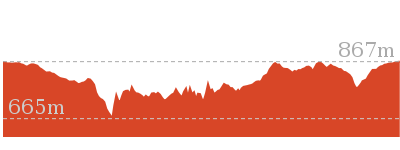
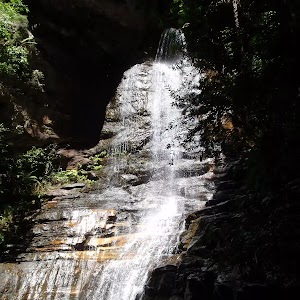
5.1 km Circuit
4 hrs
Hard track
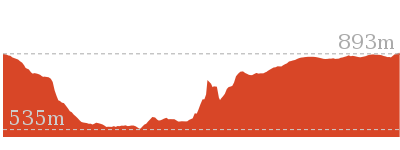
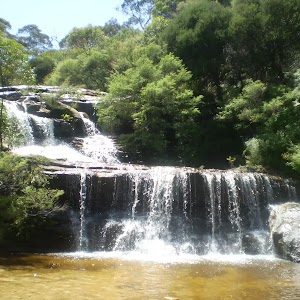
5.6 km Return
2 hrs
Moderate track
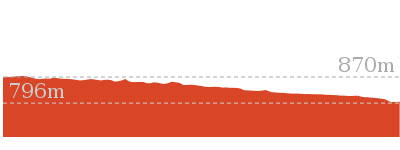

5.9 km Circuit
3 hrs 30 mins
Hard track
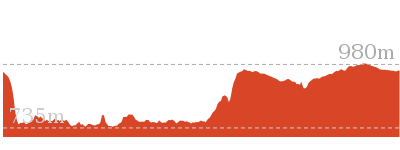
6.6 km One way
4 hrs
Hard track

6.7 km Circuit
3 hrs
Hard track
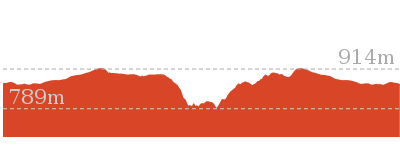
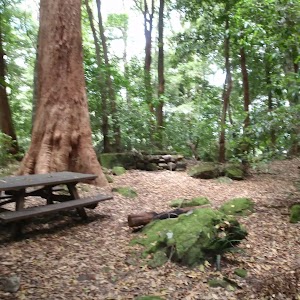
6.7 km Return
4 hrs 30 mins
Moderate track
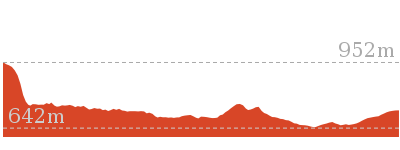
6.8 km Circuit
5 hrs
Hard track
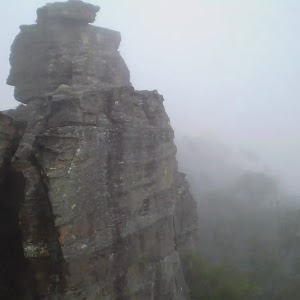
7.9 km Return
5 hrs
Hard track
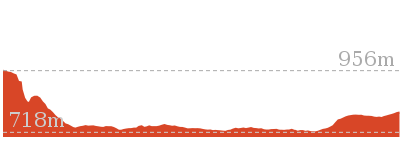
8 km One way
5 hrs
Hard track
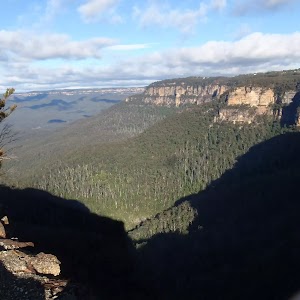
8.6 km Circuit
5 hrs
Hard track

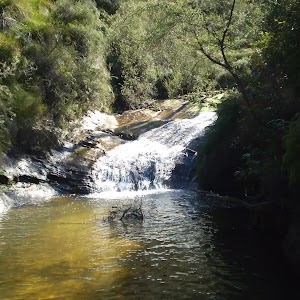
8.9 km Circuit
4 hrs 30 mins
Hard track
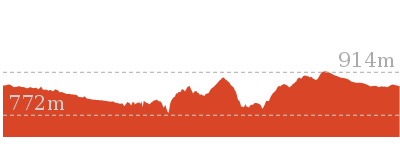
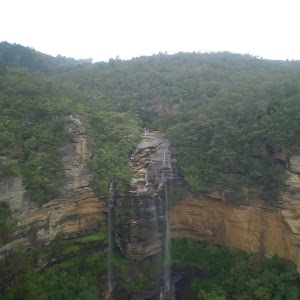
9.4 km Circuit
4 hrs
Moderate track
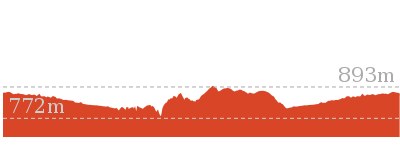
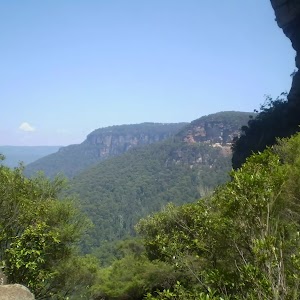
9.5 km Circuit
5 hrs 30 mins
Hard track
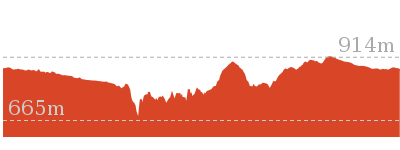
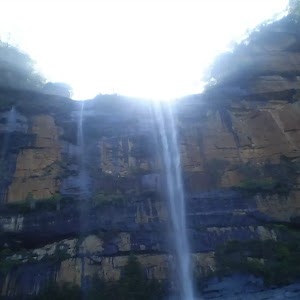
10.2 km Circuit
6 hrs
Hard track
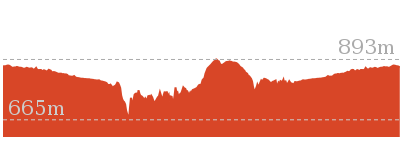
11.7 km Return
8 hrs 45 mins
Experienced only
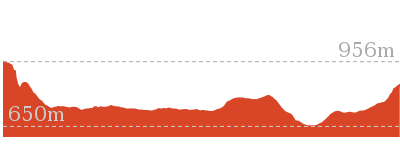
12.4 km Return
7 hrs 30 mins
Hard track
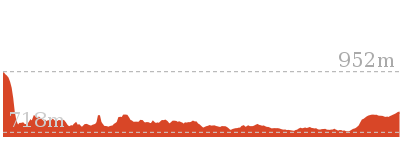
16.2 km Return
11 hrs
Experienced only
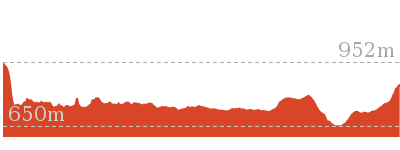

29.2 km One way
2 Days
Experienced only

33.8 km Circuit
3 Days
Experienced only
Other Nearby walks
A list of walks that start near the Scenic Railway – Ruined Castle – Mt Solitary – Kedumba River – Wentworth Falls walk.
1.5 km Circuit
1 hr 45 mins
Hard track
1.7 km Return
3 hrs 45 mins
Hard track
2.1 km One way
1 hr 15 mins
Moderate track
1.2 km Return
2 hrs
Hard track
5.8 km Circuit
5 hrs 30 mins
Hard track
6.8 km One way
3 hrs 30 mins
Moderate track
1.1 km Circuit
2 hrs
Hard track
1.8 km One way
1 Hr
Moderate track
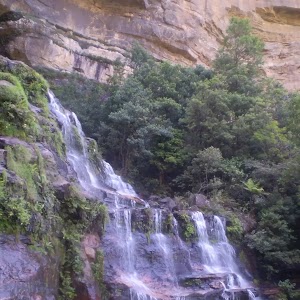
1.7 km Return
2 hrs
Hard track

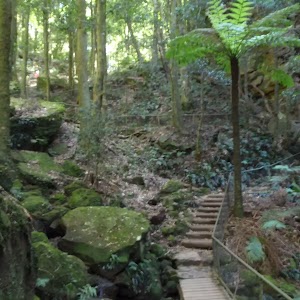
1.1 km Return
45 mins
Moderate track

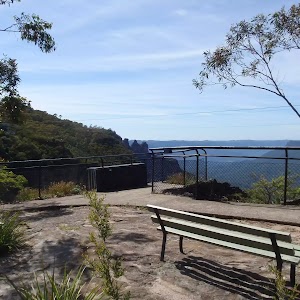
352 m Circuit
20 mins
Moderate track
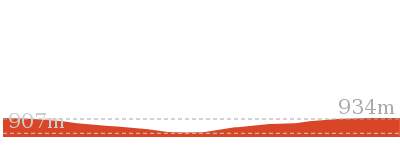
854 m Circuit
45 mins
Hard track

Plan your trip to and from the walk here
The Scenic Railway – Ruined Castle – Mt Solitary – Kedumba River – Wentworth Falls walk starts at the Scenic World (gps: -33.728585, 150.30095)
Your transport options to Scenic World are by;
![]() Bus. (get details)
Bus. (get details)
![]() Car. There is free parking available.
Car. There is free parking available.
(get details)
The Scenic Railway – Ruined Castle – Mt Solitary – Kedumba River – Wentworth Falls ends at the Wentworth Falls Railway Station (gps: -33.709737, 150.37644)
Your transport options to Wentworth Falls Railway Station are by;
![]() Train. (get details)
Train. (get details)
![]() Car. There is free parking available.
Car. There is free parking available.
(get details)
Short URL = http://wild.tl/srrcmskrwf
Gallery images
There are other downloads I am still working on.
You will probably need to login to access these — still all free.
* KML (google earth file)
* GPX (GPS file)
Special Maps/ brochures
* A3 topo maps
* PDF with Lands Topo map base
* PDF with arial image (and map overlay)
I wanted to get the main site live first, this extra stuff will come in time.
Happy walking
Matt 🙂
Dardenelles Pass
And Walk
Dardenelles Pass

3 hrs
4.8 km Circuit
595 m
Hard track
This walk offers a grand way to explore above and below the cliffline of Echo Point in Katoomba. Starting and finishing at Echo Point, the walk passes the Three Sisters and heads down the steep Giant Staircase. The walk along Dardenelles Pass is lovely as it winds through many areas of rainforest. The walk then climbs up Federal Pass and returns to the scenic Echo Point along the cliff tops.
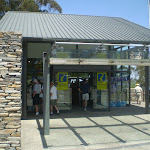
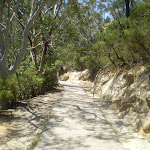


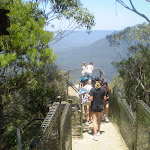
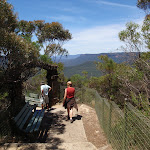

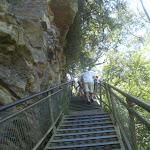


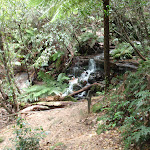

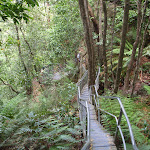
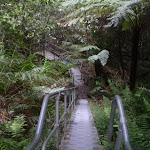

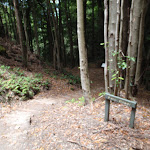

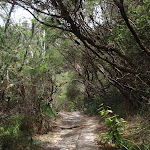

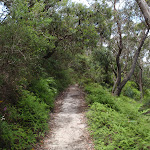
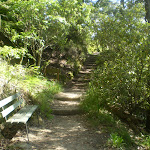
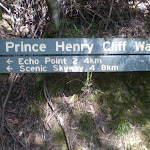
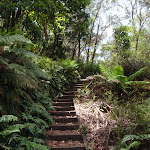
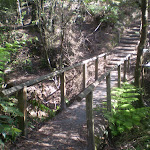
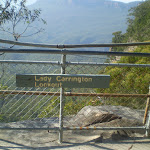

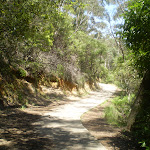

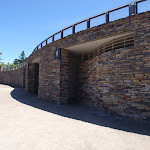
Echo Point Information Centre
This modern building at Echo Point is a great source of information. It is open daily from 9am-5pm (except Christmas Day). There is a large range of books, maps and information about the area (and ice creams). There are toilets opposite the entrance
, and mobility parking opposite
. For more information, phone 1300 653 408. More info.
(0km) Echo Point Archway Intersection → Oreades Lookout
430 m
12 mins
19m
-47m
Easy track
From the archway, this walk follows the lower of the two footpaths heading away from Echo Point, for approximately 30m, before coming to the intersection of the Spooners Lookout track.
Turn left: From the intersection, this walk follows the ‘Three Sisters’ arrow[1] gently uphill along the concrete path, keeping the main valley behind and to the left. The track then leads up, past a short fence, to a clear intersection with the Three Sisters Walk[2].
Continue straight: From the intersection, this walk follows the ‘Three Sisters 400m’ arrow[3] downhill along the concrete path, keeping the valley to the right. After about 15m the walk leads past a stone seat
(on the left), with a blue tongue lizard sculpture[4]. The walk continues gently downhill for another 60m to pass another sandstone seat (on the left)
. From here the path winds gently downhill for another 70m to find yet another sandstone seat (on the left)
. The path continues downhill for another 45m to find a clear intersection marked with a large ‘Three Sisters Walk’ sign[5]. On the right is a small flat loose gravel area with two seats
.
Continue straight: From the intersection, this walk follows the ‘Three Sisters, Giant Stairway’ sign[6] moderately steeply downhill
along the smooth concrete path[7]. After about about 90m[8] this path leads past stone seat
(on the left) in a small sandstone overhang[9]. Check the miniature cicada sculptures[10] above the overhang. From here this walk continues downhill along the path for about 30m to find the fenced Oreades Lookout[11] (on the right).
(0.43km) Oreades Lookout → Int of Prince Henry Cliff Track and the Three Sisters Footpath
20 m
1 mins
0m
-11m
Easy track
Continue straight: From Oreades Lookout platform, this walk follows the main path down the steps, keeping the valley views to the right. At the bottom of the first set of steps the walking comes to an intersection with a track (on the left).
(0.45km) Int of Lady Game Lookout Track and the Three Sisters Footpath → Top of the Giant Staircase
20 m
1 mins
0m
-10m
Easy track
Continue straight: From the intersection, the walk follows the footpath down the gentle hill towards the Three Sisters, passing under a rock archway and coming to the top of the Giant Staircase.
(0.46km) Top of the Giant Staircase → Lady Game Lookout
10 m
1 mins
0m
-12m
Very easy
Continue straight: From the intersection, the walk follows the footpath down the hill towards the Three Sisters for about 10m before coming to the Lady Game Lookout. At the end of this side trip, retrace your steps back to the main walk then Turn right.
Lady Game Lookout
Lady Game Lookout is a narrow, fenced lookout above the Three Sisters. The track to this lookout starts just near the archway which marks the start of the Giant Staircase. Lady Game Lookout provides a bird’s-eye view over the Three Sisters and is a popular stop whilst exploring the area.
(0.46km) Top of the Giant Staircase → The Three Sisters Bridge Intersection
40 m
4 mins
0m
-31m
Hard track
Turn left: From the intersection, the walk follows the steep stairs, winding down the side of the cliffs, to the intersection next to the bridge (which goes across to the overhang under the First Sister).
(0.5km) The Three Sisters Bridge Intersection → The Three Sisters
10 m
0m
0m
Very easy
Turn right: From the intersection, the walk crosses the bridge over to the Three Sisters. At the end of this side trip, retrace your steps back to the main walk then Veer right.
The Three Sisters
This well-known rock formation can be found just south of Katoomba, and can be viewed from many of the cliffside lookouts, from Narrow Neck all the way around to Sublime Point. Historically, this formation appears in Aboriginal ‘Dream Time’ stories, where three sisters were transformed into stone. This iconic rock formation is popular amongst tourists and bushwalkers alike. More info.
(0.5km) The Three Sisters Bridge intersection → Leura Forest (Int of Federal Pass and Dardenelles Tracks)
1.1 km
46 mins
109m
-259m
Hard track
Veer left: From the bridge, the walk goes steeply down the cliff using the metal Giant staircase with handrails. Along the way there are magnificent views of the valley, with chairs to help enjoy various outlooks. The walk continues to descend steeply until coming to an intersection with a flat bush track, signposted as the ‘Dardenelles Walking Track’.
Turn left: From the bottom of the Giant Staircase, this walk follows the Dardanelles Pass sign towards ‘Leura Forest’, keeping the main cliff face on the left. There are occasional good views out over the valley to the east. Gradually, the track begins to descend and becomes more shady. In this section of track, there are often fallen logs across the track, which will need to be climbed over. Gradually, the track descends down behind the pergola at Leura Forest.
Turn left: From the bottom of the Giant Staircase, this walk follows the Dardanelles Pass sign towards ‘Leura Forest’, keeping the main cliff face on the left. There are occasional good views out over the valley to the east. Gradually, the track begins to descend and becomes more shady. In this section of track, there are often fallen logs across the track, which will need to be climbed over. Gradually, the track descends down behind the pergola at Leura Forest.
Leura Forest
Leura Forest is a great picnic area in the Jamison Valley at the junction of the Federal Pass and Dardenelles Tracks. This place was home to a popular tea house (also known as ‘Lady Carrington Dining Hall’) from the late 1800’s[13]. Today walkers can still enjoy the historic rotunda and the foundations of the original tea house[14]. The picnic area provides a great rest spot under the shade of the lilli pilli and coachwood forest.
(1.58km) Leura Forest → Lower Linda Creek Falls
300 m
10 mins
9m
-50m
Moderate track
Turn left: From the gazebo, this walk follows the wide bush track past the information sign and through the forest, passing a few picnic tables and coming to the Leura Forest signpost. From here the walk continues along the wide track to cross Linda Creek in a timber foot bridge with a handrail[15]. On the other side of the creek this walk comes to an intersection with a faint track, marked with a ‘Federal Pass’ sign[16].
(1.88km) Lower Linda Creek Falls → Marguerite Cascades
20 m
1 mins
5m
0m
Hard track
Marguerite Cascades
Marguerite Cascades are a series of small cascades finishing with a taller waterfall of a few metres height, dropping into a shallow sandy pool. The cascades are on Linda Creek and a small bridge crosses the creek at the base of the falls as part of the Federal Pass walking track. The cascades are a nice place to sit and listen to the water running and the local birds in this cool shady area.
(1.9km) Marguerite Cascades → Lila Falls crossing
180 m
11 mins
90m
-37m
Hard track
Continue straight: From Marguerite Cascades, this walk climbs steeply up the wooden steps, then turns left and crosses Linda Creek. These steps climb to a bridge, where the walk passes the tall and slender Linda Falls.
From Linda Falls the walk heads up the wooden and metal staircases. The walk then follows the wooden boardwalk that hugs the side of a rock wall under a shallow overhang before heading up some more steps and soon coming to a small bridge crossing Linda Creek in front of Lila Falls.
From Linda Falls the walk heads up the wooden and metal staircases. The walk then follows the wooden boardwalk that hugs the side of a rock wall under a shallow overhang before heading up some more steps and soon coming to a small bridge crossing Linda Creek in front of Lila Falls.
Lila Falls
Lila Falls is a thin waterfall on Linda Creek. The Federal Pass crosses the creek (on a bridge) in front of these falls, just below the intersection with the amphitheatre. The waterfall is not the most spectacular one in this valley, but it is a nice cool spot to catch your breath.
(2.08km) Lila falls crossing → Fern Bower
340 m
14 mins
168m
-10m
Hard track
Continue straight: From the Lila Falls, this walk crosses the bridge and heads up the metal staircase. At the top of this climb the walk comes to signposted intersection with the ‘Amphitheatre track’.
Turn left: From the intersection, the walk follows the ‘Prince Henry Cliff Walk’ sign up the timber steps, keeping the valley on the right. The walk winds up the long wooden steps through the rainforest, until it reaches the Fern Bower information sign.
Turn left: From the intersection, the walk follows the ‘Prince Henry Cliff Walk’ sign up the timber steps, keeping the valley on the right. The walk winds up the long wooden steps through the rainforest, until it reaches the Fern Bower information sign.
Fern Bower
Fern Bower is an especially pleasant part of the Blue Mountains National Park, protected from heat and providing a great environment for fern trees, bracken ferns and moss to thrive. Fern Bower is a signposted area along the Federal Pass walking track, just below Jamieson Lookout and next to Linda Creek. This is a nice place to stop, rest and enjoy the bird noises.
(2.42km) Fern Bower → Int of Federal Pass and Jamieson Lookout Tracks
90 m
3 mins
36m
0m
Hard track
Continue straight: From the information sign, this walk follows the bush track, heading up the long set of wooden steps that wind up through the forest. The walk passes a picnic chair under a rocky overhang on the right, and continues up to the top of the valley, where it comes to the intersection with the Jamieson Lookout track.
(2.51km) Int of Federal Pass and Jamieson Lookout Tracks → Jamieson Lookout
20 m
1 mins
0m
-6m
Easy track
Veer right: From the intersection, this walk follows the ‘Jamieson Lookout’ sign along the short bush track to the rock shelf at the Jamieson Lookout. At the end of this side trip, retrace your steps back to the main walk then Turn sharp right.
Jamieson Lookout
Jamieson Lookout is a fenced lookout at the east end of the Federal Pass track, and just off Prince Henry Cliff Walk. The lookout has a bench seat and provides great views up the Jamison Valley, along Kings Tableland escarpment and past Mount Solitary. The lookout is perched up on a large rock buttress, giving views unobscured by trees.
(2.51km) Int of Federal Pass and Jamieson Lookout Tracks → Int of Prince Henry Cliff Walk and Leura Forest Track
40 m
1 mins
3m
-3m
Moderate track
Continue straight: From the intersection, this walk heads up the wooden steps and follows the bush track, winding up the gentle hill to the signposted intersection with the ‘Prince Henry Cliff Walk’.
(2.56km) Int of Prince Henry Cliff Walk and Leura Forest Track → Int of Cliff Drive and Prince Henry Cliff Walk
90 m
3 mins
3m
-6m
Easy track
Turn right: From the intersection, this walk follows the ‘Leura Cascades’ sign along the well-defined bush track, winding through the bush to the signposted intersection of the Echo Tree track at the bottom of the short set of stairs.
Turn left: From the intersection, this walk follows the short set of wooden steps up to Cliff Drive, opposite the car park behind Solitary Restaurant. At the end of this side trip, retrace your steps back to the main walk then Continue straight.
Turn left: From the intersection, this walk follows the short set of wooden steps up to Cliff Drive, opposite the car park behind Solitary Restaurant. At the end of this side trip, retrace your steps back to the main walk then Continue straight.
Solitary Kiosk and Restaurant

Solitary Restaurant offers fine dining in a heritage-listed building overlooking the beautiful Jamison Valley, as well as housing a kiosk for a more casual lunch. The kiosk is open for lunch 7 days a week, from 10am to 4pm (opens 11am weekdays in winter). The kiosk provides a casual dinning experience, with breakfast foods from $10 and lunches around $15 per dish. The restaurant is open for lunch 7 days from 12-4.30pm, and dinner on Fridays and Saturdays from 6pm. Light lunches start from $14, and dinners from $55 for a mouth-watering 2 course meal. Contact details – 90 Cliff Drive, Leura Falls Ph: 02 4782 1164. More info.
(2.56km) Int of Prince Henry Cliff Walk and Leura Forest Track → Int of Prince Henry Cliff Walk and Burrabarroo Lookout Tracks
350 m
9 mins
18m
-29m
Moderate track
Turn left: From the intersection, the track follows the ‘Echo Point’ sign along the bush track, winding through the forest for a short while before climbing up a set of wooden steps, to the intersection with the Carrington Park Track (not signposted).
Continue straight: From the intersection, this walk follows the ‘Skyway’ sign along the track heading through the forest, steadily winding down a long and gentle hill. Soon, the walk comes to the top of a set of wooden steps, which it follows down to the signposted intersection of the ‘Burrabarroo Lookout’ track.
Continue straight: From the intersection, this walk follows the ‘Skyway’ sign along the track heading through the forest, steadily winding down a long and gentle hill. Soon, the walk comes to the top of a set of wooden steps, which it follows down to the signposted intersection of the ‘Burrabarroo Lookout’ track.
(2.91km) Int of Prince Henry Cliff Walk and Burrabarroo Lookout Tracks → Burrabarroo Lookout
50 m
1 mins
0m
-8m
Moderate track
Continue straight: From the intersection, this walk follows the ‘Burrabarroo’ sign along the track, passing a picnic seat and climbing up a short set of rock steps to the top of a rock platform. The walk continues down the steps on the other side, around the base of a rock platform and along the bush track for a short while longer, to the Burrabarroo lookout. At the end of this side trip, retrace your steps back to the main walk then Turn sharp left.
Burrabarroo Lookout
This small, fenced lookout is just off the Prince Henry Cliff Walk, near Carrington Park. The view looks over the valley and out to Sublime Point and Kings Tablelands in the distance. The lookout is perched on the top of a rocky buttress at the end of a small point, giving great views.
(2.91km) Int of Prince Henry Cliff Walk and Burrabarroo Lookout Tracks → Lomandra Lookout
330 m
9 mins
23m
-25m
Easy track
Veer right: From the intersection, the walk follows the ‘Echo Point’ sign down the wooden steps to the bottom, and continues along the bush track that winds through the forest along the side of the hill to the signposted ‘Lomandra Lookout’.
Lomandra Lookout
Lomandra Lookout is a fenced lookout along Prince Henry Cliff Walk, near Katoomba. Unlike other lookouts in the area, there are no sweeping distant views, but atop this cliff there is a great close-up view of the canopy of the surrounding bush. There is a bench seat on the rock platform, making a nice place for a rest.
(3.24km) Lomandra Lookout → Honeymoon Point
260 m
3 mins
10m
-22m
Moderate track
Continue straight: From the Lomandra Lookout, this walk follows the bush track, keeping the valley and the cliffs down the hill to the left as it winds along the side of the hill, passing a picnic seat and continuing down a set of wooden steps to the Banksia Streamlet.
Continue straight: Keeping the valley down the hill to the left, this walk leaves the Banksia Streamlet, climbing up to the top of the wooden steps and continuing along the bush track for a short while before coming to the signposted Honeymoon Point.
Continue straight: Keeping the valley down the hill to the left, this walk leaves the Banksia Streamlet, climbing up to the top of the wooden steps and continuing along the bush track for a short while before coming to the signposted Honeymoon Point.
(3.5km) Honeymoon Point → Banksia Lookout
30 m
2 mins
0m
-36m
Easy track
Veer left: From the intersection, this walk heads out to the cliffs along the track, until coming to an intersection signposted as ‘Banksia Lookout’. The view is largely blocked by trees. At the end of this side trip, retrace your steps back to the main walk then Turn left.
Banksia Lookout
Banksia Lookout is a fenced lookout along the Prince Henry Cliff Walk, down a few steps from Honeymoon Point. The lookout provides views of Sublime Point and Kings Tableland. The clearing for the old sewage treatment plant, down in the valley on the Sublime Point Trail, is still visible from this lookout.
(3.5km) Honeymoon Point → Int of Prince Henry Cliff Walk and Honeymoon Lookout Tracks
100 m
2 mins
16m
-1m
Easy track
Veer right: From the lookout, the walk follows the bush track, keeping the valley and the cliffs down the hill to the left as it winds up the gentle hill through the forest. The walk then comes to an intersection with the Honeymoon Lookout track, just before the concrete structure on the right.
(3.6km) Int of Prince Henry Cliff and Honeymoon Lookout Tracks → Honeymoon Lookout
30 m
1 mins
8m
0m
Easy track
Turn right: From the intersection, this walk heads up the short hill to the concrete platform just off Cliff Drive, signposted as ‘Honeymoon Lookout’. At the end of this side trip, retrace your steps back to the main walk then Turn right.
Honeymoon Lookout
Honeymoon Lookout is a fenced lookout on Cliff Drive, just north of Katoomba High School. There is a short track that links this lookout to Prince Henry Cliff Walk. There is a bus stop at the lookout. The area is shaded by a few trees and provides views out to Sublime Point and Kings Tableland.
(3.6km) Int of Prince Henry Cliff and Honeymoon Lookout Tracks → Millamurra Lookout
390 m
10 mins
26m
-26m
Moderate track
Continue straight: From the intersection, this walk follows the bush track past the base of the Honeymoon Lookout and continues along the track, keeping the valley down the hill to the left as it winds around the side of the valley until it coming to the signposted ‘Millamurra Lookout’.
Millamurra Lookout
Millamurra Lookout is on a fenced, elevated rock platform on the side of the Prince Henry Cliff Walk. There are views of the Jamison Valley, including the Leura Falls Creek and Sublime Point. There is also a great view along the Kings Tableland escarpment to the right.
(3.99km) Millamurra Lookout → Tallawarra Lookout
60 m
2 mins
3m
-6m
Moderate track
Continue straight: From Millamurra Lookout, this walk follows the bush track, keeping the valley down to the left as it continues along through the open forest for a short, while before coming to the signposted ‘Tallawarra Lookout’ (marked on some maps as ‘Tallawalla Lookout’).
Tallawarra Lookout
Tallawarra Lookout[20] is a small, fenced lookout near Silver Mist Picnic Area, along Prince Henry Cliff walk. The lookout provides an excellent view of Sublime Point and Kings Tableland. Leura Falls and Gordon Creek both flow through the valley below. There are a few bench seats just near the lookout. (Note: the lookout is marked as ‘Tallawalla Lookout’ on some maps.)
(4.05km) Tallawarra Lookout → Int of Prince Henry Cliff and Lady Carrington Lookout Tracks
170 m
4 mins
17m
-6m
Easy track
Veer right: From the lookout, this walk follows the bush track as it winds through the bush, keeping the cliffs and the valley to the left. Gradually, the track drops down a long and steady hill, winding around to the intersection with the Lady Carrington bush track.
(4.22km) Int of Prince Henry Cliff and Lady Carrington Lookout Tracks → Lady Carrington Lookout
20 m
1 mins
0m
-12m
Easy track
Veer left: From the intersection, this walk heads out to the cliffs, going down a small flight of stairs and following the metal railing. Shortly after, the walk breaks out onto a fenced-off rockshelf, signposted as Lady Carrington Lookout. At the end of this side trip, retrace your steps back to the main walk then Turn left.
Lady Carrington Lookout
Lady (Cecelia) Carrington was wife of Lord (Charles Robert Wynne) Carrington. The couple explored parts of the Blue mountains in the late 1800’s and had a number of places named in their honour. Lady Carrington Lookout is long, narrow and fenced (twice). The lookout is perched up on a sandstone block and provides views over Jamison Valley.
(4.22km) Int of Prince Henry Cliff Walk and Lady Carrington Lookout Tracks → Int of the Prince Henry Cliff Walk and Lady Game Bushtrack
260 m
6 mins
18m
-16m
Moderate track
Veer right: From the intersection, the walk follows the ‘Echo Point’ sign along the bush track as it follows the cliffs (down the hill to the left) around the valley. The track turns to the right and winds up to the intersection with the Lady Game bush track.
(4.48km) Int of the Prince Henry Cliff Walk and Lady Game Bushtrack → Int of Prince Henry Cliff Track and the Three Sisters Footpath
50 m
1 mins
6m
-1m
Easy track
Turn right: From the intersection, this walk follows the Echo Point signpost along the wide track that winds through the bush for about 50m, before coming down to the signposted intersection of the Three Sisters path.
(4.53km) Int of Prince Henry Cliff Track and the Three Sisters Pathway → Echo Point Archway Intersection
300 m
7 mins
19m
-8m
Easy track
Veer right: From the intersection, this walk follows the large ‘Echo Point’ sign[21] uphill along the smooth concrete path. The path leads uphill for about 45m
to find a sandstone seat (on the right)
to find a sandstone seat (on the right)
. From here the path continues winding gently uphill for another 70m to pass another sandstone seat (on the right)
. From this seat the path continues gently uphill for another 60m past yet another similar stone seat
(on the right), this seat has a blue tongue lizard sculpture[22]. After another 15m
this walk comes to a clear signposted Y-intersection[23].
Continue straight: From the intersection, this walk follows the ‘Katoomba & Echo point’ arrow [24] uphill along the concrete path, initially keeping the metal fence to the left. The path leads uphill for about 80m then over a rise to head downhill for short distance to an intersection with a track[25] (on the left) just before the stone archway[26] near Echo Point.
Maps for the Dardenelles Pass walk
You can download the PDF for this walk to print a map.
These maps below cover the walk and the wider area around the walk, they are worth carrying for safety reasons.
| Six Foot Track | 1:50 000 Map Series | Six Foot Track | NSW-six-foot-track |
| Katoomba | 1:25 000 Map Series | 89301S KATOOMBA | NSW-89301S |
| Katoomba | 1:100 000 Map Series | 8930 KATOOMBA | 8930 |
Cross sectional view of the Dardenelles Pass bushwalking track
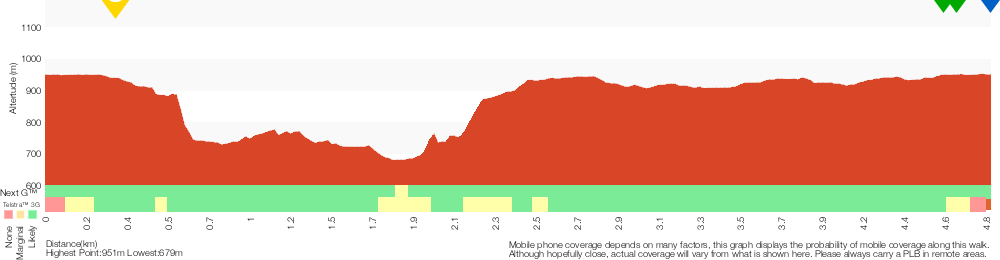
Analysis and summary of the altitude variation on the Dardenelles Pass
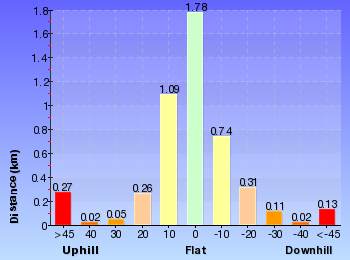
Overview of this walks grade – based on the AS 2156.1 – 2001
Under this standard, a walk is graded based on the most difficult section of the walk.
| Length | 4.8 km | ||
| Time | 3 hrs | ||
| . | |||
| Grade 4/6 Hard track |
AS 2156.1 | Gradient | Very steep (4/6) |
| Quality of track | Rough track, where fallen trees and other obstacles are likely (4/6) | ||
| Signs | Directional signs along the way (3/6) | ||
| Experience Required | Some bushwalking experience recommended (3/6) | ||
| Weather | Storms may impact on navigation and safety (3/6) | ||
| Infrastructure | Limited facilities, not all cliffs are fenced (3/6) |
Some more details of this walks Grading
Here is a bit more details explaining grading looking at sections of the walk
Gradient
3km of this walk has gentle hills with occasional steps and another 940m has short steep hills. Whilst another 440m is very steep and the remaining 410m is flat with no steps.
Quality of track
2.2km of this walk follows a clear and well formed track or trail and another 1.3km follows a smooth and hardened path. Whilst another 1.3km follows a rough track, where fallen trees and other obstacles are likely and the remaining 20m follows a formed track, with some branches and other obstacles.
Signs
Around 3.7km of this walk is clearly signposted, whilst the remaining 1.1km has directional signs at most intersection.
Experience Required
Around 4.4km of this walk requires no previous bushwalking experience, whilst the remaining 450m requires some bushwalking experience.
weather
Around 4.6km of this walk is not usually affected by severe weather events (that would unexpectedly impact safety and navigation), whilst the remaining 200m is affected by storms that may impact your navigation and safety.
Infrastructure
Around 4.4km of this walk is close to useful facilities (such as fenced cliffs and seats), whilst the remaining 410m has limited facilities (such as not all cliffs fenced).
Similar walks
A list of walks that share part of the track with the Dardenelles Pass walk.
308 m Return
15 mins
Moderate track
582 m Return
30 mins
Moderate track
595 m One way
30 mins
Moderate track
872 m Return
30 mins
Easy track
892 m Return
30 mins
Moderate track
1.1 km Return
45 mins
Hard track
1.7 km Return
1 hr 15 mins
Hard track
2.3 km Return
1 hr 30 mins
Hard track
3.1 km One way
3 hrs
Hard track
3.1 km One way
3 hrs
Hard track
3.2 km One way
1 hr 45 mins
Moderate track
3.3 km Return
1 hr 30 mins
Moderate track
3.8 km Circuit
3 hrs
Hard track
4 km Return
2 hrs
Moderate track
4.4 km One way
3 hrs 45 mins
Hard track
4.8 km Circuit
3 hrs
Hard track
4.8 km Circuit
3 hrs
Hard track
5.8 km Circuit
5 hrs 30 mins
Hard track
6.6 km One way
4 hrs
Hard track
6.8 km One way
3 hrs 30 mins
Moderate track
8 km One way
5 hrs
Hard track
9.4 km Circuit
5 hrs 30 mins
Hard track
33.8 km Circuit
3 Days
Experienced only
Other Nearby walks
A list of walks that start near the Dardenelles Pass walk.
2.2 km Return
1 hr 30 mins
Moderate track
3.1 km Return
1 hr 30 mins
Moderate track
218 m Return
20 mins
Moderate track
254 m Return
15 mins
Moderate track
556 m Return
20 mins
Very easy
869 m Circuit
1 hr 15 mins
Hard track
1.5 km Circuit
1 hr 45 mins
Hard track
6.8 km Circuit
5 hrs
Hard track
1.7 km Return
3 hrs 45 mins
Hard track
2.1 km One way
1 hr 15 mins
Moderate track
1.2 km Return
2 hrs
Hard track
1.1 km Circuit
2 hrs
Hard track
Plan your trip to and from the walk here
The Dardenelles Pass walk starts and ends at the Echo Point Archway Intersection (gps: -33.731966, 150.31271)
Your main transport option to Echo Point Archway Intersection is by;
![]() Car. Parking fees apply in the area.
Car. Parking fees apply in the area.
(get details)
Short URL = http://wild.tl/dp
Gallery images
There are other downloads I am still working on.
You will probably need to login to access these — still all free.
* KML (google earth file)
* GPX (GPS file)
Special Maps/ brochures
* A3 topo maps
* PDF with Lands Topo map base
* PDF with arial image (and map overlay)
I wanted to get the main site live first, this extra stuff will come in time.
Happy walking
Matt 🙂
Mt Solitary and Kedumba Valley Circuit

3 Days
33.8 km Circuit
2863 m
Experienced only
On this 3 day walk you will explore some remote areas around the Kedumba Valley, and some of the most famous spots in the Blue Mountains. The walks starts at Scenic World to head down Furber Steps and follow the Federal pass past the Scenic Railway, the land slide, to an optional side trip up Ruined Castle. The walk then climbs steeply up to Mount Solitary to stay the night. The next day the walk heads steeply down to cross the Kedumba River then follows the trail through the valley to stay near Leura Creek. Day three brings you back to the federal pass, the up the Giant Stair case, past the Thee Sisters and some grand lookouts back to the start of the walk.* This walk passes through very remote areas and sections have no visible track. At least one person in your group should have training and experience in off track walking and navigation. Even with these notes and a GPS these extra skills and equipment are required.


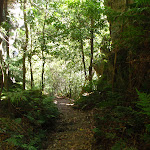

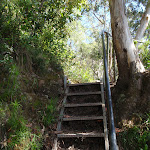
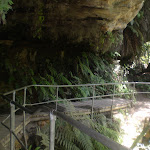

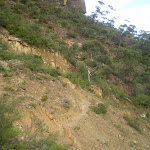


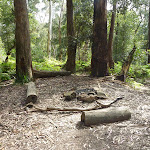
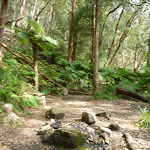
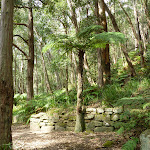


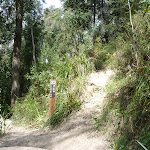

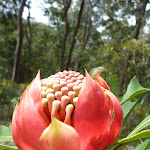


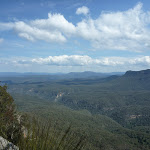


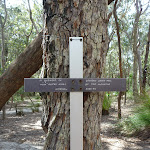
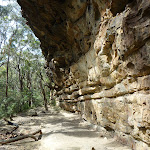

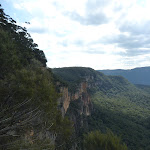
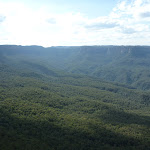


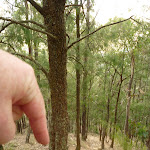


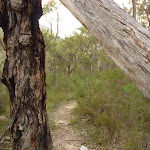


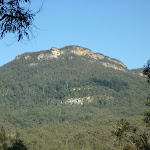


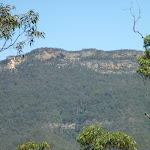
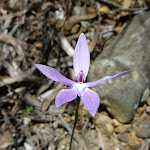
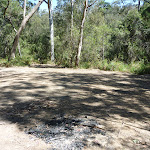

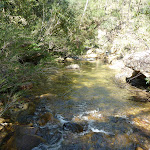


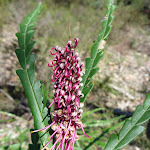
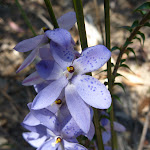


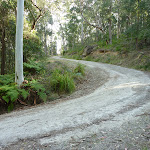


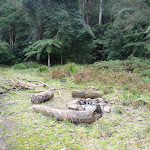

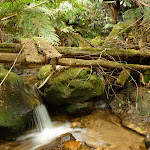


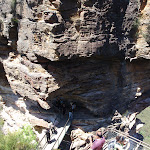
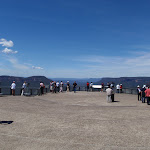
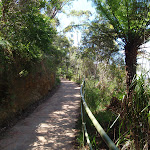
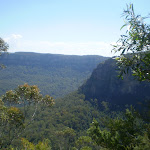


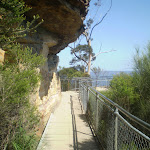

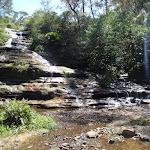


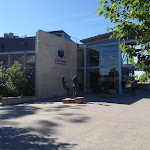
Scenic World
Scenic World is one of the most renowned tourist attractions of Katoomba and the Blue Mountains. Located on the cliffs of the Jamison Valley , visitors can enjoy a ride on the Scenic Railway (the world’s steepest incline railway) or the Scenic Cableway, into the Jamison Valley, and explore the Scenic Walkway from the base. Alternatively, the Scenic Skyway offers a bird’s eye view over the valley, with a glass floor to enhance the experience. Scenic World also features a revolving restaurant, a cafe and a kiosk, in addition to the documentary theatre and souvenir shop. Rides can be purchased, starting from $16 for adults and $10 for children, and combination or family passes are available. More info.
(0km) Scenic World → Int of Prince Henry Cliff Walk and Katoomba Falls Round Walk
170 m
4 mins
5m
-33m
Moderate track
From the Scenic World main entrance, this walk follows the ‘Prince Henry Cliff Walk’ signs down the concrete steps and around to the back of the building, where it comes to a wooden footbridge that curves around behind the main car park. At the end of the footbridge, this walk comes to an intersection with the Prince Henry Cliff Walk.
Continue straight: From the intersection, this walk follows the bush track down the gentle hill, winding down some wooden steps as the track bends around to the right. It then arrives at the signposted intersection of the ‘Prince Henry Cliff Walk’ and the track to the base of the Scenic Railway.
Continue straight: From the intersection, this walk follows the bush track down the gentle hill, winding down some wooden steps as the track bends around to the right. It then arrives at the signposted intersection of the ‘Prince Henry Cliff Walk’ and the track to the base of the Scenic Railway.
(0.17km) Int of Prince Henry Cliff Walk and Katoomba Falls Round Walk → Vanimans Lookout
40 m
1 mins
0m
-16m
Hard track
Turn right: From the intersection, this walk heads down the steep wooden steps, following the signs to the bottom of the Scenic Railway. The walk comes to the intersection of Vanimans Lookout at the bottom of the steps.
Vaniman’s Lookout
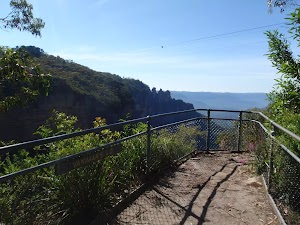
Vaniman’s Lookout is a fenced, long and narrow lookout on the cliff edge, opposite Reids Plateau. The view looks directly over the Three Sisters across the Kedumba Valley, under the Scenic Skyway. The lookout was considered one of the finest views on the Three Sisters in the 1900’s. The lookout was named after Chester Melvin Vaniman in 1905, a well-know adventurer and artist from the USA, who visited the Blue Mountains in 1903. More info.
(0.21km) Vanimans Lookout → Int of Katoomba Falls Round Walk and Juliets Balcony Track
110 m
3 mins
4m
-11m
Hard track
Turn right: From Vanimans Lookout, this walk follows the bush track heading away from the bottom of the wooden steps. The track winds around the side of the hill and down the steep metal stairs. At the bottom, the walk comes to the intersection of the Katoomba Falls Round Walk and Juliets Balcony track (unsignposted).
(0.32km) Int of Katoomba Falls Round Walk and Juliets Balcony Track → Juliets Balcony
10 m
1m
0m
Moderate track
Veer right: From the intersection, this walk heads up the short set of wooden steps, winding up to the raised rock platform, and along the bush track to the edge of the fenced-off rock shelf. At the end of this side trip, retrace your steps back to the main walk then Turn right.
Juilets Balcony
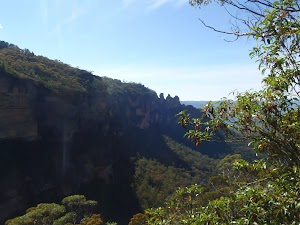
Juliets Balcony is a spectacular lookout, perched on top of a rock buttress near Orphan Rock, under the Scenic Skyway. The lookout provides sweeping views of the start of the Kedumba Valley, from Katoomba Falls to the Three Sisters. The lookout is accessed by a staircase, off the Furber Steps track. The fenceline continues along the lookout, forming a long, fenced balcony.
(0.32km) Int of Katoomba Falls Round Walk and Juliets Balcony Track → Int of Katoomba Falls Round Walk and Furber Steps
60 m
1 mins
3m
-4m
Moderate track
Veer left: From the intersection, this walk follows the long set of wooden steps winding down the side of the hill. After this, the walk flattens out for a short distance then continues up a short set wooden steps to the intersection of the Round Walk and the Furber Steps track.
(0.38km) Int of Katoomba Falls Round Walk and Furber Steps → Rainforest Lookout
10 m
0m
-1m
Moderate track
Turn right: From the intersection, this walk follows the ‘Base of Scenic Railway’ signpost down the wooden steps to the bottom, where it comes to the Rainforest Lookout.
Rainforest Lookout
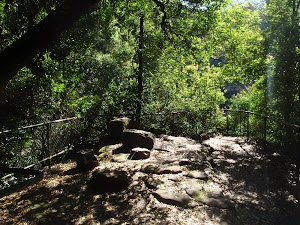
Unlike many lookouts in the area, Rainforest Lookout does not offer sweeping valley views. Instead, this lookout offers an opportunity to get up close and personal with the canopy of the rainforest. Spend some time in the cool shade listening to the birds and Witches Leap creek passing by. A sign at the lookout explains that there once were wood-fired barbeques here for picnics, but removed due to the toll on the local environment[3].
(0.39km) Rainforest Lookout → Int of Furber Steps and Katoomba Falls Lookout Track
20 m
1m
0m
Moderate track
Turn right: From the Rainforest Lookout, the track follows the bush track heading past the base of the wooden steps and then through the forest for a short while, until it reaches the signposted intersection of the Underfalls Walk.
(0.41km) Int of Furber Steps and Katoomba Falls Lookout Track → Katoomba Falls
180 m
6 mins
1m
-67m
Easy track
Turn left : From the intersection, this walk follows the ‘Underfalls Walk’ sign down a short set of steps and across a small waterfall using the wooden bridge (This creek flows from Witches Leap all the way down to Veras Grotto). Once past the falls, the track continues through the rainforest, winding along the well-defined path until arriving at Katoomba Falls Lookout, right at the base of the falls. At the end of this side trip, retrace your steps back to the main walk then Turn left.
Rainforest Lookout
Unlike many lookouts in the area, Rainforest Lookout does not offer sweeping valley views. Instead, this lookout offers an opportunity to get up close and personal with the canopy of the rainforest. Spend some time in the cool shade listening to the birds and Witches Leap creek passing by. A sign at the lookout explains that there once were wood-fired barbeques here for picnics, but removed due to the toll on the local environment[4].
(0.41km) Int of Furber Steps and Katoomba Falls Lookout Track → Queen Victoria Lookout
30 m
1 mins
1m
-1m
Easy track
Continue straight: From the intersection, this walk follows the ‘Scenic Railway’ sign along the bush track, winding through the forest for a short while before passing a large rock overhang with a wooden bench seat underneath. The walk continues down a set of stairs until reaching the signposted ‘Queen Victoria Lookout’.
(0.44km) Queen Victoria Lookout → Int of Furber Steps and Lynes Point Track
10 m
0m
-1m
Moderate track
Continue straight: From the intersection, this walk heads up the short metal staircase to the intersection of the Queen Victoria Lookout at the top.
(0.45km) Int of Furber Steps and Lynes Point Track → Furber Lookout
30 m
1 mins
0m
-7m
Moderate track
Turn right: From the intersection, this walk follows the bush track heading away from the short metal staircase, winding along the side of the hill to the top of some concrete steps where there is a ‘Furber Steps’ signpost. From here, the walk continues down the concrete steps for a short distance until it comes to the signposted ‘Furber Lookout’.
(0.48km) Furber Lookout → Int of Furber Steps and Vera’s Grotto Track
90 m
7 mins
17m
-84m
Hard track
Continue straight: From the Furber Lookout, this walk heads down the concrete steps that zigzags steeply down to the bottom of the cliffs. The track then flattens out and continues through the forest with the hand railing on the right, crossing a short boardwalk and coming down to the signposted intersection of the Vera’s Grotto track.
(0.57km) Int of Furber Steps and Vera’s Grotto Track → Vera’s Grotto
30 m
3 mins
27m
-3m
Easy track
Continue straight: From the intersection, the walk follows the ‘Vera’s Grotto’ sign along the bush track, winding down a set of wooden steps to Vera’s Grotto Lookout at the bottom. At the end of this side trip, retrace your steps back to the main walk then Turn left.
Vera’s Grotto

Vera’s Grotto is a pleasant little spot located amongst the cascades on Witches Leap creek. This is a great area for lunch on a hot day, as it is always kept cool by the falls and the shade from the surrounding trees. When venturing to the grotto, you may be lucky enough to spot the Whistler and Yellow Robins. Superb Lyrebirds are also heard and even seen frequently in the surrounding area.
(0.57km) Int of Furber Steps and Veras Grotto Track → Int of Furber Steps and Scenic Railway Track
130 m
6 mins
5m
-75m
Hard track
Turn right: From the intersection, this walk goes down the stairs. These zigzag down the hill and, at several points, go under overhangs in the cliff. The walk continues steeply downhill (occasionally on metal stairs) until reaching an intersection with a bush track signposted ‘Federal Pass’.
(0.7km) Int of Furber Steps and Scenic Railway Track → Scenic Railway (Bottom Platform)
170 m
4 mins
10m
-15m
Easy track
Turn right: From the bottom of Furber Steps, this walk follows the ‘To base of scenic railway’ sign keeping the handrail on the left, and following the flat bush track. This track passes through a small gate over a metal bridge at the bottom of the Scenic Railway.
(0.87km) Scenic Railway (Bottom Platform) → Landslide
1.3 km
46 mins
175m
-178m
Moderate track
Continue straight: From the bridge over the bottom of the Scenic Railway, this walk follows the signs to ‘scenic walkway’, passing a replica of a mining cart, as well as an old mine. Just past this, the walk comes to a pipeline that runs down the hill collecting fresh water, signposted as drinkable. Continuing past the old mine shafts along the boardwalk, this walk comes to an intersection with a bush track going slightly off to the right. This is signposted as the way to the Landslide.
Continue straight: From the intersection, the walk follows the wide track and signposts towards the ‘landslide’[6] (keeping the cliffs on the right). The walk winds along a bush track with small boulders strewn along it. There are a number of old mine shafts just off the track and some interesting historical items. The track continues under Malaita Point before breaking out of the vegetation to a worthy view of the valley, just before the landslide. As the track comes to the old landslide site, it become rougher with plenty of boulders over the track. There are also excellent views of the cliffs above and the landslide as the vegetation is quite sparse here.
Continue straight: From the intersection, the walk follows the wide track and signposts towards the ‘landslide’[6] (keeping the cliffs on the right). The walk winds along a bush track with small boulders strewn along it. There are a number of old mine shafts just off the track and some interesting historical items. The track continues under Malaita Point before breaking out of the vegetation to a worthy view of the valley, just before the landslide. As the track comes to the old landslide site, it become rougher with plenty of boulders over the track. There are also excellent views of the cliffs above and the landslide as the vegetation is quite sparse here.
The Landslide
‘The Landslide’ is a large rockfall going into the valley approximately 100m. There is a good vantage point for the landslide from under the cliffs to the east, and a great but more distant view from Narrow Neck lookout. The landslide occurred in 1931 after a few days of rumbling. There has been much debate as to whether this event was helped along by erosion and coal mining in the area at the time.
(2.21km) Landslide → Bottom of Golden Staircase
1.6 km
42 mins
128m
-123m
Moderate track
Continue straight: From the eastern side of the Landslide, the walk heads across the face of the landslide (keeping the cliff on the right). At this point, the track is quite rough, with frequent boulders making it a slight scramble. On the other side of the landslide, the track narrows and becomes a flat bush track that follows the base of the cliffs. The surrounding trees become quite dense again, adding quite an ambiance to the area. The walk heads along the bottom of the Narrow Neck escarpment, until coming to an intersection with a set of stairs off to the right, signposted as the ‘Golden Staircase’.
(3.76km) Golden Stairs Track carpark → Bottom of Golden Staircase
640 m
27 mins
50m
-257m
Hard track
Continue straight: From the Golden Stairs car park and information sign on Glenraphael Dr[7], the walk follows the ‘Golden Stairs / To Federal Pass’ sign[8] along the narrow track. The track leads gently downhill[9] past the black and yellow ‘Warning – Sections of the Golden Stairs are unfenced and can be slippery when wet’ sign[10], with the occasional glimpse out to Malaita Point and towards the Three Sisters[11][12]. The walk soon heads down a few steep eroded sections of track[13] and passes through a couple of switchbacks. The track then leads to a fenced rock platform[14] signposted as ‘Botting’s L.O.’[15].
Turn right: From the lower side of Botting’s Lookout[16], this walk heads downhill along the eroded track[17]. The walk follows the steps through a narrow gully[18] then turns right to flatten out[19] and head under a small overhang between the cliff and fence (passing a ‘Caution Rockfall Hazard’ sign[20]). After about 100m of fence, the track turns right to cross a wide gully[21]. On the other side of the gully, this walk climbs down a series of metal[22] and stone[23] staircases. The walk flattens again before heading down another series of stairs. Finally, the track winds down the wide spur[24] to meet the signposted T-intersection with ‘Federal Pass’[25]. Now Turn right to join the main walk.
Turn right: From the lower side of Botting’s Lookout[16], this walk heads downhill along the eroded track[17]. The walk follows the steps through a narrow gully[18] then turns right to flatten out[19] and head under a small overhang between the cliff and fence (passing a ‘Caution Rockfall Hazard’ sign[20]). After about 100m of fence, the track turns right to cross a wide gully[21]. On the other side of the gully, this walk climbs down a series of metal[22] and stone[23] staircases. The walk flattens again before heading down another series of stairs. Finally, the track winds down the wide spur[24] to meet the signposted T-intersection with ‘Federal Pass’[25]. Now Turn right to join the main walk.
(3.76km) Bottom of Golden Staircase → Miners Campsite
2.3 km
51 mins
104m
-129m
Moderate track
Continue straight: From the intersection, this walk follows the ‘Federal Pass – Ruined Castle’ sign[26] along the flat wide track, keeping the valley to your left. This track follows the old horse-drawn coal tram route. The track leads through a tall rainforest filled with fern trees[27] and vines[28], with the occasional lyrebird. After about 1.3km the forest opens up[29], letting in more light and exposing some distant filtered views. After wandering through the more open forest[30] for about 250m, the track passes a small campsite[31] (on the right). This walk continues for another 700m along the main track through the bracken fern forest[32] to find a larger campsite[33] (just up to the right) with a short stone wall on one side[34]).
Miners Campsite
This flat campsite beside the Federal Pass walking track about 2.2km south of the intersection at the bottom of the Golden Stairs. There is short constructed stone wall[35] left over from when there area was habited by miners. The campsite is surrounded by a tall forest, bracken ferns and some nice fern trees. There is no water or facilities.
(6.02km) Miners Campsite → Northern Ruined Castle campsite
300 m
7 mins
16m
-11m
Moderate track
Continue straight: From the miners campsite[36], this walk follows the clear track south-west, keeping the valley to your left. The mostly flat track narrows a bit as it leads past a large flat area (on your right) after about 140m[37], then past a smaller campsite[38] a short distance later. The track then winds through the forest for another 100m to come to a clearing and signposted three-way intersection[39], where there is a ‘Federal Pass – Katoomba’ sign[40] pointing back along the track. (There is a campsite a few metres further on and to the the left[41].)
Northern Ruined Castle campsite
A short distance south east of the intersection[42] with the Federal Pass and the northern access track to the Ruined Castle, is a fairly large basic campsite. There are two main flat areas for camping, both with fire scares[43]. The area is surround with tall trees and ferns[44][45][46][47]. There is no water nor any other facilities.
(6.32km) Northern Ruined Castle campsite → Ruined Castle
730 m
20 mins
82m
-17m
Hard track
Turn right: From the intersection, this walk follows the ‘Ruined Castle’[48] sign uphill along the eroded track and soon passes the yellow ‘Warning – Remote area indistinct route steep terrain – Exposed climbing loose surfaces – No reliable water Carry plenty Sterilise any water found on route’ sign[49]. The track winds up the wide valley getting steeper as it goes, climbing up onto the main ridgeline. Here the walk turns left (away from the view of Castle Head[50]) and follows the rocky track more gently uphill for about 220m to pass under the side of a large boulder[51]. The track continues along the narrow ridge for about 280m, with some filtered views past another large boulder to the base of the tall Ruined Castle summit[52]. Here the walk heads gently down a bit (keeping the rock wall to your left), past a crevice[53], then follows the main track to the other (southern) side of the summit. The track then heads up again to find a number of rocky pinnacles[54]. At the end of this side trip, retrace your steps back to the main walk then Turn right.
The Ruined Castle
A formation jutting out of the Jamison Valley, the Ruined Castle has great views of the Jamison Valley from Katoomba to Leura. It is also possible to see Mt Solitary to the south-east.
(6.32km) Northern Ruined Castle campsite → Ruined Castle mine campsite
550 m
12 mins
12m
-31m
Moderate track
Continue straight: From the intersection, this walk follows the ‘Mount Solitary’ sign[55] past the campsite (on your left) and past the ‘Warning – Remote area indistinct route steep terrain – Exposed climbing loose surfaces – No reliable water Carry plenty Sterilise any water found on route’ sign[56]. This walk continues along the mostly flat track, passing through a tall turpentine forest[57] for about 450m where you come into view of a campsite[58] (down to your left). The walk continues a short distance further, coming to an intersection[59] where there is a fair amount of coal on the ground[60], a campsite down to your left[61] and the entrance to an old small coal mine[62] (behind a rock) on your right.
Ruined Castle mine campsite
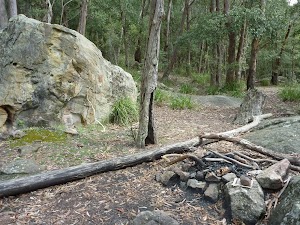
This campsite is almost due east of Ruined Castle, just off the track that leads around the base of hill. The campsite is down a short but steep bank near the site of an old mine[63]. The are a few campsites scattered along the flat area, mostly surrounded by some tall stringy barks. There are a few fire scars and some filtered valley views. A pleasant spot to stay. There was once a water spring nearby, but this is no longer reliable, you will need to carry in your own water.
(6.88km) Ruined Castle mine campsite → Intersection South of Ruined Castle
380 m
11 mins
10m
-46m
Moderate track
Continue straight: From the intersection, this walk follow the main track south-east, initially keeping the campsite and valley to your left. The track initially heads down a short rocky section[64] then flattens out to pass a large square boulder[65] after about 100m. The track continues through ferny forest for just over 200m, then passes another campsite[66] (down a steep hill to your left), and about 30m further on, comes to a signposted intersection where a ‘Katoomba’ arrow[67][68] points back along the track.
(7.26km) Intersection South of Ruined Castle → Bottom of Korrowall Knife-edge
1.3 km
35 mins
132m
-38m
Hard track
Continue straight: From the intersection, this walk follows the ‘Mount Solitary’ sign[69] gently downhill along the fairly narrow track[70], keeping the main valley to your left. After about 300m, the more eroded and rocky track[71] begins to climb the ridge and after climbing for just shy of 300m, the track flattens out and passes a couple of small clearings[72][73] – the second clearing is just past where the track leads downhill. Just after the second clearing (used as a campsite[74]), the track begins to climb up the ridge again[75]. This track climbs up a few rocky eroded section and soon comes to the base of a tall series of rockwalls – the Korrowall Knife-edge[76].
(8.59km) Bottom of Korrowall Knife-edge → Corowal Plateau campsite
650 m
31 mins
205m
-17m
Experienced only
Continue straight: From the base of the rocks[77], this walk starts the arduous climb up the Korrowall Knife-edge. Ascending the Korrowall Knife-edge is a hard climb, vertical in places and much of the climbing will involve both hands – some people use ropes to help lift heavy packs. This walk initially heads around to the left of the first boulder to head up through the eroded steep valley[78] between the rocks. The walk continues to scramble up the side of the rocks[79], then climbs vertically up a crack in the rock[80] to a small flat area[81], offering the first distant view[82] for this climb. The walk continues by climbing up a 3m rock wall[83], then up the eroded track[84] before climbing up through the obvious gap[85] in the next rock wall. At the top of this climb is another great view[86] and a short distance further up, this faint track passes a rock with a hole/cave[87] (on your right). From here, the walk follows the worn track up through a couple more rock gullies[88], still generally keeping the rock wall to your right (and passing a couple of arrows[89]). This brings the walk to an exposed flat area, with red dirt and fantastic views[90]. The walk continues by climbing up through the next eroded gully[91] to the top of the Korrowall Knife-edge, where there is a large rock wall on your left[92].
Continue straight: From the top of Korrowall Knife-edge, this walk heads south following a worn track that initially heads steeply down beside the large rock wall[93] (keeping the wall to your left). The track passes a small cave[94] at the base of this cliff then climbs up beside the cliff[95] to the top of the ridge[96], past the rocks[97] to find a view to the left[98]. Here the faint track veers right[99] to follow along the base of another cliff[100]. The walk then heads up a short but steep climb[101], where a short flat walk[102] leads to a fantastic view on your right, looking over Cedar Creek valley to Narrow Neck[103]. After following this faint track a further 60m south along the base of another cliff[104], this walk then climbs up the middle of a steep gully [105] – just past the top of this climb, the track bends sharp left and leads up[106] the hill for about 50m to enter a lovely she oak forest[107], a clearing[108] and the Corowal Plateau campsite[109].
Continue straight: From the top of Korrowall Knife-edge, this walk heads south following a worn track that initially heads steeply down beside the large rock wall[93] (keeping the wall to your left). The track passes a small cave[94] at the base of this cliff then climbs up beside the cliff[95] to the top of the ridge[96], past the rocks[97] to find a view to the left[98]. Here the faint track veers right[99] to follow along the base of another cliff[100]. The walk then heads up a short but steep climb[101], where a short flat walk[102] leads to a fantastic view on your right, looking over Cedar Creek valley to Narrow Neck[103]. After following this faint track a further 60m south along the base of another cliff[104], this walk then climbs up the middle of a steep gully [105] – just past the top of this climb, the track bends sharp left and leads up[106] the hill for about 50m to enter a lovely she oak forest[107], a clearing[108] and the Corowal Plateau campsite[109].
Corowal Plateau campsite
The Corowal Plateau campsite is an informal campsite at the north eastern end of Mount Solitary. The clearing is set among some pleasant casurina forest. There are a few campfire scares, although this is in a fuel stove only area. There is plenty of flat area but there is no water source or any other facilities.
(9.24km) Corowal Plateau campsite → Chinamans Gully Campsite
820 m
19 mins
8m
-120m
Hard track
Veer right: From the campsite[110], this walk heads south-east, following the mostly flat track along the top of the ridge through the she oak forest[111]. After about 200m, this walk enters a banksia forest[112], and continues along the flat ridge (past a few impromptu campsites) for about 400m, where the track begins to head downhill[113]. The track winds downhill for about 170m (passing a track on your left) and comes to a large flat saddle[114] and clearing with a large rock wall, Chinamans Gully Campsite[115].
Chinamans Gully Campsite
Next to a small creek (often dry) and sheltered from the winds, this campsite is great for those wanting to camp on Mt Solitary. For daywalkers, this spot offers the chance to rest under the overhangs of the cliffs before continuing. Water here is not reliable, please note that in the past water was more reliable, but not so now. Please carry plenty of water. There is a camping area near the beginning of the track and there are also a few spots along the gully where people have camped previously.
(10.06km) Chinamans Gully campsite → Chinamans Gully view
390 m
8 mins
0m
-50m
Experienced only
Turn left : From Chinamans Gully campsite, this walk follows the track north[116], keeping the rock walls to you right[117]. The track soon starts to head gently downhill, keeping the small gully on your left and passing through a number of sandstone camping caves[118][119]. The track then heads left to follow the gully downhill[120] for about 150m, and comes to a small clearing and campsite[121] at the junction of two creeks. The track then crosses the side creek[122] and heads gently up the side of the hill[123], coming to an unfenced filtered view up the Kedumba Valley to Katoomba[124]. At the end of this side trip, retrace your steps back to the main walk then Turn left.
(10.06km) Chinamans Gully campsite → Campsite View
60 m
2 mins
0m
-14m
Experienced only
Turn sharp right: From Chinamans Gully campsite, this walk follows a faint track south, keeping the main rock wall immediately to your left[125]. The track soon bends right[126] and heads up onto a rock platform[127], suddenly coming to the top of an unfenced cliff with stunning views south[128]. This point is sometimes called ‘Melvilles Lookout’, but there is some debate as the name appears in different places on different maps. At the end of this side trip, retrace your steps back to the main walk then Turn right.
End of day 1
This is the planned overnight stay for the end of day 1, happy camping.
(10.06km) Chinamans Gully campsite → Singa-Jingawell Creek Campsite
1.8 km
55 mins
179m
-206m
Experienced only
Continue straight: From the large campsite at the top of Chinamans Gully, this walk heads east up the gully[129], initially keeping the large main rock to your right (and Chinamans Gully to your left). The track leads up the short gully[130] to the top of the rock, where there is a filtered view[131](to your right). This walk follows the track as it winds up the hill for about 130m, passing another great view[132] (on your right). The track then mostly flattens out, following the top of the ridge for another 500m to pass a small campsite[133]. About 200m past this campsite, the track then passes a short track (on your left that provides great unfenced views over the Kedumba Valley[134]). Over the next 400m, the track continues east, fairly closely to the northern face of Mount Solitary, with the occasional gap in the trees to provide great views. The track alternately rises and falls, and passes the (not very noteworthy) summit[135] of Mount Solitary. From here, the track starts to lead down[136] a ridge, passing a few filtered views over about 500m, then comes to a large campsite[137], with a rock platform[138] (up to the left) that provides even more views[139].
Singa-Jingawell Creek Campsite
Singa-Jingawell Creek Campsite is near the northern wall, partway across the eastern half of Mount Solitary. The informal campsite sits in a pleasant little depression beside the small, usually dry creek. There is a rock platform at the top of the campsite that provides great views[140] up the Kedumba River towards Katoomba. There is a large fire scare[141], but this is in a fuel stove only area, so please avoid lighting any campfires. The creek gets a small amount of water in it after rain, but it does not last long, so always best to bring your own.
(11.87km) Singa-Jingawell Creek Campsite → Solitary Pass
1.2 km
29 mins
61m
-105m
Experienced only
Continue straight: From Singa-Jingawell Creek Campsite, this walk heads south-east, initially keeping the rock wall to your left. After about 80m, this walk stays left (ignoring the track that crosses the creek). Here the track climbs the fairly short hill then follows the ridgeline for just over 100m to climb up the gully[142] beside the large rock formation[143], then climbs up a rock wall[144] (about 2-3m tall). There are some views (to the right) over Singa-Jingawell Creek valley[145]. The rocky track continues east for about 500m and then turns right, coming to a small ridgetop campsite[146] just over 100m later. Shortly after this campsite (just before a large rocky outcrop[147]), the walk turns left and starts to lead down the ridgeline, quite steeply in places[148], for about 250m and finds an intersection in a saddle, with a steep gully[149] on your left and a short climb to a rocky viewpoint[150][151] (and logbook[152][153]) straight ahead.
(13.05km) Solitary Pass → Int of Kedumba Camping and Solitary Tracks
1.2 km
40 mins
11m
-428m
Experienced only
Turn left : From the saddle, this walk follows the eroded track very steeply down the gully[154] to the north. The track soon bends right[155] around the base of the cliff to find the ridge[156]. The walk follows the steep eroded track down the ridge for about 300m to where the track flattens out for a short time[157], then turns left to wind down through the casuarina forest[158]. The track winds down through this casuarina forest, very steeply and slippery in places[159] for about 800m, (turning right at the faint track intersection partway down) heading east to a flat area, campsite[160] and signposted intersection, where a ‘Mount Solitary’ sign[161] points back up the hill.
(14.25km) Int of Kedumba Camping and Solitary Tracks → Kedumba River
1.4 km
31 mins
2m
-206m
Hard track
Continue straight: From the intersection and campsite[162], this walk follows the ‘Kedumba Pass’[163] and ‘Kedumba River’[164] signs west, gently downhill along the ridge. After about 600m, just after passing between some boulders[165], the track starts to steepen[166] and leads down towards the views of the cliff[167] (on the far side of the valley), then mostly flattens out again[168]. This track then steeply descends[169] again, until the track bends right and comes to a beach on the south (western) side of the Kedumba River[170]. Here the walk crosses the river[171] (usually lower-shin deep, this river has a large catchment and may be impassable after rain). Once on the other side, this walk comes to a rocky beach and climbs over a large fallen tree[172] to see the main track continuing ahead and a little to the left (sometimes marked with a cairn[173]). There is a place that has been used as a campsite a short distance upstream[174] (not safe if there is a chance of the river rising), or there are a few alternative places to camp up the embankment[175].
Kedumba River Campsite
This campsite is next to the Kedumba River, along the Mount Solitary walking track. This is a large clearing and basic campsite. Open fires are not permitted so it is necessary to take a fuel stove. There is normally plenty of water in the creek, but it should be treated for drinking. There are no facilities.
(15.65km) Kedumba River → Int of Kedumba River track and Sublime Point trail
2.2 km
1 hr 8 mins
345m
-17m
Hard track
Continue straight: From the Kedumba River crossing, this walk follows the track (sometimes marked with a rock cairn[176]) north, up the embankment and away from the river. The track soon bends left and leads around the side of the flat area with a nice blue gum stand[177]. The track then starts to climb, steeply at first[178], for about 400m (passing some views back to the cliffs of Mount Solitary[179]) before flattening out[180]. The track then leads gently up through the open forest[181] for about 800m, where it then leads gently down to cross a small gully[182][183]. The track continues up the main ridge for another 400m then along the side of a narrow steep gully[184] (on your left). Near the top of this gully, the track turns left to cross the now small gully[185]. The track now leads north for a little while around the ridge and climbs the hill for another 500m, passing through a ferny forest, to find a yellow ‘warning’ sign[186]. From this sign, the track leads left and up the bank, coming to an intersection with the Sublime Point management trail, where a ‘Mount Solitary’ sign[187] points back along the track.
(17.84km) Int of Sublime Point trail and Kedumba Valley Rd → Jamison Creek Crossing
3.1 km
1 hr 5 mins
28m
-311m
Moderate track
Turn left: From the intersection, this walk follows the ‘Leura’ sign[188] downhill along the wide management trail. The trail soon crosses a concrete ford then leads up a short hill. The trail then winds down through the tall wooded forest for about 1km to cross a culverted creek[189]. The steeper sections of this trail have been concreted. The trail continues to wind downhill for another 500m, to some good views (left) to the cliffs of Mount Solitary[190]. Over the following 600m, the trail passes through some sharp bends, then heads along the side of a steep gully[191] (on your left). As the trail continues down, it crosses a saddle, after which it has a steep gully[192] on the right. The trail then leads down the side of this gully to pass a small clearing (used as a campsite)[193], and come to a ‘Jamison Creek’ sign[194], just before the creek[195].
Jamison Creek campsite
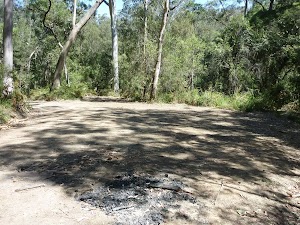
(20.99km) Jamison Creek Crossing → Leura Falls Creek Crossing
3.9 km
1 hr 36 mins
275m
-192m
Hard track
Continue straight: From the Jamison Creek sign[200], this walk crosses Jamison Creek on the concrete ford[201] (usually ankle deep). Warning – this river may be impassable after rain, depth indicators are present[202]. On the other side, the trail bends right and leads uphill for just over 1km to come to a flat open saddle with great views over the valley to the Three Sisters[203] and also much of the surrounding escarpment[204]. From here, this walk continues along the trail as it winds generally downhill for almost 3km, with the steeper sections concreted. As the trail approaches Leura Falls Creek crossing, it winds down into a deep cool gully[205], passing through several sharp bends. Just before the creek, there is a clearing[206] and campsite[207] (on your left), then the trail comes to a ‘Leura Creek – Dont drink water’ sign[208], just before the concrete ford[209].
Leura Falls Creek Crossing
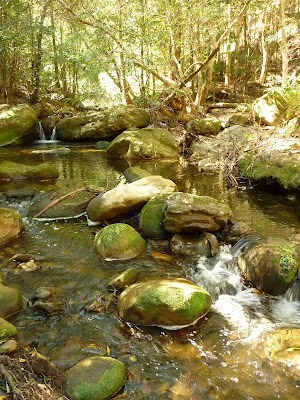
Just on the eastern side of Leura Creek is a fairly large clearing[210] near the tight bend in the management trail. This informal campsite is set along the tall wooded forest and has close access to ‘Leura Creek’[211][212][213], a pleasant spot to cool of on a hot day. The creek flows from near the old sewage treatment plant and also has run off from townships, so treat the water well before use. This informal campsite is still just inside the Blue Mountains National Park boundary.
End of day 2
This is the planned overnight stay for the end of day 2, happy camping.
(24.9km) Leura Falls Creek Crossing → Old STP site
4.2 km
1 hr 52 mins
438m
-103m
Hard track
Continue straight: From the sign[214], this walk heads down and crosses Leura Falls Creek on the concrete ford[215] (usually ankle deep). Warning – this creek may be impassable after rain, depth indicators are present. The trail then winds uphill steeply at first and after about 1km, the trail comes to a particularly wide section[216] (with ‘special area’ signs[217], pointing back) with good views up to the Three Sisters[218]. This walk continues along the trail as it starts to head fairly consistently uphill again for another 1.5km, until mostly flattening out just past the large square boulder[219]. Here, the trail bends right (ignoring the faint track on your left[220]) and gently undulates along the side of the hill for about 300m to pass below the Three Sisters[221] (visible up to your left). After another 300m, the trail crosses a concrete ford[222], then just over 100m later, passes another narrow track[223] (on your left). Continuing along the trail for another 600m, this walk comes to the edge of a large clearing[224] with great views up to the surrounding cliffs. Here the walk heads around the revegetating site of the sewage treatment plant, following the now grassy trail[225] up to the left, to a flat area[226] with a campfire scar[227] (just before the trail leads into the dense fern forest[228]).
Old South Katoomba STP site
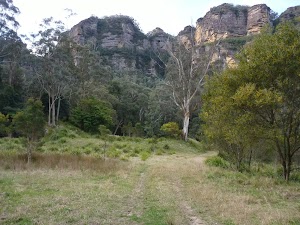
This area, currently under rehabilitation, is the site of the old South Katoomba sewage treatment plant (STP). This and other nearby STP’s were decommissioned in the mid 1990’s. The clearing provides great views of Leura’s escarpment[230] to the north and is surrounded by a dense forest with fern trees[231]. This site is managed by Sydney Catchment Authority, and is outside the boundaries of the Blue Mountains National Park. This area is used occasionally as a campsite, and there are a couple of campfire scares[232]. There are a few creek along the track north west of the clearing, but any water in the area should be treated well before use.
(29.13km) Old STP site → Lower Linda Creek Falls
550 m
16 mins
71m
-4m
Hard track
Continue straight: From the top of the old STP site, this walk follows the old trail uphill and into the dense fern forest[233]. The old trail narrows[234] to a track as it winds up through the moist forest and after about 240m, this walk bends right and crosses a small gully[235] (ignoring the track up to the left[236] just before the gully). The track then bends left and passes a metal vent post[237] (on your right) under a fallen tree[238], then continues uphill for about 200m where the track leads across a small creek (just downstream of an old timber bridge)[239]. The track continues up the side of the hill for about 20m, passing a couple of concrete pipe maintenance holes[240][241] to come to a large concrete maintenance point[242] (in view of some small falls to your right[243]). Here the walk turns very sharply left[244], stepping up a short way. This walk follows the track around the side of the hill for about 60m to come to a signposted intersection with the ‘Federal Pass’[245] just in front of a small waterfall[246].
(29.68km) Lower Linda Creek Falls → Leura Forest
300 m
10 mins
50m
-9m
Moderate track
Turn left: From the intersection, this walk crosses Linda Creek just below a pleasant cascade[247] using the foot bridge with a handrail[248]. This walk then continues along the bush track that winds along the valley floor, to the signposted ‘Leura Forest’. From here, the walk continues along the wide bush track, passing a few picnic tables, and winding through the forest to an open area with a large gazebo and an information sign at the intersection of the Federal Pass and the Dardenelles tracks.
Leura Forest
Leura Forest is a great picnic area in the Jamison Valley at the junction of the Federal Pass and Dardenelles Tracks. This place was home to a popular tea house (also known as ‘Lady Carrington Dining Hall’) from the late 1800’s[249]. Today walkers can still enjoy the historic rotunda and the foundations of the original tea house[250]. The picnic area provides a great rest spot under the shade of the lilli pilli and coachwood forest.
(29.98km) Leura Forest (Int of Federal Pass and Dardenelles Tracks) → Bottom of Giant Staircase
870 m
27 mins
108m
-89m
Hard track
Turn right: From the pergola at Leura Forest, this walk follows the ‘Dardenelles Track’ sign (the sign is up the hill behind the pergola) which heads up the stairs towards the cliff face, before turning left behind Leura Forest. The walk then leaves the shade of the forest, along a track with many fallen logs, until coming to the base of the Giant Staircase (signposted).
(30.85km) Bottom of Giant Staircase → Top of the Giant Staircase
240 m
23 mins
182m
-20m
Hard track
Turn right: From the intersection, the walk follows the sign up the ‘Giant Staircase’. This climbs steeply (with handrails) until coming to an intersection with a bridge that goes across to the First of the three Sisters. Along the way, there are chairs in which to rest from the climb and enjoy the magnificent views of the valley.
Veer right: From the bridge, the walk heads up the staircase steeply to the top. The stairs have handrails and climb up the side of the cliffs to the intersection with the Lady Game Lookout track.
Veer right: From the bridge, the walk heads up the staircase steeply to the top. The stairs have handrails and climb up the side of the cliffs to the intersection with the Lady Game Lookout track.
(31.09km) Top of the Giant Staircase → Oreades Lookout
40 m
2 mins
21m
0m
Easy track
Turn right: From the intersection, the walk follows the footpath up and away from the lookout, passing under a rock archway and continuing up the gentle hill to the intersection with the Cliff Drive access track.
Continue straight: From the intersection, this walk heads up the stone/concrete steps on the main path to almost immediatly find an unnamed, fenced lookout platform[251] (on the left).
Continue straight: From the intersection, this walk heads up the stone/concrete steps on the main path to almost immediatly find an unnamed, fenced lookout platform[251] (on the left).
(31.13km) Oreades Lookout → Int of Prince Henry Cliff Track and the Three Sisters Footpath
110 m
3 mins
18m
-2m
Easy track
Continue straight: From Oreades Lookout, this walk heads uphill along the path for about 30m to pass a stone seat
(on the right), in a small sandstone overhang[252]. Check the miniature cicada sculptures[253] above the overhang. From here the walk leads moderately steeply
uphill along the smooth concrete path[254] for about 90m[255], to come to a clear intersection marked with a large ‘Three Sisters Walk’ sign[256]. On the left is a small flat loose gravel area with two seats
.
(31.24km) Int of Prince Henry Cliff Track and the Three Sisters Pathway → Echo Point Archway Intersection
300 m
7 mins
19m
-8m
Easy track
Continue straight: From the intersection, this walk follows the large ‘Echo Point’ sign[257] uphill along the smooth concrete path. The path leads uphill for about 45m
to find a sandstone seat (on the right)
to find a sandstone seat (on the right)
. From here the path continues winding gently uphill for another 70m to pass another sandstone seat (on the right)
. From this seat the path continues gently uphill for another 60m past yet another similar stone seat
(on the right), this seat has a blue tongue lizard sculpture[258]. After another 15m
this walk comes to a clear signposted Y-intersection[259].
Continue straight: From the intersection, this walk follows the ‘Katoomba & Echo point’ arrow [260] uphill along the concrete path, initially keeping the metal fence to the left. The path leads uphill for about 80m then over a rise to head downhill for short distance to an intersection with a track[261] (on the left) just before the stone archway[262] near Echo Point.
(31.54km) Echo Point Archway Intersection → Echo Point Information Center
30 m
1 mins
1m
0m
Very easy
Continue straight: From the interestction[263], this walk heads past the ‘Blue Mountains National Park’ sign[264] and under the stone archway[265]. Here the walk veers left passing the toilet block
[266] to find the front of the visitor center[267] (on the left) and an accessible car parking area
(on the right).
Echo Point Information Centre
This modern building at Echo Point is a great source of information. It is open daily from 9am-5pm (except Christmas Day). There is a large range of books, maps and information about the area (and ice creams). There are toilets opposite the entrance
, and mobility parking opposite
. For more information, phone 1300 653 408. More info.
(31.57km) Echo Point Information Center → Echo Point
90 m
4 mins
3m
-22m
Very easy
Continue straight: From the front of the Echo Point Visitor Center[268] and mobility car parking area
, this walk heads downhill following the ‘Echo point’ sign[269] across the wide open concrete area[270]. After about 30m the walk leads past a large concrete seat
(on the left) then passes a similar seat
after another 20m. Continue gently downhill towards the view for another 30m to the stunning views at the formal Echo Point lookout[271].
Echo Point
Echo Point is the Blue Mountains’ most famous and popular lookout, home to one of the best photo opportunities for the Three Sisters[272]. Visited by over two million tourists each year, this popular spot also serves as the starting point for many great walks in the area. The lookout is well fenced[273], has information signs[274][275] and stunning views across the valley to the Three Sisters[276] and Mount Solitary[277]. There are mounted binoculars and seats nearby.
(31.65km) Echo Point → Lady Darley Lookout
480 m
18 mins
54m
-66m
Moderate track
Turn right: From the main lookout area at Echo Point, this walk heads across the concrete, keeping the view to the left, and then follows the concrete ramp down the gentle hill to the intersection of the Queen Elizabeth Lookout path.
Veer right: From the intersection, the walk follows the footpath heading away from Echo Point, winding through the bush for a short while until coming to the Kedumba View at the information sign, near the end of the footpath.
Turn right: From the Kedumba View, the walk heads off the footpath and follows the bush track, keeping the valley to the left while winding through the bush and along the side of the hill, climbing up to the ‘Lady Darley Lookout’.
Lady Darley Lookout
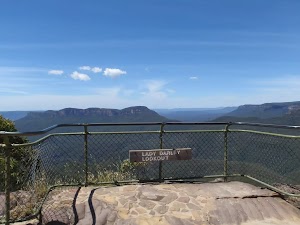
Lady Darley Lookout is a moderately-sized, fenced lookout, found on the Prince Henry Cliff Track. The lookout can also be accessed directly by a track from Panorama Drive. There is an information sign describing the view and the traditional naming of the natural features. The panoramic views from the lookout are great, from Kings Tableland on the left to Mount Solitary, Narrow Neck and parts of Scenic World on the far right.
(32.14km) Lady Darley Lookout → Allambie Lookout
140 m
4 mins
11m
-19m
Moderate track
Veer left: From Lady Darley Lookout, the walk heads down the metal staircase to the bush track, which it follows down the long set of wooden steps to the bottom, then continues through the bush until it climbs up a few more wooden steps to the Allambie Lookout.
Allambie Lookout

Allambie Lookout is a small, fenced lookout on the side of the Prince Henry Cliff Track. The lookout provides an opportunity to enjoy the valley view and the sights of the Three Sisters, Kings Tablelands and Mount Solitary.
(32.28km) Allambie Lookout → Wollumai Lookout
100 m
3 mins
13m
-10m
Moderate track
Continue straight: With the lookout and the valley to the left, the walk follows the bush track, winding along the side of the hill with the cliff’s edge visible (down the hill to the left), as the track passes through a patch of tall gum trees and winds up some concrete steps, continuing along through thick scrub to Wollumai Lookout.
Wollumai Lookout
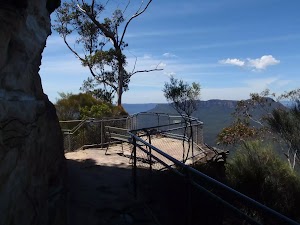
Wollumai Lookout is a small, fenced lookout on the side of the Prince Henry Cliff Track. The lookout is on a sandstone platform at the base of a cliff, and looks over a much larger drop into the Jamison Valley. There is a bench seat to enjoy the views over the valley, including Mount Solitary, Narrow Neck and glimpses of the Three Sisters.
(32.38km) Wollumai Lookout → Cliff View Lookout
240 m
8 mins
29m
-25m
Moderate track
Continue straight: Keeping the lookout and the valley to the left, the walk follows the bush track through the scrub and across the short wooden walkway, winding past a wooden picnic bench, and continues through the dense scrub until it drops down some wooden steps and comes to Cliff View Lookout.
Cliff View Lookout
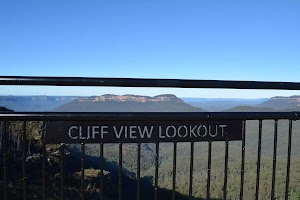
This large, fenced wheelchair accessible lookout provides great mountain views[278] of Mt Solitary[279], Kedumba Valley, Narrow Neck[280] and across to Scenic World[281]. There’s a bench seat

at the back of the lookout to enjoy the views from. The lookout fence is 1.2m high, the platform is 7.8×5.5m wide.
(32.61km) Cliff View Lookout → Katoomba Falls Park
280 m
7 mins
28m
-10m
Very easy
Turn right: From the lookout[282], this walk follows the concrete path gently up and over a rise keeping the fence and the valley on the left[283]. This walk continues for about 40m to come to a 3-way intersection[284] with the ‘Skyway East Station’ staircase (on the right).
Continue straight: From the intersection[285], this walk follows the stenciled concrete path gently downhill[286], keeping the view and handrailing to your left. After about 90m this walk flattens and comes to a second handrail[287] (on the right) at the start of a slightly steeper uphill section. After about 45m this walk flattens a bit and continues to meander along following the path gently downhill for about 120m to come to 3-way intersection[288], marked by a signposted mobility parking bay
Continue straight: From the intersection[285], this walk follows the stenciled concrete path gently downhill[286], keeping the view and handrailing to your left. After about 90m this walk flattens and comes to a second handrail[287] (on the right) at the start of a slightly steeper uphill section. After about 45m this walk flattens a bit and continues to meander along following the path gently downhill for about 120m to come to 3-way intersection[288], marked by a signposted mobility parking bay

beside Cliff Drive.
(32.89km) Katoomba Falls Park → Katoomba Cascades
130 m
3 mins
1m
-18m
Moderate track
Turn left: From the intersection, this walk heads away from the ‘Cliff View Lookout’ sign, keeping the road on the right of the footpath. The path heads into open parkland, around the edge of the park and down the wooden steps to the bottom, where the walk comes to the Kedumba River crossing, just downstream of the Katoomba Cascades.
Katoomba Cascades

Popular with locals and visitors alike, these picturesque cascades are on the Kedumba River. The cascades are nestled in the bend on Cliff Drive, near Katoomba Park. There are stepping stones across the creek at the bottom of the falls and a bench seat in the shade. There are a few small clearings where visitors can sit and enjoy the falls.
(33.02km) Katoomba Cascades → Kedumba River lookout
180 m
4 mins
4m
-22m
Moderate track
Continue straight: From the cascades, this walk crosses the creek to the western side, where it passes a picnic bench. The track continues downstream, winding through the forest for a short while until climbing up a gentle hill to the Kedumba River lookout.
Kedumba River lookout

This unnamed, fenced lookout is at the bend in the track along Kedumba River, at the top of Katoomba Falls. The lookout gives great views across the valley to Mount Solitary and Narrow Neck. There are also glimpses of the Katoomba Falls as it drops away, far into the valley below.
(33.2km) Kedumba River lookout → Int of Prince Henry Cliff Walk and Reids Plateau loop
130 m
5 mins
31m
-4m
Moderate track
Veer right: From the intersection at the lookout, the walk follows the bush track going up the hill, keeping the valley to the left. The track soon comes to the intersection with the Solitary lookout track.
Continue straight: From the intersection, this walk follows the hardened footpath, keeping the handrailing on the left as the path begins to wind uphill, climbing up some wooden steps to the top, where it comes to the large clearing at the intersection of the Reids Plateau track and the Katoomba Falls Round Walk.
Continue straight: From the intersection, this walk follows the hardened footpath, keeping the handrailing on the left as the path begins to wind uphill, climbing up some wooden steps to the top, where it comes to the large clearing at the intersection of the Reids Plateau track and the Katoomba Falls Round Walk.
(33.33km) Int of Katoomba Kiosk Loop and Witches Leap Track → Int of Katoomba Kiosk Track and Prince Henry Cliff Walk
30 m
1 mins
5m
0m
Moderate track
Turn right: With the Katoomba Falls track to the left and the picnic bench to the right, this walk heads north up the concrete stairs, passing a ‘Greenspace Project’ sign. The walk comes to the top of the stairs, to the signposted intersection of ‘Round Walk’ at the back of the small park near the Katoomba Kiosk.
(33.35km) Int of Katoomba Kiosk Track and Prince Henry Cliff Walk → Scenic World
430 m
9 mins
39m
-18m
Moderate track
Veer left: From the intersection, the walk follows the ‘Scenic Railway’ sign along the hardened bush track, winding along the side of the hill as the track heads through the forest, to the signposted intersection of the Round Walk and the Prince Henry Cliff Walk.
Veer right: From the intersection, this walk follows the only unsignposted bush track up the gentle hill. It winds up the wooden steps, bending around to the left until it flattens out at the intersection with the Scenic World footbridge.
Continue straight: From the intersection, this walk heads along the wooden footbridge that winds around the back of the Scenic World multi-story car park, to the concrete footpath. The walk continues around the main building, climbing up some concrete steps to the main entrance of Scenic World.
Maps for the Mt Solitary and Kedumba Valley Circuit walk
You can download the PDF for this walk to print a map.
These maps below cover the walk and the wider area around the walk, they are worth carrying for safety reasons.
| Six Foot Track | 1:50 000 Map Series | Six Foot Track | NSW-six-foot-track |
| Jamison | 1:25 000 Map Series | 89302N JAMISON | NSW-89302N |
| Katoomba | 1:25 000 Map Series | 89301S KATOOMBA | NSW-89301S |
| Katoomba | 1:100 000 Map Series | 8930 KATOOMBA | 8930 |
Cross sectional view of the Mt Solitary and Kedumba Valley Circuit bushwalking track
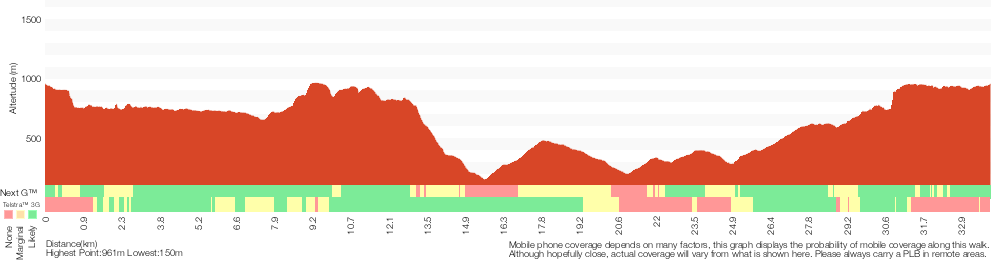
Analysis and summary of the altitude variation on the Mt Solitary and Kedumba Valley Circuit
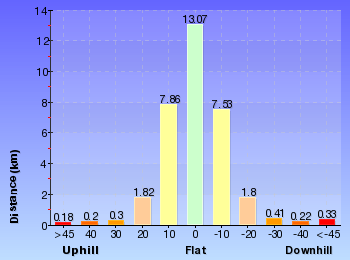
Daily actual walking time estimates
| Day | Walking Time | Length |
|---|---|---|
| 1 | 5 hrs 48 mins | 12.1 km |
| 2 | 6 hrs 24 mins | 14.8 km |
| 3 | 4 hrs 27 mins | 8.9 km |
Overview of this walks grade – based on the AS 2156.1 – 2001
Under this standard, a walk is graded based on the most difficult section of the walk.
| Length | 33.8 km | ||
| Time | 3 Days | ||
| . | |||
| Grade 5/6 Experienced only |
AS 2156.1 | Gradient | Very steep and difficult scrambles (5/6) |
| Quality of track | Rough unclear track (5/6) | ||
| Signs | No directional signs (5/6) | ||
| Experience Required | High level of bushwalking experience recommended (5/6) | ||
| Weather | Forecast, unforecast storms and severe weather likely to have an impact on your navigation and safety (5/6) | ||
| Infrastructure | No facilities provided (5/6) |
Some more details of this walks Grading
Here is a bit more details explaining grading looking at sections of the walk
Gradient
13km of this walk is very steep and another 12km has short steep hills. Whilst another 6km has gentle hills with occasional steps and a 2.6km section is very steep with difficult rock scrambles. The remaining 1.2km is flat with no steps.
Quality of track
13km of this walk follows a clear and well formed track or trail and another 8km follows a rough track, where fallen trees and other obstacles are likely. Whilst another 7km follows a formed track, with some branches and other obstacles and a 3km section follows a rough unclear track. The remaining 2.3km follows a smooth and hardened path.
Signs
16km of this walk has directional signs at most intersection and another 11km has minimal directional signs. Whilst another 3.6km Has no directional signs and the remaining 3.6km is clearly signposted.
Experience Required
14km of this walk requires a leader a with moderate level of bushwalking experience and another 8km requires some bushwalking experience. Whilst another 6km requires no previous bushwalking experience and the remaining 4.8km requires a leader with a high level of bushwalking experience.
weather
13km of this walk is affected by storms that may impact your navigation and safety and another 10km is not usually affected by severe weather events (that would unexpectedly impact safety and navigation). Whilst another 10km is affected by forecast, unforecast storms and severe weather events that may impact on navigation and safety and the remaining 450m forecast, unforecast storms and severe weather likely to have an impact on your navigation and safety.
Infrastructure
14km of this walk has limited facilities (such as not all cliffs fenced) and another 11km has limited facilities (such as cliffs not fenced, significant creeks not bridged). Whilst another 4.8km has no facilities provided and the remaining 4.8km is close to useful facilities (such as fenced cliffs and seats).
Similar walks
A list of walks that share part of the track with the Mt Solitary and Kedumba Valley Circuit walk.
254 m Return
15 mins
Moderate track
352 m Circuit
20 mins
Moderate track
556 m Return
20 mins
Very easy
854 m Circuit
45 mins
Hard track
869 m Circuit
1 hr 15 mins
Hard track
872 m Return
30 mins
Easy track
1.1 km Return
45 mins
Hard track
1.1 km Circuit
2 hrs
Hard track
1.1 km Return
45 mins
Moderate track
1.2 km Return
2 hrs
Hard track
1.5 km Circuit
1 hr 45 mins
Hard track
1.7 km Return
2 hrs
Hard track
1.7 km Return
1 hr 15 mins
Hard track
1.7 km Return
3 hrs 45 mins
Hard track
1.8 km One way
1 Hr
Moderate track
2.1 km One way
1 hr 15 mins
Moderate track
2.2 km Return
1 hr 30 mins
Moderate track
2.3 km Return
1 hr 30 mins
Hard track
2.7 km Return
2 hrs 30 mins
Moderate track
3.1 km One way
3 hrs
Hard track
3.1 km One way
3 hrs
Hard track
3.1 km Return
1 hr 30 mins
Moderate track
3.2 km One way
1 hr 45 mins
Moderate track
3.8 km Circuit
3 hrs
Hard track
4 km Return
2 hrs
Moderate track
4.4 km One way
3 hrs 45 mins
Hard track
4.8 km Circuit
3 hrs
Hard track
4.8 km Circuit
3 hrs
Hard track
4.8 km Circuit
3 hrs
Hard track
5.8 km Circuit
5 hrs 30 mins
Hard track
5.9 km Circuit
3 hrs 30 mins
Hard track
6.6 km One way
4 hrs
Hard track
6.7 km Return
4 hrs 30 mins
Moderate track
6.8 km Circuit
5 hrs
Hard track
6.8 km One way
3 hrs 30 mins
Moderate track
7.9 km Return
5 hrs
Hard track
8 km One way
5 hrs
Hard track
9.4 km Circuit
5 hrs 30 mins
Hard track
11.7 km Return
8 hrs 45 mins
Experienced only
12.4 km Return
7 hrs 30 mins
Hard track
16.2 km Return
11 hrs
Experienced only
29.2 km One way
2 Days
Experienced only
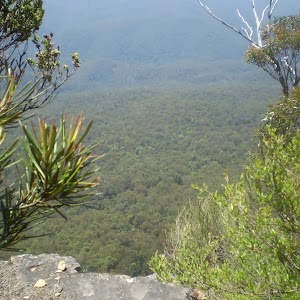
29.3 km One way
3 Days
Experienced only

Other Nearby walks
A list of walks that start near the Mt Solitary and Kedumba Valley Circuit walk.
218 m Return
20 mins
Moderate track
595 m One way
30 mins
Moderate track
308 m Return
15 mins
Moderate track
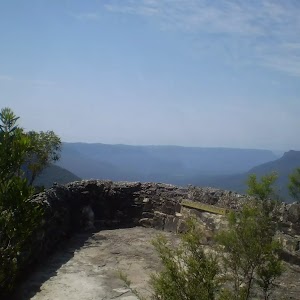
570 m Return
20 mins
Moderate track

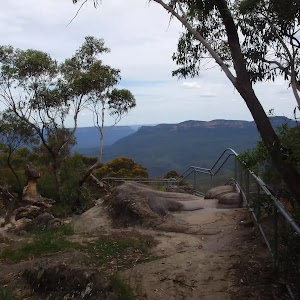
150 m Return
15 mins
Moderate track

582 m Return
30 mins
Moderate track
3.3 km Return
1 hr 30 mins
Moderate track
892 m Return
30 mins
Moderate track
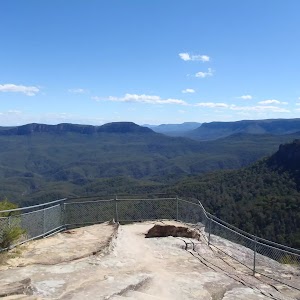
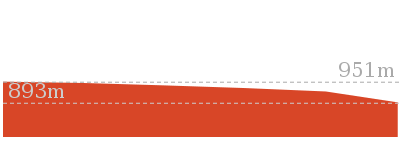
222 m Return
15 mins
Moderate track

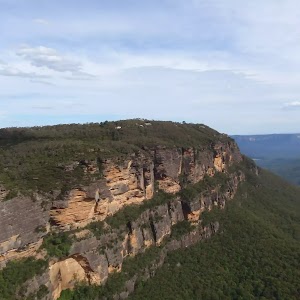
260 m Return
15 mins
Moderate track

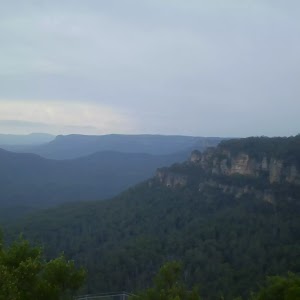
2 km Circuit
1 Hr
Moderate track
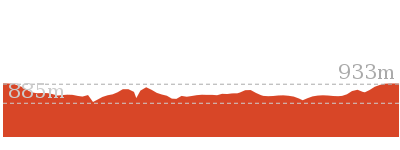
Plan your trip to and from the walk here
The Mt Solitary and Kedumba Valley Circuit walk starts and ends at the Scenic World (gps: -33.728585, 150.30096)
Your transport options to Scenic World are by;
![]() Bus. (get details)
Bus. (get details)
![]() Car. There is free parking available.
Car. There is free parking available.
(get details)
Short URL = http://wild.tl/msakvc
Gallery images
There are other downloads I am still working on.
You will probably need to login to access these — still all free.
* KML (google earth file)
* GPX (GPS file)
Special Maps/ brochures
* A3 topo maps
* PDF with Lands Topo map base
* PDF with arial image (and map overlay)
I wanted to get the main site live first, this extra stuff will come in time.
Happy walking
Matt 🙂
Scenic world to Three Sisters Loop via Furber Steps

5 hrs 30 mins
5.8 km Circuit
722 m
Hard track
This walk starts from the popular Scenic World, in Katoomba, and winds down the Furber steps into the Jamison Valley, following the bush track around the Three Sisters, before climbing up the Giant Staircase and returning along the clifftops. This walk takes you on a crash course of the Blue Mountains National Park, providing you with great views, green forests, and iconic rock formations.


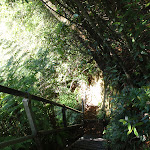
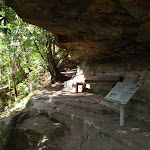


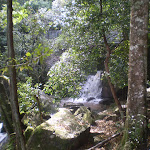
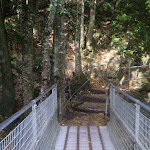
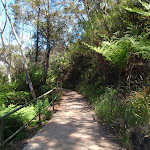

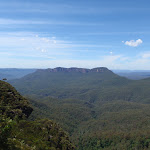
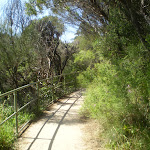
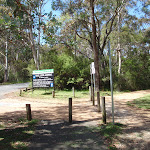
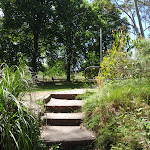
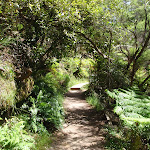
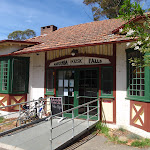

Scenic World
Scenic World is one of the most renowned tourist attractions of Katoomba and the Blue Mountains. Located on the cliffs of the Jamison Valley , visitors can enjoy a ride on the Scenic Railway (the world’s steepest incline railway) or the Scenic Cableway, into the Jamison Valley, and explore the Scenic Walkway from the base. Alternatively, the Scenic Skyway offers a bird’s eye view over the valley, with a glass floor to enhance the experience. Scenic World also features a revolving restaurant, a cafe and a kiosk, in addition to the documentary theatre and souvenir shop. Rides can be purchased, starting from $16 for adults and $10 for children, and combination or family passes are available. More info.
(0km) Scenic World → End of wooden footbridge
120 m
3 mins
5m
-20m
Very easy
From the Scenic World main entrance, this walk follows the ‘Prince Henry Cliff Walk’ signs down the concrete steps and around to the back of the building, where it comes to a wooden footbridge that curves around behind the main car park. At the end of the footbridge, this walk comes to an intersection with the Prince Henry Cliff Walk.
(0.12km) End of wooden footbridge → Vanimans Lookout
90 m
2 mins
0m
-29m
Hard track
Continue straight: From the intersection, this walk follows the bush track down the gentle hill, winding down some wooden steps as the track bends around to the right. It then arrives at the signposted intersection of the ‘Prince Henry Cliff Walk’ and the track to the base of the Scenic Railway.
Turn right: From the intersection, this walk heads down the steep wooden steps, following the signs to the bottom of the Scenic Railway. The walk comes to the intersection of Vanimans Lookout at the bottom of the steps.
Turn right: From the intersection, this walk heads down the steep wooden steps, following the signs to the bottom of the Scenic Railway. The walk comes to the intersection of Vanimans Lookout at the bottom of the steps.
Vaniman’s Lookout
Vaniman’s Lookout is a fenced, long and narrow lookout on the cliff edge, opposite Reids Plateau. The view looks directly over the Three Sisters across the Kedumba Valley, under the Scenic Skyway. The lookout was considered one of the finest views on the Three Sisters in the 1900’s. The lookout was named after Chester Melvin Vaniman in 1905, a well-know adventurer and artist from the USA, who visited the Blue Mountains in 1903. More info.
(0.21km) Vanimans Lookout → Rainforest Lookout
180 m
4 mins
7m
-16m
Hard track
Turn right: From Vanimans Lookout, this walk follows the bush track heading away from the bottom of the wooden steps. The track winds around the side of the hill and down the steep metal stairs. At the bottom, the walk comes to the intersection of the Katoomba Falls Round Walk and Juliets Balcony track (unsignposted).
Veer left: From the intersection, this walk follows the long set of wooden steps winding down the side of the hill. After this, the walk flattens out for a short distance then continues up a short set wooden steps to the intersection of the Round Walk and the Furber Steps track.
Turn right: From the intersection, this walk follows the ‘Base of Scenic Railway’ signpost down the wooden steps to the bottom, where it comes to the Rainforest Lookout.
Rainforest Lookout
Unlike many lookouts in the area, Rainforest Lookout does not offer sweeping valley views. Instead, this lookout offers an opportunity to get up close and personal with the canopy of the rainforest. Spend some time in the cool shade listening to the birds and Witches Leap creek passing by. A sign at the lookout explains that there once were wood-fired barbeques here for picnics, but removed due to the toll on the local environment[3].
(0.39km) Rainforest Lookout → Int of Furber Steps and Katoomba Falls Lookout Track
20 m
1m
0m
Moderate track
Turn right: From the Rainforest Lookout, the track follows the bush track heading past the base of the wooden steps and then through the forest for a short while, until it reaches the signposted intersection of the Underfalls Walk.
(0.41km) Int of Furber Steps and Katoomba Falls Lookout Track → Katoomba Falls
180 m
6 mins
1m
-67m
Easy track
Turn left : From the intersection, this walk follows the ‘Underfalls Walk’ sign down a short set of steps and across a small waterfall using the wooden bridge (This creek flows from Witches Leap all the way down to Veras Grotto). Once past the falls, the track continues through the rainforest, winding along the well-defined path until arriving at Katoomba Falls Lookout, right at the base of the falls. At the end of this side trip, retrace your steps back to the main walk then Turn left.
Katoomba Falls
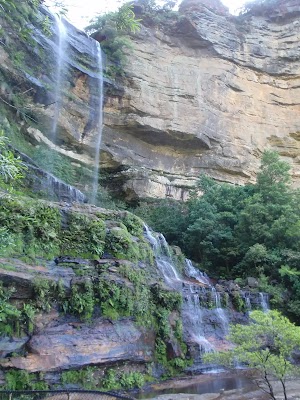
The Katoomba Falls are among the most famous waterfalls in the the Blue Mountains region. The Kedumba River falls about 150 meters in 2 main stages. The Undercliff Track, from the Furber Steps, can be used to access the first landing of the waterfall. The Katoomba Falls can be viewed from most lookouts in the the area, including from the bottom of the falls at Cooks Landing on Federal Pass, or from the track running next to the Kedumba River at the top of the falls. These falls are also a highlight for the trip across the Scenic Skyway.
(0.41km) Int of Furber Steps and Katoomba Falls Lookout Track → Int of Furber Steps and Lynes Point Track
40 m
1 mins
1m
-2m
Moderate track
Continue straight: From the intersection, this walk follows the ‘Scenic Railway’ sign along the bush track, winding through the forest for a short while before passing a large rock overhang with a wooden bench seat underneath. The walk continues down a set of stairs until reaching the signposted ‘Queen Victoria Lookout’.
Continue straight: From the intersection, this walk heads up the short metal staircase to the intersection of the Queen Victoria Lookout at the top.
Continue straight: From the intersection, this walk heads up the short metal staircase to the intersection of the Queen Victoria Lookout at the top.
(0.45km) Int of Furber Steps and Lynes Point Track → Lynes Point
10 m
1m
0m
Moderate track
Turn left : From the intersection, this walk follows the bush track heading around the right-hand side of the metal staircase, continuing around under the Queen Victoria Lookout to Lynes Point. At the end of this side trip, retrace your steps back to the main walk then Veer right.
(0.45km) Int of Furber Steps and Lynes Point Track → Int of Furber Steps and Vera’s Grotto Track
120 m
8 mins
17m
-91m
Hard track
Turn right: From the intersection, this walk follows the bush track heading away from the short metal staircase, winding along the side of the hill to the top of some concrete steps where there is a ‘Furber Steps’ signpost. From here, the walk continues down the concrete steps for a short distance until it comes to the signposted ‘Furber Lookout’.
Continue straight: From the Furber Lookout, this walk heads down the concrete steps that zigzags steeply down to the bottom of the cliffs. The track then flattens out and continues through the forest with the hand railing on the right, crossing a short boardwalk and coming down to the signposted intersection of the Vera’s Grotto track.
Continue straight: From the Furber Lookout, this walk heads down the concrete steps that zigzags steeply down to the bottom of the cliffs. The track then flattens out and continues through the forest with the hand railing on the right, crossing a short boardwalk and coming down to the signposted intersection of the Vera’s Grotto track.
(0.57km) Int of Furber Steps and Vera’s Grotto Track → Vera’s Grotto
30 m
3 mins
27m
-3m
Easy track
Continue straight: From the intersection, the walk follows the ‘Vera’s Grotto’ sign along the bush track, winding down a set of wooden steps to Vera’s Grotto Lookout at the bottom. At the end of this side trip, retrace your steps back to the main walk then Turn left.
Vera’s Grotto
Vera’s Grotto is a pleasant little spot located amongst the cascades on Witches Leap creek. This is a great area for lunch on a hot day, as it is always kept cool by the falls and the shade from the surrounding trees. When venturing to the grotto, you may be lucky enough to spot the Whistler and Yellow Robins. Superb Lyrebirds are also heard and even seen frequently in the surrounding area.
(0.57km) Int of Furber Steps and Veras Grotto Track → Cooks Crossing
300 m
11 mins
17m
-96m
Hard track
Turn right: From the intersection, this walk goes down the stairs. These zigzag down the hill and, at several points, go under overhangs in the cliff. The walk continues steeply downhill (occasionally on metal stairs) until reaching an intersection with a bush track signposted ‘Federal Pass’.
Turn left: From the bottom of Furber steps, this walk follows the sign to ‘Katoomba Falls View’ keeping the handrail on the right. The walk goes along the flat and very well-managed bush track and passes a signposted ‘Turpentine Tree’ on the right. Soon after the Turpentine Tree, the track comes to the base of Katoomba Falls, at a place known as ‘Cooks Crossing’. There is a metal bridge that crosses the falls just past the picnic table.
Turn left: From the bottom of Furber steps, this walk follows the sign to ‘Katoomba Falls View’ keeping the handrail on the right. The walk goes along the flat and very well-managed bush track and passes a signposted ‘Turpentine Tree’ on the right. Soon after the Turpentine Tree, the track comes to the base of Katoomba Falls, at a place known as ‘Cooks Crossing’. There is a metal bridge that crosses the falls just past the picnic table.
(0.87km) Cooks Crossing → Int of Federal Pass, Scenic Railway and Dardenelles Tracks
1.7 km
52 mins
169m
-179m
Moderate track
Continue straight: From the base of Katoomba Falls, the walk crosses the creek along the metal footbridge and joins up with the track on the other side. The track starts to turn to the right, winding along Federal Pass walking track, under the cliffs. At several points, the walk passes some notable rock formations and caves embedded in the cliffs. In addition, there are occasional good views that are not shrouded by the trees. The track continues in this manner for some time, and then passes ‘under the (three) sisters’[5] (clearly signposted). After passing under this rock formation, the track turns to the left and climbs slightly up to a seat and an intersection signposted with ‘Dardanelles Pass’ and ‘Federal Pass’ signs.
(2.59km) Int of Federal Pass, Scenic Railway and Dardenelles Tracks → Bottom of Giant Staircase
290 m
10 mins
36m
-33m
Moderate track
Turn left: From the intersection, the walk follows the sign pointing along the ‘Dardenelles Track’ towards the ‘Giant Steps’ – this is the upper track, keeping the main cliffs on the left. After the first short rise, the track flattens out and continues with some great views over the valley. At several points, small seats have been installed to enjoy these views. The track soon comes to an intersection signposted as the ‘Giant Staircase’.
(2.88km) Bottom of Giant Staircase → The Three Sisters Bridge intersection
200 m
19 mins
151m
-20m
Hard track
Turn left: From the intersection, the walk follows the sign up the ‘Giant Staircase’. This climbs steeply (with handrails) until coming to an intersection with a bridge that goes across to the First of the three Sisters. Along the way, there are chairs in which to rest from the climb and enjoy the magnificent views of the valley.
The Three Sisters
This well-known rock formation can be found just south of Katoomba, and can be viewed from many of the cliffside lookouts, from Narrow Neck all the way around to Sublime Point. Historically, this formation appears in Aboriginal ‘Dream Time’ stories, where three sisters were transformed into stone. This iconic rock formation is popular amongst tourists and bushwalkers alike. More info.
(3.09km) The Three Sisters Bridge Intersection → Top of the Giant Staircase
40 m
4 mins
31m
0m
Hard track
Veer right: From the bridge, the walk heads up the staircase steeply to the top. The stairs have handrails and climb up the side of the cliffs to the intersection with the Lady Game Lookout track.
(3.13km) Top of the Giant Staircase → Lady Game Lookout
10 m
1 mins
0m
-12m
Very easy
Turn left : From the intersection, the walk follows the footpath down the hill towards the Three Sisters for about 10m before coming to the Lady Game Lookout. At the end of this side trip, retrace your steps back to the main walk then Continue straight.
Lady Game Lookout
Lady Game Lookout is a narrow, fenced lookout above the Three Sisters. The track to this lookout starts just near the archway which marks the start of the Giant Staircase. Lady Game Lookout provides a bird’s-eye view over the Three Sisters and is a popular stop whilst exploring the area.
(3.13km) Top of the Giant Staircase → Int of Lady Game Lookout Track and the Three Sisters Footpath
20 m
1 mins
10m
0m
Easy track
Turn right: From the intersection, the walk follows the footpath up and away from the lookout, passing under a rock archway and continuing up the gentle hill to the intersection with the Cliff Drive access track.
(3.14km) Int of Prince Henry Cliff Track and the Three Sisters Footpath → Oreades Lookout
20 m
1 mins
11m
0m
Easy track
Continue straight: From the intersection, this walk heads up the stone/concrete steps on the main path to almost immediatly find an unnamed, fenced lookout platform[7] (on the left).
(3.16km) Oreades Lookout → Int of Prince Henry Cliff Track and the Three Sisters Footpath
110 m
3 mins
18m
-2m
Easy track
Continue straight: From Oreades Lookout, this walk heads uphill along the path for about 30m to pass a stone seat
(on the right), in a small sandstone overhang[8]. Check the miniature cicada sculptures[9] above the overhang. From here the walk leads moderately steeply
uphill along the smooth concrete path[10] for about 90m[11], to come to a clear intersection marked with a large ‘Three Sisters Walk’ sign[12]. On the left is a small flat loose gravel area with two seats
.
(3.27km) Int of Prince Henry Cliff Track and the Three Sisters Pathway → Echo Point Archway Intersection
320 m
9 mins
29m
-17m
Easy track
Continue straight: From the intersection, this walk follows the large ‘Echo Point’ sign[13] uphill along the smooth concrete path. The path leads uphill for about 45m
to find a sandstone seat (on the right)
to find a sandstone seat (on the right)
. From here the path continues winding gently uphill for another 70m to pass another sandstone seat (on the right)
. From this seat the path continues gently uphill for another 60m past yet another similar stone seat
(on the right), this seat has a blue tongue lizard sculpture[14]. After another 15m
this walk comes to a clear signposted Y-intersection[15].
Continue straight: From the intersection[16], this walk follows the ‘Spooners Lookout’ sign down along the concrete path, initially keeping the fence to the left. The path leads gently downhill to a signposted three-way intersection[17].
Turn right: From the intersection, this walk follows the footpath up the gentle hill along the footpath until coming to the intersection at the archway entrance to Echo Point.
(3.59km) Echo Point Archway Intersection → Echo Point Information Center
30 m
1 mins
1m
0m
Very easy
Turn left: From the interestction[18], this walk heads past the ‘Blue Mountains National Park’ sign[19] and under the stone archway[20]. Here the walk veers left passing the toilet block
[21] to find the front of the visitor center[22] (on the left) and an accessible car parking area
(on the right).
Echo Point Information Centre
This modern building at Echo Point is a great source of information. It is open daily from 9am-5pm (except Christmas Day). There is a large range of books, maps and information about the area (and ice creams). There are toilets opposite the entrance
, and mobility parking opposite
. For more information, phone 1300 653 408. More info.
(3.62km) Echo Point Information Center → Echo Point
90 m
4 mins
3m
-22m
Very easy
Continue straight: From the front of the Echo Point Visitor Center[23] and mobility car parking area
, this walk heads downhill following the ‘Echo point’ sign[24] across the wide open concrete area[25]. After about 30m the walk leads past a large concrete seat
(on the left) then passes a similar seat
after another 20m. Continue gently downhill towards the view for another 30m to the stunning views at the formal Echo Point lookout[26].
Echo Point
Echo Point is the Blue Mountains’ most famous and popular lookout, home to one of the best photo opportunities for the Three Sisters[27]. Visited by over two million tourists each year, this popular spot also serves as the starting point for many great walks in the area. The lookout is well fenced[28], has information signs[29][30] and stunning views across the valley to the Three Sisters[31] and Mount Solitary[32]. There are mounted binoculars and seats nearby.
(3.71km) Echo Point → Int of Echo Point and Queen Elizabeth Lookout tracks
70 m
3 mins
19m
-1m
Very easy
Turn right: From the main lookout area at Echo Point, this walk heads across the concrete, keeping the view to the left, and then follows the concrete ramp down the gentle hill to the intersection of the Queen Elizabeth Lookout path.
(3.77km) Int of Echo Point and Queen Elizabeth Lookout tracks → Lady Darley Lookout
420 m
15 mins
35m
-65m
Moderate track
Veer right: From the intersection, the walk follows the footpath heading away from Echo Point, winding through the bush for a short while until coming to the Kedumba View at the information sign, near the end of the footpath.
Turn right: From the Kedumba View, the walk heads off the footpath and follows the bush track, keeping the valley to the left while winding through the bush and along the side of the hill, climbing up to the ‘Lady Darley Lookout’.
Turn right: From the Kedumba View, the walk heads off the footpath and follows the bush track, keeping the valley to the left while winding through the bush and along the side of the hill, climbing up to the ‘Lady Darley Lookout’.
Lady Darley Lookout
Lady Darley Lookout is a moderately-sized, fenced lookout, found on the Prince Henry Cliff Track. The lookout can also be accessed directly by a track from Panorama Drive. There is an information sign describing the view and the traditional naming of the natural features. The panoramic views from the lookout are great, from Kings Tableland on the left to Mount Solitary, Narrow Neck and parts of Scenic World on the far right.
(4.19km) Lady Darley Lookout → Allambie Lookout
140 m
4 mins
11m
-19m
Moderate track
Veer left: From Lady Darley Lookout, the walk heads down the metal staircase to the bush track, which it follows down the long set of wooden steps to the bottom, then continues through the bush until it climbs up a few more wooden steps to the Allambie Lookout.
Allambie Lookout
Allambie Lookout is a small, fenced lookout on the side of the Prince Henry Cliff Track. The lookout provides an opportunity to enjoy the valley view and the sights of the Three Sisters, Kings Tablelands and Mount Solitary.
(4.33km) Allambie Lookout → Wollumai Lookout
100 m
3 mins
13m
-10m
Moderate track
Continue straight: With the lookout and the valley to the left, the walk follows the bush track, winding along the side of the hill with the cliff’s edge visible (down the hill to the left), as the track passes through a patch of tall gum trees and winds up some concrete steps, continuing along through thick scrub to Wollumai Lookout.
Wollumai Lookout
Wollumai Lookout is a small, fenced lookout on the side of the Prince Henry Cliff Track. The lookout is on a sandstone platform at the base of a cliff, and looks over a much larger drop into the Jamison Valley. There is a bench seat to enjoy the views over the valley, including Mount Solitary, Narrow Neck and glimpses of the Three Sisters.
(4.43km) Wollumai Lookout → Cliff View Lookout
240 m
8 mins
29m
-25m
Moderate track
Continue straight: Keeping the lookout and the valley to the left, the walk follows the bush track through the scrub and across the short wooden walkway, winding past a wooden picnic bench, and continues through the dense scrub until it drops down some wooden steps and comes to Cliff View Lookout.
Cliff View Lookout
This large, fenced wheelchair accessible lookout provides great mountain views[33] of Mt Solitary[34], Kedumba Valley, Narrow Neck[35] and across to Scenic World[36]. There’s a bench seat
at the back of the lookout to enjoy the views from. The lookout fence is 1.2m high, the platform is 7.8×5.5m wide.
(4.67km) Cliff View Lookout → Int of Prince Henry Cliff Walk and the eastern Skyway steps
40 m
2 mins
11m
-5m
Very easy
(4.71km) Int of Prince Henry Cliff Walk and the eastern Skyway steps → Katoomba Falls Park
240 m
5 mins
17m
-5m
Very easy
Continue straight: From the intersection[40], this walk follows the stenciled concrete path gently downhill[41], keeping the view and handrailing to your left. After about 90m this walk flattens and comes to a second handrail[42] (on the right) at the start of a slightly steeper uphill section. After about 45m this walk flattens a bit and continues to meander along following the path gently downhill for about 120m to come to 3-way intersection[43], marked by a signposted mobility parking bay
beside Cliff Drive.
(4.95km) Katoomba Falls Park → Katoomba Cascades
130 m
3 mins
1m
-18m
Moderate track
Turn left: From the intersection, this walk heads away from the ‘Cliff View Lookout’ sign, keeping the road on the right of the footpath. The path heads into open parkland, around the edge of the park and down the wooden steps to the bottom, where the walk comes to the Kedumba River crossing, just downstream of the Katoomba Cascades.
Katoomba Cascades
Popular with locals and visitors alike, these picturesque cascades are on the Kedumba River. The cascades are nestled in the bend on Cliff Drive, near Katoomba Park. There are stepping stones across the creek at the bottom of the falls and a bench seat in the shade. There are a few small clearings where visitors can sit and enjoy the falls.
(5.07km) Katoomba Cascades → Kedumba River lookout
180 m
4 mins
4m
-22m
Moderate track
Continue straight: From the cascades, this walk crosses the creek to the western side, where it passes a picnic bench. The track continues downstream, winding through the forest for a short while until climbing up a gentle hill to the Kedumba River lookout.
Kedumba River lookout
This unnamed, fenced lookout is at the bend in the track along Kedumba River, at the top of Katoomba Falls. The lookout gives great views across the valley to Mount Solitary and Narrow Neck. There are also glimpses of the Katoomba Falls as it drops away, far into the valley below.
(5.25km) Kedumba River lookout → Int of Solitary Lookout track and Prince Henry Cliff Walk
60 m
3 mins
18m
-3m
Moderate track
Veer right: From the intersection at the lookout, the walk follows the bush track going up the hill, keeping the valley to the left. The track soon comes to the intersection with the Solitary lookout track.
(5.31km) Int of Solitary Lookout track and Prince Henry Cliff Walk → Solitary Lookout
20 m
1 mins
0m
-10m
Easy track
Turn left: From the intersection, this walk heads down the wooden steps and along the bush track, winding through the forest for a short while before dropping down some concrete steps to Solitary Lookout. At the end of this side trip, retrace your steps back to the main walk then Turn left.
Solitary Lookout
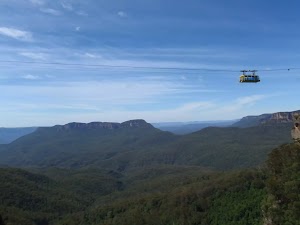
This unnamed lookout, near Katoomba falls, looks straight out across the Kedumba Valley to Mount Solitary. Although the Three Sisters are not visible, visitors can see Narrow Neck plateau and Ruined Castle to the right. The lookout is fenced, and there is a chair where you can sit and watch the Scenic Skyway go back and forth.
(5.31km) Int of Solitary Lookout track and Prince Henry Cliff Walk → Int of Katoomba Kiosk Track and Prince Henry Cliff Walk
100 m
3 mins
18m
-1m
Moderate track
Continue straight: From the intersection, this walk follows the hardened footpath, keeping the handrailing on the left as the path begins to wind uphill, climbing up some wooden steps to the top, where it comes to the large clearing at the intersection of the Reids Plateau track and the Katoomba Falls Round Walk.
Turn right: With the Katoomba Falls track to the left and the picnic bench to the right, this walk heads north up the concrete stairs, passing a ‘Greenspace Project’ sign. The walk comes to the top of the stairs, to the signposted intersection of ‘Round Walk’ at the back of the small park near the Katoomba Kiosk.
Turn right: With the Katoomba Falls track to the left and the picnic bench to the right, this walk heads north up the concrete stairs, passing a ‘Greenspace Project’ sign. The walk comes to the top of the stairs, to the signposted intersection of ‘Round Walk’ at the back of the small park near the Katoomba Kiosk.
Katoomba Falls Kiosk
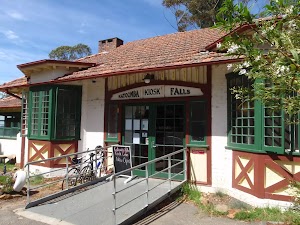
The Katoomba Falls Kiosk serves a variety of light and healthy meals including breakfast, lunch and Devonshire teas. A drink enjoyed here will add to the experience of any local bushwalk. For more information, phone (02) 4782-4868. More info.
(5.41km) Int of Katoomba Kiosk Track and Prince Henry Cliff Walk → End of wooden footbridge
310 m
6 mins
19m
-13m
Moderate track
Veer left: From the intersection, the walk follows the ‘Scenic Railway’ sign along the hardened bush track, winding along the side of the hill as the track heads through the forest, to the signposted intersection of the Round Walk and the Prince Henry Cliff Walk.
Veer right: From the intersection, this walk follows the only unsignposted bush track up the gentle hill. It winds up the wooden steps, bending around to the left until it flattens out at the intersection with the Scenic World footbridge.
Veer right: From the intersection, this walk follows the only unsignposted bush track up the gentle hill. It winds up the wooden steps, bending around to the left until it flattens out at the intersection with the Scenic World footbridge.
(5.72km) End of wooden footbridge → Scenic World
120 m
3 mins
20m
-5m
Very easy
Continue straight: From the intersection, this walk heads along the wooden footbridge that winds around the back of the Scenic World multi-story car park, to the concrete footpath. The walk continues around the main building, climbing up some concrete steps to the main entrance of Scenic World.
Maps for the Scenic world to Three Sisters Loop via Furber Steps walk
You can download the PDF for this walk to print a map.
These maps below cover the walk and the wider area around the walk, they are worth carrying for safety reasons.
| Six Foot Track | 1:50 000 Map Series | Six Foot Track | NSW-six-foot-track |
| Katoomba | 1:25 000 Map Series | 89301S KATOOMBA | NSW-89301S |
| Katoomba | 1:100 000 Map Series | 8930 KATOOMBA | 8930 |
Cross sectional view of the Scenic world to Three Sisters Loop via Furber Steps bushwalking track
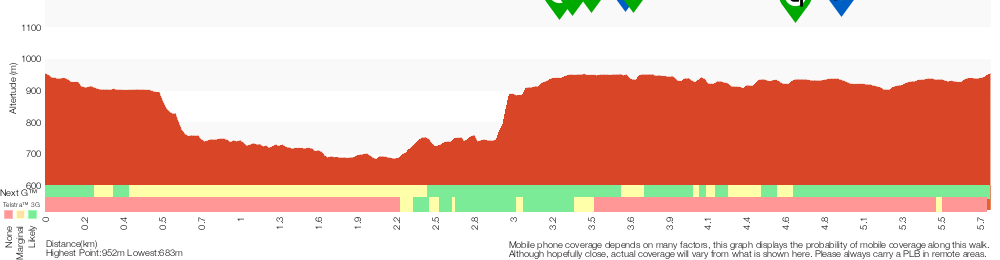
Analysis and summary of the altitude variation on the Scenic world to Three Sisters Loop via Furber Steps

Overview of this walks grade – based on the AS 2156.1 – 2001
Under this standard, a walk is graded based on the most difficult section of the walk.
| Length | 5.8 km | ||
| Time | 5 hrs 30 mins | ||
| . | |||
| Grade 4/6 Hard track |
AS 2156.1 | Gradient | Very steep (4/6) |
| Quality of track | Rough track, where fallen trees and other obstacles are likely (4/6) | ||
| Signs | Directional signs along the way (3/6) | ||
| Experience Required | Some bushwalking experience recommended (3/6) | ||
| Weather | Storms may impact on navigation and safety (3/6) | ||
| Infrastructure | Limited facilities, not all cliffs are fenced (3/6) |
Some more details of this walks Grading
Here is a bit more details explaining grading looking at sections of the walk
Gradient
2.2km of this walk has gentle hills with occasional steps and another 2.1km has short steep hills. Whilst another 920m is flat with no steps and the remaining 570m is very steep.
Quality of track
2.7km of this walk follows a clear and well formed track or trail and another 2.1km follows a smooth and hardened path. Whilst another 1km follows a formed track, with some branches and other obstacles and the remaining 40m follows a rough track, where fallen trees and other obstacles are likely.
Signs
Around 4.6km of this walk is clearly signposted, whilst the remaining 1.2km has directional signs at most intersection.
Experience Required
Around 6km of this walk requires no previous bushwalking experience, whilst the remaining 280m requires some bushwalking experience.
weather
Around 6km of this walk is not usually affected by severe weather events (that would unexpectedly impact safety and navigation), whilst the remaining 200m is affected by storms that may impact your navigation and safety.
Infrastructure
Around 6km of this walk is close to useful facilities (such as fenced cliffs and seats), whilst the remaining 330m has limited facilities (such as not all cliffs fenced).
Similar walks
A list of walks that share part of the track with the Scenic world to Three Sisters Loop via Furber Steps walk.
254 m Return
15 mins
Moderate track
352 m Circuit
20 mins
Moderate track
556 m Return
20 mins
Very easy
854 m Circuit
45 mins
Hard track
869 m Circuit
1 hr 15 mins
Hard track
872 m Return
30 mins
Easy track
1.1 km Return
45 mins
Hard track
1.1 km Circuit
2 hrs
Hard track
1.1 km Return
45 mins
Moderate track
1.2 km Return
2 hrs
Hard track
1.5 km Circuit
1 hr 45 mins
Hard track
1.7 km Return
2 hrs
Hard track
1.7 km Return
3 hrs 45 mins
Hard track
1.8 km One way
1 Hr
Moderate track
2.1 km One way
1 hr 15 mins
Moderate track
2.2 km Return
1 hr 30 mins
Moderate track
3.1 km One way
3 hrs
Hard track
3.1 km One way
3 hrs
Hard track
3.1 km Return
1 hr 30 mins
Moderate track
3.2 km One way
1 hr 45 mins
Moderate track
3.8 km Circuit
3 hrs
Hard track
4 km Return
2 hrs
Moderate track
4.4 km One way
3 hrs 45 mins
Hard track
4.8 km Circuit
3 hrs
Hard track
4.8 km Circuit
3 hrs
Hard track
4.8 km Circuit
3 hrs
Hard track
6.6 km One way
4 hrs
Hard track
6.7 km Return
4 hrs 30 mins
Moderate track
6.8 km Circuit
5 hrs
Hard track
6.8 km One way
3 hrs 30 mins
Moderate track
8 km One way
5 hrs
Hard track
9.4 km Circuit
5 hrs 30 mins
Hard track
12.4 km Return
7 hrs 30 mins
Hard track
16.2 km Return
11 hrs
Experienced only
33.8 km Circuit
3 Days
Experienced only
Other Nearby walks
A list of walks that start near the Scenic world to Three Sisters Loop via Furber Steps walk.
29.2 km One way
2 Days
Experienced only
29.3 km One way
3 Days
Experienced only
5.9 km Circuit
3 hrs 30 mins
Hard track
2.7 km Return
2 hrs 30 mins
Moderate track
218 m Return
20 mins
Moderate track
595 m One way
30 mins
Moderate track
11.7 km Return
8 hrs 45 mins
Experienced only
7.9 km Return
5 hrs
Hard track
308 m Return
15 mins
Moderate track
570 m Return
20 mins
Moderate track
150 m Return
15 mins
Moderate track
582 m Return
30 mins
Moderate track
Plan your trip to and from the walk here
The Scenic world to Three Sisters Loop via Furber Steps walk starts and ends at the Scenic World (gps: -33.728585, 150.30096)
Your transport options to Scenic World are by;
![]() Bus. (get details)
Bus. (get details)
![]() Car. There is free parking available.
Car. There is free parking available.
(get details)
Short URL = http://wild.tl/swttslvfs
Gallery images
There are other downloads I am still working on.
You will probably need to login to access these — still all free.
* KML (google earth file)
* GPX (GPS file)
Special Maps/ brochures
* A3 topo maps
* PDF with Lands Topo map base
* PDF with arial image (and map overlay)
I wanted to get the main site live first, this extra stuff will come in time.
Happy walking
Matt 🙂
Six Foot Track
And Walk
Six Foot Track

3 Days
44.8 km One way
2066 m
Hard track

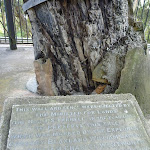


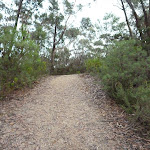
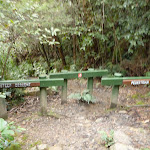
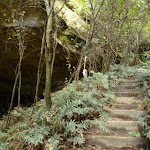

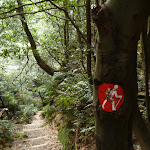
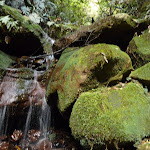

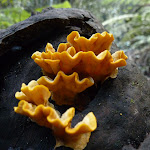
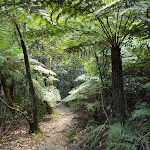
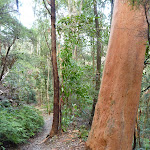
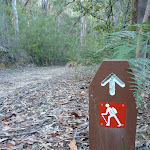
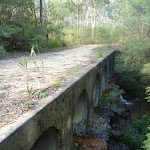

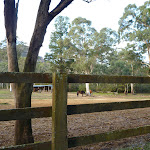
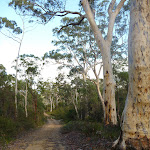
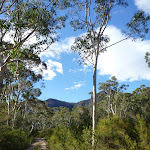

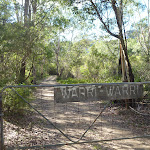
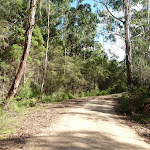


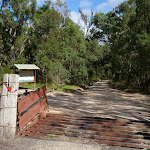


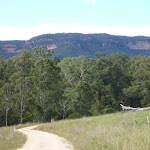


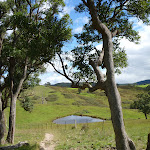

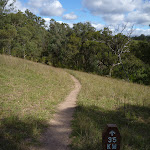
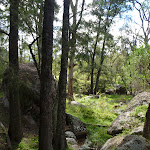
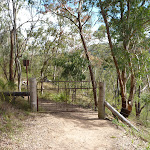


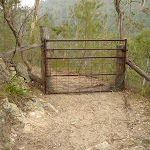

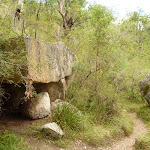
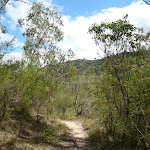

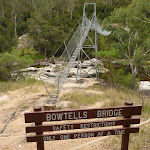
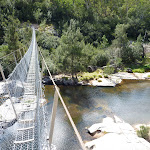
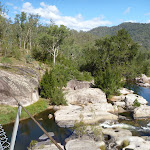


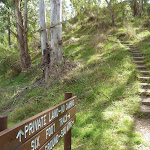

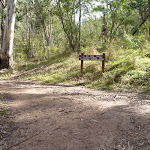
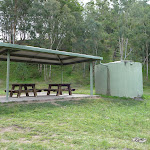
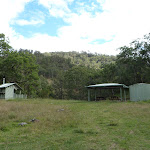
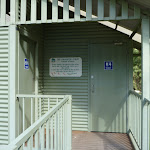


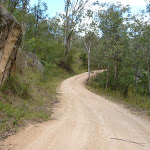
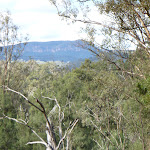


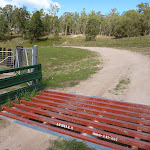


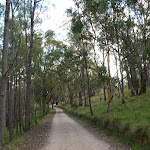
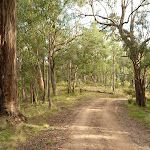
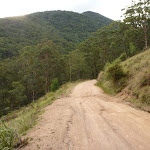
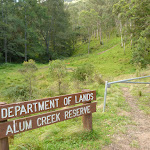
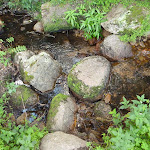

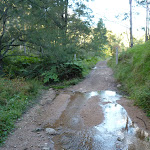
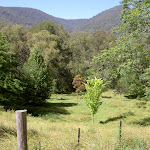
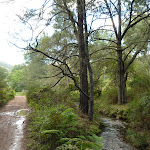

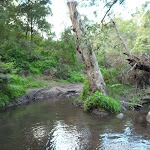
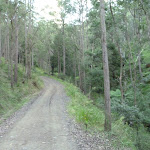


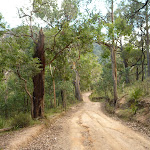

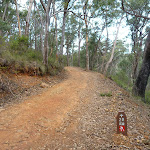
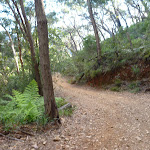

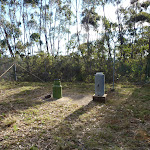


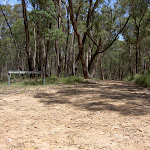
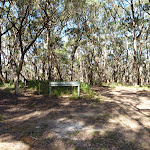


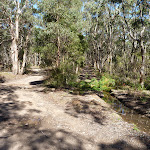
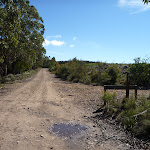
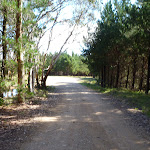

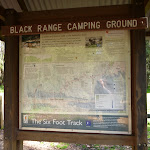


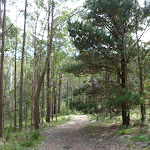

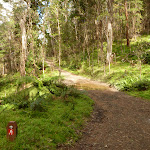
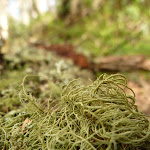

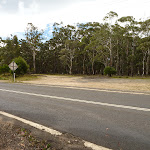
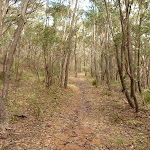
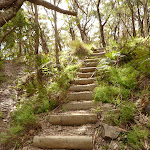


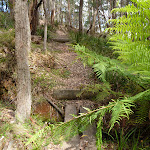
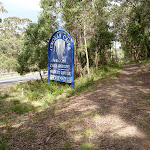
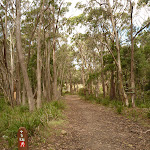

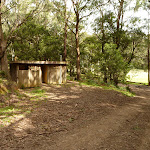
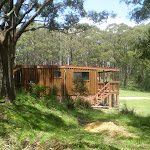
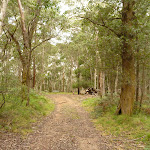
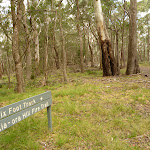
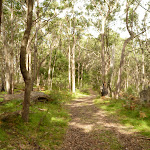
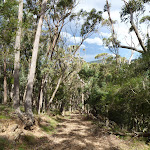
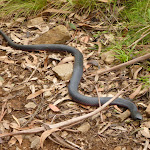
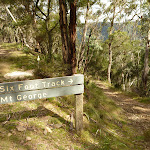
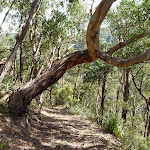

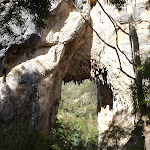
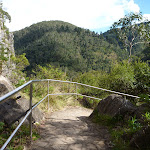
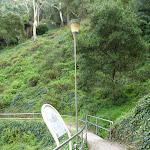

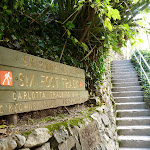
Six Foot Track
Individuals and family groups do not need to book for the walk, however large groups such as school groups should be registered via [email protected] Please provide contact details, basic itinerary, dates, number of students or people and teachers or leaders.
NSW Department of Primary Industries – Lands within the Department of Industry is the state government agency, which manages and maintains the Six Foot Track (as well as others including the Great North Walk and the Hume & Hovell Walking Track). They sell a detailed map kit for the Six Foot Track scaled at 1:50,000 with 100m contour intervals, containing track notes, walking times & distances, points of interest, history, flora & fauna, as well as safety tips. The kit is available for $10 (plus $2 postage & handling), with proceeds from all of their map kit sales supporting ongoing maintenance of the tracks.
To order their Six Foot Track Map Kit, or for Lands tracks & trails, see their order form (PDF 80kb) . More info.
Free Beacon Hire
A Personal Locating Beacon (PLB) is a hand-held device that, when triggered, sends a message to the emergency services with your location. The emergency services staff can then look at your trip intention forms and decide how best to help you. In the Blue Mountains, you can borrow these for no charge, just complete this Trip intention form, and a borrowing form. The device can be picked up from:
NPWS Office – Govetts Leap Rd Blackheath – 9am to 4pm 7 days Ph: 02 4787 8877
Katoomba Police Station – 217 Katoomba St Katoomba – Anytime Ph: 02 4782 8199
Springwood Police Station – 4 Jerseywold Avenue Springwood – Anytime Ph: 02 4751 0299
More info.
NPWS Office – Govetts Leap Rd Blackheath – 9am to 4pm 7 days Ph: 02 4787 8877
Katoomba Police Station – 217 Katoomba St Katoomba – Anytime Ph: 02 4782 8199
Springwood Police Station – 4 Jerseywold Avenue Springwood – Anytime Ph: 02 4751 0299
More info.
Explorers Tree (Katoomba)
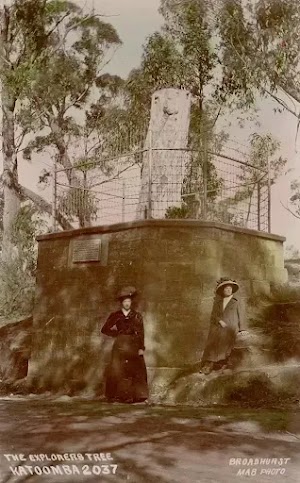
In 1813, the explorers Gregory Blaxland, William Wentworth and William Lawson, on their historic crossing of the Blue Mountains, engraved their names not only into the history books, but also reportedly into this tree on the side of Pulpit Hill. The tree now long dead was caged[1] in 1884 in an attempt to preserve the engravings[2]. The engravings are no longer visible[3] and there is even debate over the last 100+ years as to the authenticity of the engravings.
(0km) Explorers Tree → Six Foot Track Info Shelter
260 m
5 mins
8m
-6m
Easy track
From the ‘Explorers Tree’[5] (at the intersection of Nellies Glen Rd and the Great Western Hwy), this walk follows the ‘Six Foot Track – 200m’ sign[6] up along the sealed Nellies Glen Rd[7] for just over 200m before turning left at another ‘Six Foot Track’ sign[8]. Here the walk comes to a dirt car park[9] and shelter[10] with a large ‘Six Foot Track’ information sign[11].
(0.26km) Six Foot Track Info Shelter → Int of 6 Foot Track and Norths Lookout Trail
550 m
12 mins
2m
-68m
Moderate track
Continue straight: From the shelter and car park (on Nellies Glen Rd), this walk follows the ‘Six Foot Track’ sign[12] around the lower locked metal gate to follow the management trail gently downhill[13]. The walk continues down this trail, which becomes fairly steep in places, for about 500m. Here the trail flattens out and comes to an intersection marked with a couple of ‘Six Foot Track’ signs[14] and a ‘Nellies Glen Bushland Restoration’ sign[15].
(0.81km) Int of 6 Foot Track and Norths Lookout Trail → Norths Lookout
210 m
6 mins
1m
-32m
Moderate track
Continue straight: From the intersection[16], this walk heads through the gap in the large metal gate, over a small rise. The fairly narrow track soon leads down a series of timber steps[17], past some nice views for just shy of 150m to come to a faint intersection with a track (on your left), marked with a ‘Bonnie Doon Fauna Study’ sign[18].
Continue straight: From the intersection, this walk follows the track downhill towards the open views[19]. After about 50m the track comes to the fenced[20] and signposted ‘Norths Lookout’[21] with great views over Nellie’s Glen and into the valley[22]. At the end of this side trip, retrace your steps back to the main walk then Veer left.
Continue straight: From the intersection, this walk follows the track downhill towards the open views[19]. After about 50m the track comes to the fenced[20] and signposted ‘Norths Lookout’[21] with great views over Nellie’s Glen and into the valley[22]. At the end of this side trip, retrace your steps back to the main walk then Veer left.
(0.81km) Int of Six Foot Track and Norths Lookout Trail → Int at Lower Nellies Glen
1.6 km
44 mins
26m
-337m
Hard track
Turn right: From the intersection, this walk follows the ‘Six Foot Track’ sign[23], fairly steeply down the management trail past the ‘Nellies Glen’ metal plaque[24] and, about 10m later, past the timber ‘Nellies Glen’ sign. After another 80m, the trail narrows and this walk turns left to head through the green timber chicane with the ‘Caution – Steep Decent’ and ‘Pedestrian Access only’ signs[25]. As the sign suggests, this walk now leads steeply down the Nellies Glen canyon steps[26] for about 300m, passing alongside the tall rock walls[27] and crossing the usually small creek a few times before bending distinctly left to cross below a small set of falls (below the main Bonnie Doon Falls)[28]. Here the track mostly flattens out[29] and leads along the side of the gully for another 400m to pass a ‘Blue Mountains National Park’ sign[30], then just over 100m later, passes another sign marking the lower end of ‘Nellies Glen’[31]. About 600m after this sign, the track bends to cross a narrow gully then leads up to a small clearing at the northern end of the wide Nellies Glen trail.
(2.44km) Int at Lower Nellies Glen → Int of Nellies Glen Rd Trail and Devils Hole Trail
2 km
36 mins
14m
-102m
Moderate track
Veer left: From the clearing, this walk follows the wide trail gently downhill[32] while keeping the valley to your right. The trail leads generally downhill through the scribbly gum forest[33] for about 1.4km to then cross the culverted[34] Devils Hole Creek – just past the creek is an unused concrete pipe[35] with wild bee hives[36] inside. This walk continues along the trail for another 500m to an intersection with the Devils Hole Trail[37] (on your left), marked a ‘Six Foot Track’ and a ‘Ladders have been removed’ sign.
(4.42km) Int of Nellies Glen Rd Trail and Devils Hole Trail → Megalong Village site
90 m
1 mins
1m
0m
Easy track
Megalong Village (Historic)
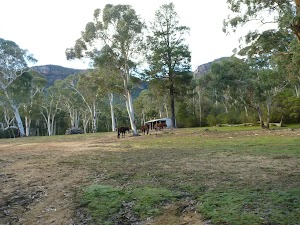
In 1870, kerosene shale was discovered in the area surrounding the upper end of Megalong and Diamond Creeks so in 1885, Mr J. B. North started to mine the resource. The mine continued for nearly 10 years. During the life of the mine, the Megalong Village grew to to a small town with a hotel, butchery, bakery, public hall and around about 40 families[42]. When the mines were closed in 1904, the best buildings were demolished and rebuilt in Katoomba. In the December of 1904, a huge bushfire ripped up through the valley destroying what buildings were left. Now the area is private land with a horse paddock[43] with a view of the escarpment behind. A small bronze sign marks the site[44] .
(4.5km) Megalong Village site → Int Mitchells Creek and Nellies Glen Rd trails
1.1 km
18 mins
8m
-23m
Easy track
Continue straight: From the beside the historic Megalong ‘Village site’[45], this walk heads along the wide trail, initially keeping the horse paddock[46] and view to the escaprment to your left after just shy of 250m this walk heads through a usually closed gate[47] and continues gently undulating along the trail through the tall scribbly gum forest[48] for 500m, crossing a usually small creek[49] to then pass a 6FT ’40km’ arrow post[50]. About 400m further along this trail, soon after crossing the usually small Corral Creek[51], this walk comes to a T-intersection[52], where a ‘Six Foot Track’, sign[53] points back along the trail, and where there are some power lines[54] to your right.
(5.6km) Intersection of Medlow Gap Management Trail and 6 Foot Track → Megalong Ford
1.5 km
26 mins
21m
-39m
Easy track
Veer right: From the intersection, this walk heads west along the Nellies Glen Road trail, initially keeping the power lines to your right. After about 170m this walk veers right at the locked ‘Wari-Wari’ gate[55] to climb the fence using a stile [56]. The walk continue along the (now public) dirt Nellies Glen Road, for 900m passing a series of driveways[57], to rejoin then power lines[58] for 120m passing just below a nearby house[59]. Here the road leads downhill for 200m to pass a large ‘Road subject to flooding…’ sign[60] then just 100m later this walk comes to an intersection with ‘Six Foot Track’ sign and stile[61] (just before the road bends right to cross Megalong Creek[62]).
(7.09km) Megalong Ford → Int of Six Foot Track and Megalong Rd
1.1 km
22 mins
40m
-21m
Moderate track
Continue straight: From the intersection, this walk follows the ‘Six Foot Track’ sign[63] over the fence using the stile[64]. A sign reminds walkers to stay on the track as this section is on private property[65]. The walk leads through mostly open farmland for 130m passing a ‘Private Land No Camping’ sign[66] to then cross Mitchells Creek[67], this creek may become impassable after heavy or prolonged rain. Over the next 300m the trail leads over a rise[68] through the farmland to then cross a fence using a stile on the right[69]. The track now leads through a denser forest for another 300m to cross ‘McLennan Bridge’[70], named after Mr Michael (Mick) McLellan who has been in charge of the maintenance of the 6FT for many years. Just shy of 150m after the bridge this walk continues straight at a four-way intersection[71] for another 200m to cross a fence using a stile[72]. Here the walk crosses the sealed Megalong Rd, to find a car park[73] beside a clearing[74] and several ‘Six Foot Track’ signposts[75] (about 400m south of Megalong Creek).
Old Ford Reserve
Old Ford Reserve campsite is a few meters north of the Megalong Rd bridge over Megalong Creek. The campsite is accessible by car, has a (wheelchair accessible) toilet, and plenty of flat space to pitch a tent. Some nice groupings of trees and access to the creek makes this an OK place to stay. Been on the side of the road this campsite does attract some load campers at times. The campsite is about 500m north of the Six Foot Track crossing point at Megalong Rd.
(8.23km) Int of 6 Foot Track and Megalong Rd → Megalong Cemetery
100 m
2 mins
0m
-5m
Easy track
Continue straight: From the car park on Megalong Road (about 400m south of Megalong Creek), this walk follows the ‘Six Foot Track’ sign[76] over the cattle grate[77] or stile[78] and goes beside the large sheltered ‘Six Foot Track’ information sign[79]. Here the walk heads gently downhill along the dirt road[80] for about 80m to come beside a stone memorial[81], marking ‘Megalong Cemetery’[82] (on your left).
Megalong Cemetery (historical)
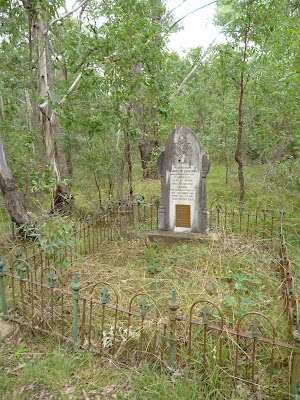
The Megalong Cemetery became the final resting place for at least 14 people who died between 1894 and 1931[83]. Many of the grave sites[84] are in poor repair or can no longer be easily found – please take care in the area to avoid any further damage. A tall stone monument[85] marks the edge of the cemetery on the Six Foot Track, about 100m west of Megalong Road. This cemetery is currently under the management of the Blue Mountains City Council, and is recognised by the National Trust.
(8.32km) Megalong Cemetery → Int Near Guyver Bridge
770 m
15 mins
14m
-34m
Easy track
Continue straight: From beside ‘Megalong Cemetery’[87], this walk heads gently downhill along the dirt road[88] for about 80m to pass through gate with a ‘No Through Road’ sign[89]. Just shy of 300m later, this walk passes a few driveways, beside the farmland[90] to cross another cattle grate[91]. Then about 150m later, the road leads close to Megalong Creek[92], where a sign reminds visitors this is private land[93]. About 30m further on, the main dirt road veers right at a Y-intersection[94] then crosses a cattle grate[95]. Here the walk heads uphill along the dirt road for just over 200m (with views of the escarpment behind[96]) to cross another grate and come to an intersection marked with a ‘Six Foot Track’ sign pointing right into the valley[97].
(9.09km) Int Near Guyver Bridge → Euroka back gate
1.9 km
41 mins
69m
-122m
Moderate track
Turn right: From the intersection, this walk follows the ‘Six Foot Track’ sign[98] downhill along the narrow track into the valley. The walk now crosses a small creek on the timber ‘Guyver Bridge’[99], named in honour of Jon Guyver who worked hard to redevelop the 6FT as the track coordinator/administrator until 2010. Here the walk heads up the timber steps[100] and over a rise[101]. The track now follows a wire fence down through the farmland[102] and across a valley (above a dam) for almost 100m to metal stile just before a dirt trail[103]. Here the walk turns right and crosses the fence using the stile[104], then follows a ‘Six Foot Track’ sign along the track as it undulates over a series of hills[105] for about 300m before crossing another fence using another metal stile[106] beside a large tree. The track now leads uphill for 200m to pass a ‘Private Land – No Camping before Coxs River Reserve’ sign[107], then winds along the side of the hill for a further 150m before heading into a wooded forest and down some timber steps[108]. The walk then crosses a steep gully and winds along the side of the hill for just over 100m to pass a ’35km’ 6FT arrow post[109], then 150m later, crosses another fence using a metal stile[110]. Here the walk continues for another 600m through a mix of farmland and open forest, crossing a few more steep gullies with timber steps to head through a closed gate[111], marked with a few ‘Private Property’ signs[112].
(10.94km) Private Gate → Bowtells Bridge East
3.4 km
1 hr 25 mins
157m
-348m
Hard track
Continue straight: From the gate, this walk heads downhill along the narrowing track, keeping the valley to your right. After about 120m, this walk crosses a timber fence on a metal stile[113], then continues down the track over a few large rocks for just over 200m, to an intersection with a wide trail. Here the walk turns right then immediately left[114], to continue along the track as it narrows again. The track then leads down along the side of the valley for about 600m and passes through another usually closed gate[115], then about 250m later, the track passes a few granite boulders[116] and heads down a few timber steps. About 400m after this, this walk heads down a 100m-long series of timber steps[117] to cross a gully and find a series of large granite boulders[118] – one of the small overhangs is home to a wild bee hive[119]. The track leads out of the valley and gently down along the side of the hill for about 1km, where the valley opens up with wider views down to the Coxs River[120], then heads down some more timber steps[121]. About 250m later, the track leads down another set of timber steps[122] to then head through a pleasant lush gully with views close to the river[123]. The track then heads along the hillside for another 150m to an intersection (just above the swing bridge, to your right), marked with a ‘Six Foot Track’ and ‘Alternative Bridge’ signs[124].
Bowtells Swing Bridge
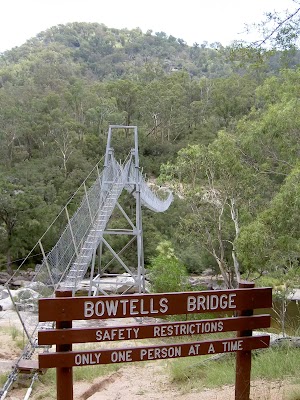
This suspension footbridge[125] spans the Coxs River and provides an alternate route for the Six Foot Track when the river is in flood[126]. Regardless of weather, this route is now becoming more popular with many walkers, wanting to avoid the river crossing. The bridge was built and opened in 1992 by the Royal Australian Engineers. The bridge is named after a fellow soldier of the builders, Corporal Bob Bowtell, who suffocated and died in foul air whilst attempting to clear a tunnel of the VC during the Vietnam war
. Bowtell grew up in Katoomba and is now buried in West Malaysia.
(14.38km) Bowtells Swing Bridge → Coxs River Campsite
1.1 km
25 mins
46m
-74m
Hard track
Continue straight: From the intersection just above above Bowtells Swing Bridge[128], this walk follows the ‘Six Foot Track’ sign[129] along the clear track keeping the main valley to your right. After about 30m the track passes an intersection with another track (to the bridge[130]) then continues along the side of the hill for about 800m crosses several gullies [131] to come an intersection with a trail beside a short timber fence[132]. The walk continues beside this fence for about 70m to then turn right to follow the ‘Six Foot Track’ sign[133] moderately steeply down the embankment. Here the walk leads down across the open floodplain[134] to the bank of the Cox’s River[135].
Continue straight: From the clearing and floodplain[136], this walk
crosses the river that may flow in two or three sections[137] across smooth and slippery rocks. This river becomes impassable when in flood[138], the river is normally only shin deep, if deeper consider using the swing bridge upstream. Once on the sandy beach on the far side, this walk follows the wide trail uphill for about 40m to the intersection marked with a ‘Six Foot Track’ sign[139], where the Coxs River Campsite is just up to the right. Now Veer right to rejoin the main walk .
(14.38km) Bowtells Swing Bridge → Bowtells Swing Bridge North
130 m
4 mins
15m
-8m
Moderate track
Turn right: From the intersection, this walk follows the ‘Alternative Bridge When River High’ sign[140] down the timber steps[141] to the southern end of the ‘Bowtells Bridge’[142]. Here the walk climbs the ramp and crosses the Cox’s River on the suspension bridge[143], observing the ‘Only one Person at a time’[144] safety sign. This crossing can take some time with a large group – the bridge does swing a fair bit and people concerned by heights may find this challenging. The bridge spans 100m, giving great views of the river below[145]. On the far side, this walk steps off the bridge onto the large rock platform[146].
(14.51km) Bowtells Bridge West → Six Foot Track Lodge
790 m
20 mins
49m
-73m
Moderate track
Continue straight: From the north side of the bridge, this walk heads up the timber steps through the dense forest[147] to soon pass the ‘Bowtells Bridge’ sign[148]. At the top of these steps, the track bends left then leads along the side of the hill for 500m, crossing a few gullies[149] and undulating up and down a series of timber steps to then pass between a couple of fences posts[150]. Here the walk continues down a series of timber steps[151] to a clearing and intersection marked with a ‘Private Land – No Camping’ sign[152].
Turn sharp right: From the intersection and clearing, this walk follows the ‘Camping Ground-500mtrs’ sign[153] north up the timber steps. The track soon bends left and follows the side of the hill[154] for about 130m to then head through a gate with a ‘Welcome’ sign[155]. The walk continues along the clear track for another 70m to the intersection with the timber path[156] just below the ‘Six Foot Track Lodge’[157].
Turn sharp right: From the intersection and clearing, this walk follows the ‘Camping Ground-500mtrs’ sign[153] north up the timber steps. The track soon bends left and follows the side of the hill[154] for about 130m to then head through a gate with a ‘Welcome’ sign[155]. The walk continues along the clear track for another 70m to the intersection with the timber path[156] just below the ‘Six Foot Track Lodge’[157].
Six Foot Track Lodge

The Six Foot Track Lodge is situated above the flats of the Coxs River along the Six Foot Track alternate route, not far north of Coxs River Campsite. The lodge consists of two cabins, each with the capacity to sleep twelve people in bunks[158]. The cabins are equipped with linen, warm blankets, log fire[159], pizza oven[160], tank water[161] and has its own outhouse toilet[162]. At $35 per person per night, this is a very pleasant way to spend an evening. Authentic meals can also be organised for a fee. For more information, visit www.6fttracklodge.com or call Pavel on 0421 932 631. Walk-ins are welcome, however to ensure beds are available, booking in advance is recommended.
(15.3km) Six Foot Track Lodge → Coxs River Campsite
410 m
8 mins
7m
-19m
Moderate track
Continue straight: From the intersection below the ‘Six Foot Track Lodge’[164], this walk follows the clear track west initially keeping the lodge up to your right. After about 30m this walk crosses a gully[165] then climbs over a fence using stile[166]. Here the walk turns right and follows the track for almost 50m to a T-intersection[167] with a wide trail, beside a private property gate[168] and marked with several ‘Six Foot Track’ signs[169].
Veer left: From the intersection, this walk follows the ‘Camping Ground-200m’ sign[170] gently down along wide trail[171]. After about 230m the trail flattens out and passes below the main camping area[172] marked with a ‘Coxs River Reserve’ sign[173]. About 30m past here, this walk comes to a clear intersection with a dirt road marked with a ‘Six Foot Track’ sign[174].
Veer left: From the intersection, this walk follows the ‘Camping Ground-200m’ sign[170] gently down along wide trail[171]. After about 230m the trail flattens out and passes below the main camping area[172] marked with a ‘Coxs River Reserve’ sign[173]. About 30m past here, this walk comes to a clear intersection with a dirt road marked with a ‘Six Foot Track’ sign[174].
Coxs River Campsite
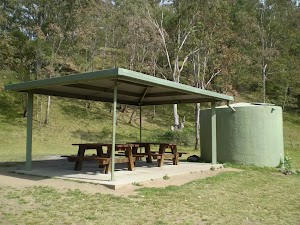
Coxs River Campsite, on the Six Foot Track, is found on the western bank of the Coxs River. It provides a sheltered picnic table[175], water (rain tank[176] or creek[177] – treat before drinking either), toilet[178][179] and a flat grassed camping area[180] with excellent access to the river[181]. The campsite is used by people walking the Six Foot Track, but is also visited at times people people camping in 4WD. A nice place to camp. Despite the several fire scares, this is a fuel stove only area no fires allowed[182].
Coxs River

The Coxs River starts west of Katoomba, running south-east as the main tributary for the Warragamba Dam. The Six Foot Track crosses the river using on the slippery rounded stones or, when in flood, the large metal Bowtells Bridge. The campsite is located a short distance up the west bank from where the 6FT crosses. The water must be treated before drinking. The river provides some potentially nice swimming spots, with pools and interesting granite rock formations, be very careful if deciding to swim as it can also be a very dangerous.
End of day 1
This is the planned overnight stay for the end of day 1, happy camping.
(15.71km) Coxs River Campsite → Kiangatha Yards
3.1 km
1 hr 10 mins
354m
-61m
Moderate track
Turn right: From the intersection, this walk follows the ‘Six Foot Track’ sign[183] uphill along the dirt road
passing alongside the Coxs River Campsite (which is on your right). After about 150m this walk crosses the usually shallow Gibraltar Creek[184] that leads uphill for another 150m to pass close to a high tension power line tower[185] (up the hill to your left). The walk continues up along the dirt road for 200m to cross a usually small creek[186] then heads under the high tension power lines to cross the usually usually shallow Gibraltar Creek[187] again. These creeks may become impassable after heavy or prolonged rain, they also often dry up. From here the dirt road winds moderately steeply uphill for about 2.1km where it then passes around a left hand hairpin bend to pass another ‘Drive With Caution Walkers On Road’ sign[188] (where there is also some views to your left). The road leads more gently uphill where it then bends right to lead gently past the top of the Kiangatha Yards[189] to cross a cattle grate[190] on the dirt road.
passing alongside the Coxs River Campsite (which is on your right). After about 150m this walk crosses the usually shallow Gibraltar Creek[184] that leads uphill for another 150m to pass close to a high tension power line tower[185] (up the hill to your left). The walk continues up along the dirt road for 200m to cross a usually small creek[186] then heads under the high tension power lines to cross the usually usually shallow Gibraltar Creek[187] again. These creeks may become impassable after heavy or prolonged rain, they also often dry up. From here the dirt road winds moderately steeply uphill for about 2.1km where it then passes around a left hand hairpin bend to pass another ‘Drive With Caution Walkers On Road’ sign[188] (where there is also some views to your left). The road leads more gently uphill where it then bends right to lead gently past the top of the Kiangatha Yards[189] to cross a cattle grate[190] on the dirt road.
(18.76km) Kiangatha Yards → Alum Creek Reserve
3.1 km
1 hr 14 mins
184m
-190m
Hard track
Continue straight: From beside Kiangatha cattle Yards[191] this walk heads north west along the dirt road to cross a small dip and head straight through an intersection and continue for 250m to pass a ‘Grid’ sign[192] (facing away). About 140m later this walk pass another ‘Grid’ sign[193] then 100m after crosses another cattle grid[194]. The walk continues (moderately steeply in places) up the dirt road for 700m where it flattens out mostly[195] at a grassy clearing with view of the distant escarpment[196] (behind). Here the dirt road leads more consistently and steeply uphill for 300m until suddenly flattening out on at the top of Mini Mini Saddle, beside a large clearing[197] (on your left).
Continue straight: From beside the Mini Mini Saddle clearing[198], this walk follows the dirt road gently uphill along the side of the hill. The road leads past a open section of forest and starts to head downhill to pass a 6FT ’20km’ arrow post[199] about 250m after leaving the clearing. Here the track leads downhill, moderately steeply in places for 900m where the road bends left[200] around the edge of a grassy clearing. About 40m further down the road, this walk passes an intersection with the regenerating trail[201] (on your right) and continues steeply downhill for just shy of 300m to turn left at the intersection at the other end of the regenerating trail[202]. This walk continues more gently downhill along the dirt road for just over 350m until coming to the signposted (and gated) ‘Alum Creek Reserve’[203] (on your right).
Continue straight: From beside the Mini Mini Saddle clearing[198], this walk follows the dirt road gently uphill along the side of the hill. The road leads past a open section of forest and starts to head downhill to pass a 6FT ’20km’ arrow post[199] about 250m after leaving the clearing. Here the track leads downhill, moderately steeply in places for 900m where the road bends left[200] around the edge of a grassy clearing. About 40m further down the road, this walk passes an intersection with the regenerating trail[201] (on your right) and continues steeply downhill for just shy of 300m to turn left at the intersection at the other end of the regenerating trail[202]. This walk continues more gently downhill along the dirt road for just over 350m until coming to the signposted (and gated) ‘Alum Creek Reserve’[203] (on your right).
Alum Creek Camping ground
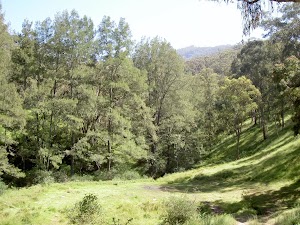
Signposted as ‘Alum Creek Reserve’[204], this fairly flat grassy area[205], off the side of the dirt Glen Chee Road, part of the six foot track). The campsite is the least used and least developed of the three official campsites on the Six Foot Track, and makes a good place to stay if attempting the walk in two days. There are no facilities provided but the flat campsite is in a well-protected valley with the small Alum Creek beside the campsite and the fairly reliable Little River down the road (treat water before use).
(21.82km) Alum Creek Reserve → Int of Black Range Rd and Cronje Mtn Fire Trail
4.2 km
1 hr 32 mins
468m
-54m
Hard track
Continue straight: From ‘Alum Creek Reserve’[206], this walk follows the dirt road downhill for just shy of 100m to cross Alum Creek[207]. Here the walk heads up between the two timber posts[208] and heads through old farmland[209] for about 300m to pass a ‘Drive with Caution Walkers on road’ sign[210] (facing away). Over next 300m this walk continues through the old farmland[211], then leads beside Little River[212] before crossing the usually shallow Little River[213]. Just over 100m later this dirt road leads across the river again [214], then again after another 110m[215]. These creeks may become impassable after heavy or prolonged rain, and may become dry. The dirt road now starts to head uphill for about 300m where it then bends right around a hand hairpin bend then a short distance further up to the ‘Kiangatha’ gate[216].
Continue straight: From here, this walk heads up through the Kiangatha Gate[217] and continues walking fairly steeply uphill along the dirt road. After about 500m the road leads around a left hand hairpin bend[218] then 150m later the road briefly flattens out beside a large flat clearing (on your left)[219]. The walk continues steeply uphill for 800m to walk past a ‘Drive with Caution Walkers On Road’ sign[220] (facing away) to come to a Y-intersection with the signposted ‘Waterfall Creek Fire Trail’[221] (on your right).
Turn left: From the intersection, this walk follows the arrow on the metal post quiet steeply uphill along the dirt road. After about 400m this walk passes a ’20km’ 6FT arrow post[222] then about 150m later the road flattens out briefly to pass a clearing on the top of the ridge (on your left)[223]. The dirt road continues to wind fairly steeply uphill for another 700m with some distance views of the escarpment[224] behind before passing around a sharp left hand hair pin bend[225]. Just shy of 150m later this walk comes to a clearing at the top if Black Range, marked with a few 6FT signs and the intersection with the signposted ‘Cronje Mountain Fire Trail’[226].
(26.01km) Int. Black Range Rd and Cronje Mtn Fire Trail → Int. Black Range Rd and Moorara Boss Fire Trail
2.1 km
38 mins
103m
-24m
Moderate track
Veer right: From the intersection, this walk follows the ‘6`t’ arrow on metal pole generally west along main dirt road that follows the top of the ridge line. The dirt road undulates along the ridge line for 2.1km, moderately steeply in a few places through a wooded forest and past a few large ant mounds[227] until leading up to the signposted intersection with ‘Moorara Boss Fire Trail’[228] (on your left).
(28.06km) Int. Black Range Rd and Moorara Boss Fire Trail → Int. Black Range Rd and Warlock Fire Trail
3.2 km
57 mins
118m
-32m
Moderate track
Continue straight: From the intersection, this walk follows the ‘6`t’ arrow on metal pole[229] west and uphill along the main dirt road that follows the ridge line. After about 100m this walk heads past a small dam on the side of the road[230] then continues along the dirt road as it gently undulates through the pleasant open forest for 2.3km before heading up a short steep section[231]. About 900m from the top of this steep section the road leads fairly gently up to and intersection with the signposted ‘Warlock Fire Trail’[232] (on your left).
(31.27km) Int. Black Range Rd and Warlock Fire Trail → Black Range Rd
3.1 km
51 mins
82m
-13m
Moderate track
Continue straight: From the intersection, this walk follows the arrow on the metal ‘6`T’ post west along the main dirt road. After just shy of 100m this road splits in two for a short distance[233] then almost 400m later this walk comes to an intersection with the signposted ‘Beefsteak Creek Fire Trail’[234] (on your right).
Continue straight: From the intersection, this walk follows the ‘6`t’ arrow on a metal post north west, uphill along the main dirt road. Soon the road leads up a short steep rise then leads more gently as it undulates along the ridge for 400m to pass straight ahead at an intersection marked with a metal ‘Kanangra Boyd National Park’ sign[235]. This walk continues along the main dirt road for another 1.2km to pass a short trail (on your right, that leads into a clearing that has been used as a campsite[236]). Here the dirt road continues gently uphill for 500m to find an intersection[237] with a faint trail (on the left), just before the clearing and pine forest[238].
Continue straight: From the intersection[239], this walk heads north and gently uphill along the main trail, towards the clearing. After about 80m the dirt road leads past a ‘Black Range Fire Trail’ sign[240] then about 25m later comes to the edge of the clearing and intersection with another trail[241]. Here the walk continues straight and gently up along the main dirt road for 400m as the road bends right to a T-intersection on the edge of the pine forest [242], marked with a ‘6`t’ metal arrow post[243].
(34.34km) Black Range Rd → Black Range Camping Ground
360 m
8 mins
0m
-28m
Moderate track
Turn left: From the intersection, this walk follows the ‘6`t’ metal arrow post[244] downhill along the dirt road keeping the main pine forest to your right[245]. After about 250m this walk comes to a clear four way intersection[246] marked with several ‘Six Foot Track’ signs[247][248], and some power lines on your left.
Turn left: From the intersection, this walk follows the ‘Six Foot Track – Black Range Camping Ground’ sign[249] gently downhill and some under power lines[250] along the dirt road. After about 50m this walk heads past a ‘Drive With Caution Walkers On Road’ sign[251] then another 50m later comes to an information sign in front of the ‘Black Range Camping Ground’[252] (on your right).
Turn left: From the intersection, this walk follows the ‘Six Foot Track – Black Range Camping Ground’ sign[249] gently downhill and some under power lines[250] along the dirt road. After about 50m this walk heads past a ‘Drive With Caution Walkers On Road’ sign[251] then another 50m later comes to an information sign in front of the ‘Black Range Camping Ground’[252] (on your right).
Black Range camping ground
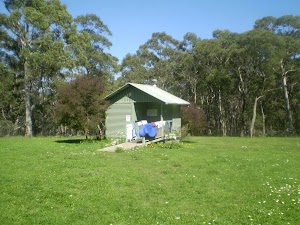
Black Range camping ground is found along the Six Foot Track, and is also accessible by car. The well maintained and signposted[253] campsite has a couple of sheltered picnic tables[254], toilets[255][256], rainwater tank[257] and and information board with map[258]. The campsite is in a large fenced grassy area[259]. The tank water is quiet reliable but the tank can become empty during long dry spells or through vandalism, please treat before use. A sign reminds campers that this is a Fuel Stove Only area – no camp fires[260]
End of day 2
This is the planned overnight stay for the end of day 2, happy camping.
(34.7km) Black Range Campsite → Int of 6 ft track and Jenolan Caves Rd
3 km
1 hr 5 mins
141m
-123m
Hard track
Continue straight: From the information sign in front of ‘Black Range Camping Ground’[261], this walk follows the dirt road gently downhill initially keeping the campsite to your right[262]. After about 100m this walk leaves the edge of the campsite and comes to an intersection with a management trail (on your left), marked with a 6FT arrow post[263].
Continue straight: From the intersection, this walk follows the 6FT arrow post gently downhill (south west) along the management trail[264] through the tall wooded forest. After almost 200m this walk passes a ’10km’ 6FT arrow post[265] then about 400m later the trail bends right and heads more steeply downhill[266] for about 200m where the trail bends left to cross a ferny gully (the upper reaches if Bulls Creek)[267]. The walk continues along the trail heading uphill past a few more 6FT arrow posts[268] for about 500m to a clearing at the top of the ridge[269]. Here the trail bends and leads downhill through tall eucalypt forest with some pine trees[270] for 250m to veer left at an intersection with a faint trail (on your right)[271]. The walk now continues up the moderately steep hill[272] keeping the valley on the left for just shy of 300m to then head up a notably steeper section of trail[273] with a few Telsta posts[274] for about 250m. About 40m from the top of this climb the walk comes to a clear intersection with a trail (on your right), marked with 6FT arrow post[275].
Continue straight: From the intersection, this walk follow 6FT arrow post south west[276] gently downhill along the clear trail. After about 50m the trail bends right then leads fairly steeply downhill[277] for 250m to a pleasant gully[278]. The trail then gently undulates along the side of the hill for 300m to find a T-intersection, marked with a 6FT arrow post (pointing right)[279].
Veer right: From the intersection, this walk follows the 6FT arrow post[280] gently uphill along the trail heading north west. After about 120m this trail bends left (at a large grassy clearing[281]) then just over 100m later the trail passes a ‘Road Ahead’ sign[282] and comes to a larger clearing and gravel stock pile[283] beside the sealed Jenolan Caves Rd[284],
(37.73km) Int of 6 ft track and Jenolan Caves Rd → Jenolan Caves Cottages Administration
2.4 km
49 mins
82m
-102m
Moderate track
Continue straight: From the clearing and gravel pit[285], this walk crosses Jenolan Caves Road[286] (take care with traffic) veering a little left to follow a 6FT arrow post[287] along the narrow track. Here the track leads past a ‘Road Ahead’ sign[288] (facing away) and winds gently along the side of the hill for about 300m before turning right, following a 6FT arrow post[289], down some timber steps[290]. After another 40m this walk crosses a ferny gully and small creek on a small flat timber plank bridge[291]. Here the walk heads along the side of the gully and up timber steps[292] for about 100m before flattening out and heading around the side of the hill for another 200m. Here the walk comes beside the road and heads just behind the safety barrier[293] for about 30m before heading around the side of another small hill for 120m. Here the walk turns right and follows another 6FT arrow post[294] down some timber steps[295] for about 80m to cross another gully on another small flat timber plank bridge[296]. The walk now heads up more timber steps[297] for about 40m where the track flattens out near the road again[298]. Turning right the walk now heads around the side a small hill for 40m before once again turning right and following the 6ft arrow post down timber steps[299] across a gully then head up the hill for 130m to the large blue ‘Jenolan Caves Welcome’ sign[300].
The track now widens (into an old trail) and follows fairly close to road and power lines for 400m before bending right to lead up over a hill[301] for about 600m (passing a ‘5km’ 6FT arrow) to then come down and walk along side of a vegetating clearing[302] and come back to the road[303]. From here this walk follows the track keeping the road a short distance to your left[304] for 150m to an intersection with driveway near a large blue ‘Jenloan Caves Cottages’ sign[305].
The track now widens (into an old trail) and follows fairly close to road and power lines for 400m before bending right to lead up over a hill[301] for about 600m (passing a ‘5km’ 6FT arrow) to then come down and walk along side of a vegetating clearing[302] and come back to the road[303]. From here this walk follows the track keeping the road a short distance to your left[304] for 150m to an intersection with driveway near a large blue ‘Jenloan Caves Cottages’ sign[305].
(40.11km) Jenolan Caves Cottages Administration → Jenolan Caves Cottages
540 m
11 mins
17m
-18m
Easy track
Veer right: From the intersection, this walk follows the ‘Cottages’ sign[306] along the driveway past the ’20’ km/h speed limit sign, initially keeping the office/house to your left[307]. The driveway leads over a small rise then heads downhill for about 300m to pass a toilet block[308]. Here the walk stays on the driveway as it bends left[309] and continues beside the clearing[310] to come beside the cottages[311].
Jenolan Caves Cottages
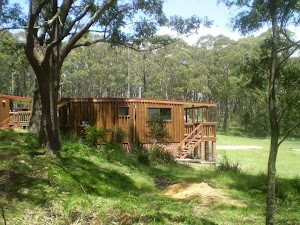
Located 9km from Jenolan Caves by road, Jenolan Caves Cottages offers eight well presented self contained timber cottages for guests to stay in. Each is fully insulated and furnished, with lounge, kitchen, two bedrooms and linen. The is a large flat grassy area in front with often with kangaroos grazing and with a children’s playground. For more information call the Jenolan Caves on 1300 763 311. The cottages have a two night minimum stay and prices are from around $130 per night per cabin.
(40.65km) Jenolan Caves Cottages → Carlotta Arch Lookout
3.7 km
1 hr 22 mins
65m
-402m
Hard track
Continue straight: From beside Jenolan Caves Cottages[314], this walk heads gently uphill along driveway[315] (initially keeping the cottages to your right) for about 60m to walk around the metal gate beside ‘Six Foot Track’ sign[316]. This walk continues along this mostly flat trail for 350m through tall wooded forest to a T-intersection marked with a ‘Kia-ora Hill Fire Trail’ sign[317]. This walk turns right and follows ‘Six Foot Track’ sign[318] gently down along the trail for about 300m to find a fairly large flat clearing[319]. The walk continues along the trail which generally leads downhill along the ridge line for 1.5km to where the trail moves to the side of the steep valley (on your right)[320]. The trail begins to become steeper then after 400m the trail leads particularly steeply down along the rocky trail[321] for about 600m. Here the trial flattens out on a saddle with a Y-intersection marked with a ‘Six Foot Track’ sign (pointing right) and a ‘Mt George’ sign (pointing ahead)[322].
Veer right: From the intersection, this walk follows the ‘Six Foot Track’ sign[323] downhill along the narrowing track, keeping the steep wide valley to your right. After about 25m the track leads between two timber posts[324] and continues fairly steeply down the side of the valley with glimpses to the cave buildings for 500m where the track flattens out a bit and heads under a solid gum tree leaning over the track[325]. The track continues leading downhill for another 300m to cross a narrow saddle and along a very narrow ridge[326] where there are good views down to Blue Lake[327] (on your left). The track now leads down some timber steps for about 50m to a T-intersection[328] with a gravel path where a ‘Six Foot Track’ sign points back uphill.
Turn left: From the intersection, this walk follows the ‘Caves House’ sign[329] gently downhill along the gravel path a short distance to an intersection and fenced lookout near ‘Carlotta Arch’[330][331] (on your left).
Carlotta Arch
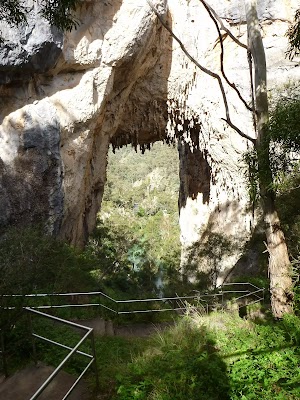
Carlotta Arch is a large and spectacular cave remnant overlooking Blue Lake. It is believed that the arch was named in honour of a daughter of a surveyor – General P.F. Adams. Adams is credited with having taken some of the earliest photos at Jenolan.
(44.34km) Carlotta Arch Lookout → Caves House
410 m
12 mins
21m
-74m
Moderate track
Continue straight: From the fenced lookout near ‘Carlotta Arch’[332][333], this walk follows the ‘Caves House’ sign gently uphill along the stone path[334] with handrail. The path leads over a small rise to a view into another valley. Here the path begins to zig zag fairly steeply downhill for 150m beside the limestone cliffs[335] passing views down to Caves House[336], past a bench seat[337] to a ‘Caves House’ information sign[338]. The path continues more gently downhill for another 100m past the ‘Grand Arch’ information sign (and view of the Arch)[339] then just over 30m later to the ‘Southside Show Caves’ information sign[340]. The path continues down the side of the valley for another 80m to head down some concrete steps to the side of Jenolan Caves Road[341], opposite Caves House[342], where a ‘Six Foot Track’ sign points up the steps[343]. The official end of the Six Foot Track.
Jenolan Caves House
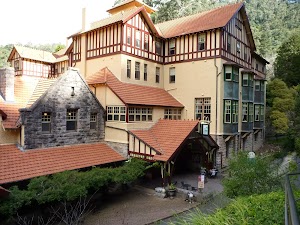
Jenolan Caves House, built in 1898, is a heritage-listed building which houses dining, a variety of accommodation options, and other services for visitors to the caves. Jenolan has two licensed restaurants: Trails Bistro is open from breakfast onwards and closes early evening. Trails serves a range of light meals including sandwiches, salads and hot food. Chisholm’s Restaurant is open each morning for breakfast and each evening for dinner from 6.00pm. Essential items and beautiful souvenirs may be purchased from Things Jenolan, located on the ground floor of Caves House. Don’t forget to explore one of the many caves to explore in the area. For more information, call Jenolan Caves on 1300 76 33 11.
Maps for the Six Foot Track walk
You can download the PDF for this walk to print a map.
These maps below cover the walk and the wider area around the walk, they are worth carrying for safety reasons.
| Six Foot Track | 1:50 000 Map Series | Six Foot Track | NSW-six-foot-track |
| Hampton | 1:25 000 Map Series | 89304S HAMPTON | NSW-89304S |
| Jenolan | 1:25 000 Map Series | 89303N JENOLAN | NSW-89303N |
| Katoomba | 1:25 000 Map Series | 89301S KATOOMBA | NSW-89301S |
| Katoomba | 1:100 000 Map Series | 8930 KATOOMBA | 8930 |
Cross sectional view of the Six Foot Track bushwalking track

Analysis and summary of the altitude variation on the Six Foot Track

Daily actual walking time estimates
| Day | Walking Time | Length |
|---|---|---|
| 1 | 6 hrs 10 mins | 17.1 km |
| 2 | 6 hrs 30 mins | 19 km |
| 3 | 3 hrs 39 mins | 10.1 km |
Overview of this walks grade – based on the AS 2156.1 – 2001
Under this standard, a walk is graded based on the most difficult section of the walk.
| Length | 44.8 km | ||
| Time | 3 Days | ||
| . | |||
| Grade 4/6 Hard track |
AS 2156.1 | Gradient | Very steep (4/6) |
| Quality of track | Rough track, where fallen trees and other obstacles are likely (4/6) | ||
| Signs | Directional signs along the way (3/6) | ||
| Experience Required | Some bushwalking experience recommended (3/6) | ||
| Weather | Storms may impact on navigation and safety (3/6) | ||
| Infrastructure | Limited facilities (such as cliffs not fenced, significant creeks not bridged) (4/6) |
Some more details of this walks Grading
Here is a bit more details explaining grading looking at sections of the walk
Gradient
18km of this walk has short steep hills and another 17km is very steep. Whilst another 8km has gentle hills with occasional steps and the remaining 1.8km is flat with no steps.
Quality of track
33km of this walk follows a clear and well formed track or trail and another 10km follows a formed track, with some branches and other obstacles. Whilst another 1.6km follows a rough track, where fallen trees and other obstacles are likely and the remaining 430m follows a smooth and hardened path.
Signs
Around 32km of this walk has directional signs at most intersection, whilst the remaining 13km is clearly signposted.
Experience Required
Around 33km of this walk requires no previous bushwalking experience, whilst the remaining 11km requires some bushwalking experience.
weather
Around 37km of this walk is not usually affected by severe weather events (that would unexpectedly impact safety and navigation), whilst the remaining 8km is affected by storms that may impact your navigation and safety.
Infrastructure
24km of this walk has limited facilities (such as not all cliffs fenced) and another 19km is close to useful facilities (such as fenced cliffs and seats). The remaining (1.6km) has limited facilities (such as cliffs not fenced, significant creeks not bridged).
Similar walks
A list of walks that share part of the track with the Six Foot Track walk.
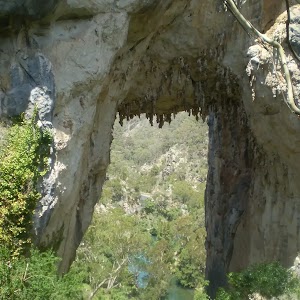
828 m Return
30 mins
Moderate track
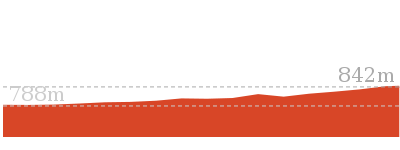

2 km Return
1 Hr
Moderate track

2.2 km Return
1 hr 30 mins
Moderate track
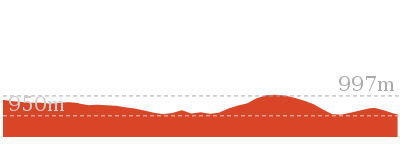
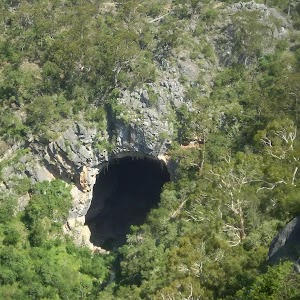
2.2 km Return
1 hr 9 mins
Moderate track
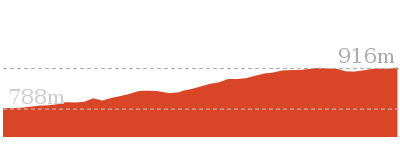
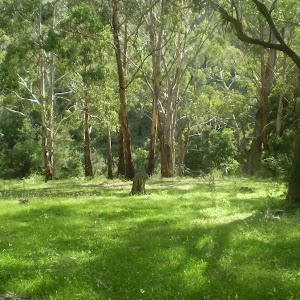
3.1 km Return
1 hr 30 mins
Hard track
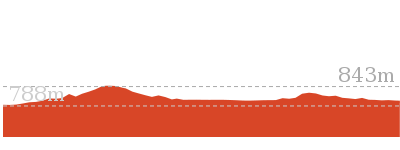
3.5 km Circuit
2 hrs
Hard track
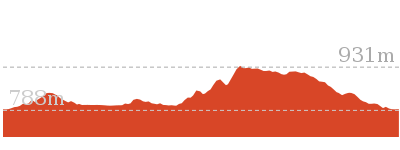
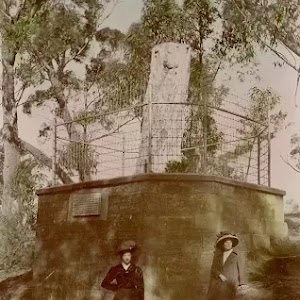
4 km Return
2 hrs
Moderate track
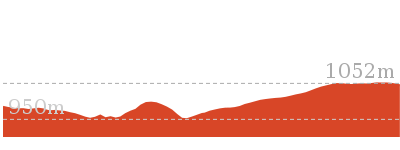
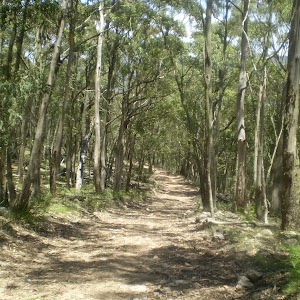
4.6 km One way
2 hrs
Hard track
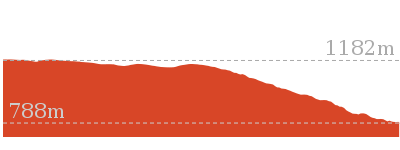
7 km One way
3 hrs 30 mins
Very experienced only
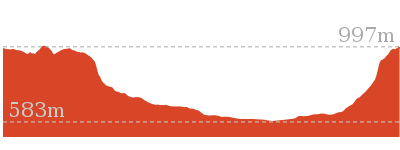

12.6 km Return
5 hrs 30 mins
Hard track
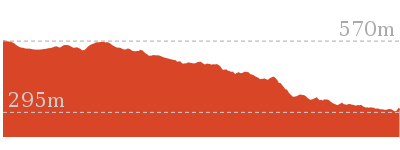
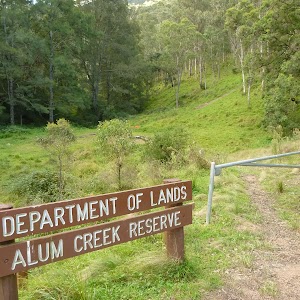
44.8 km One way
2 Days
Hard track
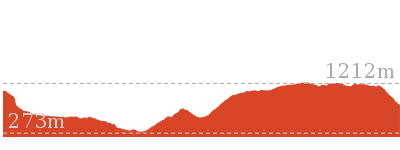
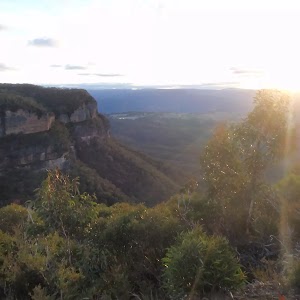
47.8 km One way
2 Days
Very experienced only

47.8 km One way
3 Days
Very experienced only
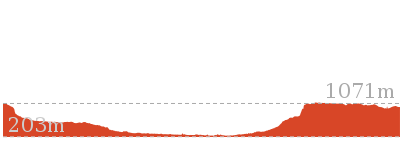
Other Nearby walks
A list of walks that start near the Six Foot Track walk.
1.8 km One way
1 Hr
Moderate track
1.7 km Return
2 hrs
Hard track
1.1 km Return
45 mins
Moderate track
352 m Circuit
20 mins
Moderate track
854 m Circuit
45 mins
Hard track
582 m Return
30 mins
Moderate track
3.3 km Return
1 hr 30 mins
Moderate track
892 m Return
30 mins
Moderate track
4.8 km Circuit
3 hrs
Hard track
2.3 km Return
1 hr 30 mins
Hard track
1.7 km Return
1 hr 15 mins
Hard track
8 km One way
5 hrs
Hard track
Plan your trip to and from the walk here
The Six Foot Track walk starts at the Explorers Tree (gps: -33.70397, 150.29126)
Your transport options to Explorers Tree are by;
![]() Bus. (get details)
Bus. (get details)
![]() Car. There is free parking available.
Car. There is free parking available.
(get details)
The Six Foot Track ends at the Caves House (gps: -33.820325, 150.02117)
Your transport options to Caves House are by;
![]() Bus. There is no public transport from Jenolan caves. There are a lot of tourist buses, most will not give you a lift.Trolley Tours has a special deal for bushwalkers and offers a ( concession) one way deal from Jenolan to Katoomba. The bus leaves the caves at 3pm daily and takes about 1.5 hrs to get to Katoomba town center (about 1 min walk to the train station). Tickets must be pre booked and paid for by phoning 1800 801 577, or through their website. (get details)
Bus. There is no public transport from Jenolan caves. There are a lot of tourist buses, most will not give you a lift.Trolley Tours has a special deal for bushwalkers and offers a ( concession) one way deal from Jenolan to Katoomba. The bus leaves the caves at 3pm daily and takes about 1.5 hrs to get to Katoomba town center (about 1 min walk to the train station). Tickets must be pre booked and paid for by phoning 1800 801 577, or through their website. (get details)
![]() Car. There is free parking available.
Car. There is free parking available.
(get details)
Short URL = http://wild.tl/sft
Gallery images
There are other downloads I am still working on.
You will probably need to login to access these — still all free.
* KML (google earth file)
* GPX (GPS file)
Special Maps/ brochures
* A3 topo maps
* PDF with Lands Topo map base
* PDF with arial image (and map overlay)
I wanted to get the main site live first, this extra stuff will come in time.
Happy walking
Matt 🙂
Scenic Railway to Golden Staircase Circuit

3 hrs 30 mins
5.9 km Circuit
723 m
Hard track
Exploring below the cliffs on the western side of the Scenic Railway, this walk passes some spectacular lookouts, especially the view from the Landslide. In addition to this, it goes through beautiful shrouded forest before climbing steeply up the Golden Staircase. Once out of the valley, be prepared for a long walk back along dirt and asphalt roads to Scenic World.
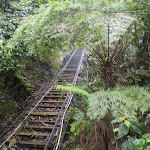

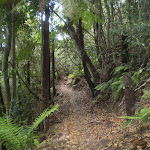
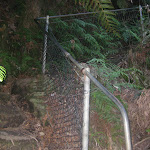
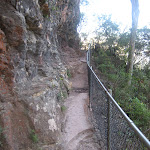


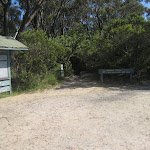
Scenic World
Scenic World is one of the most renowned tourist attractions of Katoomba and the Blue Mountains. Located on the cliffs of the Jamison Valley , visitors can enjoy a ride on the Scenic Railway (the world’s steepest incline railway) or the Scenic Cableway, into the Jamison Valley, and explore the Scenic Walkway from the base. Alternatively, the Scenic Skyway offers a bird’s eye view over the valley, with a glass floor to enhance the experience. Scenic World also features a revolving restaurant, a cafe and a kiosk, in addition to the documentary theatre and souvenir shop. Rides can be purchased, starting from $16 for adults and $10 for children, and combination or family passes are available. More info.
(0km) Scenic World → Scenic Railway (Bottom Platform)
300 m
26 mins
8m
-210m
Very easy
From Scenic World, this walk goes down the cliffs using the Scenic Railway. Hang on tight! This 415m-long journey is the world’s steepest railway. At the bottom, the track comes to a great viewing platform of the valley. Use of the railway costs $10 for adults and $5 for children one-way. Last train normally at 4:45pm (opens at 9am) More info.
(0.3km) Scenic Railway (Bottom Platform) → Int of Scenic Railway Boardwalk and Landslide Bush Track
190 m
6 mins
25m
-17m
Very easy
Turn left : From the bridge over the bottom of the Scenic Railway, this walk follows the signs to ‘scenic walkway’, passing a replica of a mining cart, as well as an old mine. Just past this, the walk comes to a pipeline that runs down the hill collecting fresh water, signposted as drinkable. Continuing past the old mine shafts along the boardwalk, this walk comes to an intersection with a bush track going slightly off to the right. This is signposted as the way to the Landslide.
(0.49km) Int of Scenic Railway Boardwalk and Landslide Bush Track → Landslide
1.2 km
40 mins
150m
-161m
Moderate track
Continue straight: From the intersection, the walk follows the wide track and signposts towards the ‘landslide’[2] (keeping the cliffs on the right). The walk winds along a bush track with small boulders strewn along it. There are a number of old mine shafts just off the track and some interesting historical items. The track continues under Malaita Point before breaking out of the vegetation to a worthy view of the valley, just before the landslide. As the track comes to the old landslide site, it become rougher with plenty of boulders over the track. There are also excellent views of the cliffs above and the landslide as the vegetation is quite sparse here.
The Landslide
‘The Landslide’ is a large rockfall going into the valley approximately 100m. There is a good vantage point for the landslide from under the cliffs to the east, and a great but more distant view from Narrow Neck lookout. The landslide occurred in 1931 after a few days of rumbling. There has been much debate as to whether this event was helped along by erosion and coal mining in the area at the time.
(1.64km) Landslide → Bottom of Golden Staircase
1.6 km
42 mins
128m
-123m
Moderate track
Continue straight: From the eastern side of the Landslide, the walk heads across the face of the landslide (keeping the cliff on the right). At this point, the track is quite rough, with frequent boulders making it a slight scramble. On the other side of the landslide, the track narrows and becomes a flat bush track that follows the base of the cliffs. The surrounding trees become quite dense again, adding quite an ambiance to the area. The walk heads along the bottom of the Narrow Neck escarpment, until coming to an intersection with a set of stairs off to the right, signposted as the ‘Golden Staircase’.
(3.19km) Bottom of Golden Staircase → Bottings Lookout
430 m
19 mins
177m
-41m
Hard track
Turn right: From the intersection, this walk follows the ‘Golden Stairs car park’ sign[3] uphill past the termite mound[4] then past the ‘Warning – Sections of the Golden Stairs are unfenced and can be slippery when wet’ sign[5]. The walk heads up the broad spur along a narrow track, and before long, starts to climbs the first set of rock and metal stairs. After this climb, the track is relatively flat for a little while before another climb up similar stairs[6]. Then the walk makes its way around a gully[7] to the base of a cliff. From here the track is flat for a while, heading between the cliff and the fence for about 100m[8], (passing a ‘Caution Rockfall Hazard’ sign[9]) before another, smaller climb, up through a gap in the rock[10] to the fenced and signposted ‘Botting’s L.O.’[11].
Botting’s Lookout

Botting’s Lookout[12] offers great views over the Jamison Valley and the cliff line, including the Landslide, Malaita Point and the Golden Stairs. A plaque at the lookout states that the lookout was named after Walter Botting (1887-1985)[13], a pioneer trail-maker of the Katoomba District. More info.
(3.62km) Bottings Lookout → Golden Stairs Track carpark
210 m
8 mins
80m
-9m
Moderate track
Turn left: From Botting’s Lookout[14], the walk heads up the hill where the track then turns left. The walk continues, steeply in a couple of places, up some eroded sections of track[15] and through a couple of switchbacks. Soon the narrow track mostly flattens out. leading to the signposted ‘Golden Stairs’[16] car park[17] on Glenraphael Dr[18].
(3.83km) Golden Staircase car park → Sydney Water pipe service trail
860 m
22 mins
30m
-81m
Moderate track
Veer right: From the Golden Stairs car park, this walk follows the dirt road north, down the gentle hill and along the ridge as it undulates up and down for about 1km, before reaching the Sydney Water management trail – this is closed to the public at all times.
(4.68km) Sydney Water pipe service trail → Int of Glenraphael and Cliff Drives
970 m
26 mins
126m
-48m
Moderate track
Veer right: From the intersection, this walk follows the dirt road heading up the hill and undulating along the ridge for about 1km, before it climbs up to the intersection with Cliff Drive.
(5.65km) Int of Glenraphael and Cliff Drives → Scenic World
570 m
11 mins
7m
-34m
Easy track
Turn sharp left: From the intersection, this walk heads up Cliff Drive briefly, then follows the management trail on the right, just past the house. At the end of the trail, this walk turns right onto Violet Street, following this to the front entrance of Scenic World.
Maps for the Scenic Railway to Golden Staircase Circuit walk
You can download the PDF for this walk to print a map.
These maps below cover the walk and the wider area around the walk, they are worth carrying for safety reasons.
| Six Foot Track | 1:50 000 Map Series | Six Foot Track | NSW-six-foot-track |
| Katoomba | 1:25 000 Map Series | 89301S KATOOMBA | NSW-89301S |
| Katoomba | 1:100 000 Map Series | 8930 KATOOMBA | 8930 |
Cross sectional view of the Scenic Railway to Golden Staircase Circuit bushwalking track
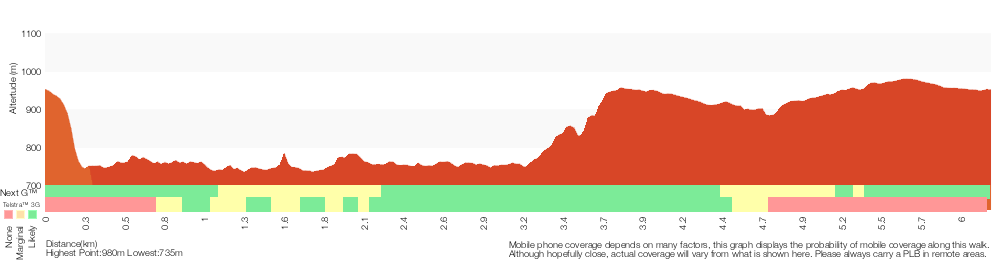
Analysis and summary of the altitude variation on the Scenic Railway to Golden Staircase Circuit
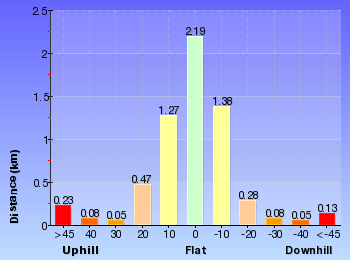
Overview of this walks grade – based on the AS 2156.1 – 2001
Under this standard, a walk is graded based on the most difficult section of the walk.
| Length | 5.9 km | ||
| Time | 3 hrs 30 mins | ||
| . | |||
| Grade 4/6 Hard track |
AS 2156.1 | Gradient | Very steep (4/6) |
| Quality of track | Formed track, with some branches and other obstacles (3/6) | ||
| Signs | Directional signs along the way (3/6) | ||
| Experience Required | Some bushwalking experience recommended (3/6) | ||
| Weather | Weather generally has little impact on safety (1/6) | ||
| Infrastructure | Limited facilities, not all cliffs are fenced (3/6) |
Some more details of this walks Grading
Here is a bit more details explaining grading looking at sections of the walk
Gradient
4.7km of this walk has short steep hills and another 570m has gentle hills with occasional steps. Whilst another 490m is flat with no steps and the remaining 430m is very steep.
Quality of track
3.3km of this walk follows a formed track, with some branches and other obstacles and another 2.4km follows a clear and well formed track or trail. The remaining (490m) follows a smooth and hardened path.
Signs
Around 4.1km of this walk has directional signs at most intersection, whilst the remaining 2.1km is clearly signposted.
Experience Required
Around 4.6km of this walk requires no previous bushwalking experience, whilst the remaining 1.6km requires some bushwalking experience.
weather
This whole walk, 6km is not usually affected by severe weather events (that would unexpectedly impact safety and navigation).
Infrastructure
Around 3.1km of this walk has limited facilities (such as not all cliffs fenced), whilst the remaining 3.1km is close to useful facilities (such as fenced cliffs and seats).
Similar walks
A list of walks that share part of the track with the Scenic Railway to Golden Staircase Circuit walk.
869 m Circuit
1 hr 15 mins
Hard track
2.7 km Return
2 hrs 30 mins
Moderate track
3.1 km One way
3 hrs
Hard track
3.1 km One way
3 hrs
Hard track
4.4 km One way
3 hrs 45 mins
Hard track
6.6 km One way
4 hrs
Hard track
6.7 km Return
4 hrs 30 mins
Moderate track
6.8 km Circuit
5 hrs
Hard track
7.9 km Return
5 hrs
Hard track
8 km One way
5 hrs
Hard track
11.7 km Return
8 hrs 45 mins
Experienced only
12.4 km Return
7 hrs 30 mins
Hard track
16.2 km Return
11 hrs
Experienced only
29.2 km One way
2 Days
Experienced only
29.3 km One way
3 Days
Experienced only
33.8 km Circuit
3 Days
Experienced only
47.8 km One way
2 Days
Very experienced only
47.8 km One way
3 Days
Very experienced only
Other Nearby walks
A list of walks that start near the Scenic Railway to Golden Staircase Circuit walk.
1.5 km Circuit
1 hr 45 mins
Hard track
1.7 km Return
3 hrs 45 mins
Hard track
2.1 km One way
1 hr 15 mins
Moderate track
1.2 km Return
2 hrs
Hard track
5.8 km Circuit
5 hrs 30 mins
Hard track
6.8 km One way
3 hrs 30 mins
Moderate track
1.1 km Circuit
2 hrs
Hard track
1.8 km One way
1 Hr
Moderate track
1.7 km Return
2 hrs
Hard track
1.1 km Return
45 mins
Moderate track
352 m Circuit
20 mins
Moderate track
854 m Circuit
45 mins
Hard track
Plan your trip to and from the walk here
The Scenic Railway to Golden Staircase Circuit walk starts and ends at the Scenic World (gps: -33.728585, 150.30095)
Your transport options to Scenic World are by;
![]() Bus. (get details)
Bus. (get details)
![]() Car. There is free parking available.
Car. There is free parking available.
(get details)
Short URL = http://wild.tl/srtgsc
Gallery images
There are other downloads I am still working on.
You will probably need to login to access these — still all free.
* KML (google earth file)
* GPX (GPS file)
Special Maps/ brochures
* A3 topo maps
* PDF with Lands Topo map base
* PDF with arial image (and map overlay)
I wanted to get the main site live first, this extra stuff will come in time.
Happy walking
Matt 🙂
Six Foot Track (Alum Creek Reserve)
And Walk
Six Foot Track (Alum Creek Reserve)

2 Days
44.8 km One way
2066 m
Hard track
The Six Foot Track is a classic walk which takes you from the Explorers Tree in Katoomba out to the amazing Jenolan Caves. This walk stays the night in Alum Creek Reserve before tackling the long hill up to Black Range Road. The walk is a classic and normally done in 3 days, this two day option is for the fit and keen.
Six Foot Track
Individuals and family groups do not need to book for the walk, however large groups such as school groups should be registered via [email protected] Please provide contact details, basic itinerary, dates, number of students or people and teachers or leaders.
NSW Department of Primary Industries – Lands within the Department of Industry is the state government agency, which manages and maintains the Six Foot Track (as well as others including the Great North Walk and the Hume & Hovell Walking Track). They sell a detailed map kit for the Six Foot Track scaled at 1:50,000 with 100m contour intervals, containing track notes, walking times & distances, points of interest, history, flora & fauna, as well as safety tips. The kit is available for $10 (plus $2 postage & handling), with proceeds from all of their map kit sales supporting ongoing maintenance of the tracks.
To order their Six Foot Track Map Kit, or for Lands tracks & trails, see their order form (PDF 80kb) . More info.
NSW Department of Primary Industries – Lands within the Department of Industry is the state government agency, which manages and maintains the Six Foot Track (as well as others including the Great North Walk and the Hume & Hovell Walking Track). They sell a detailed map kit for the Six Foot Track scaled at 1:50,000 with 100m contour intervals, containing track notes, walking times & distances, points of interest, history, flora & fauna, as well as safety tips. The kit is available for $10 (plus $2 postage & handling), with proceeds from all of their map kit sales supporting ongoing maintenance of the tracks.
To order their Six Foot Track Map Kit, or for Lands tracks & trails, see their order form (PDF 80kb) . More info.
Free Beacon Hire
A Personal Locating Beacon (PLB) is a hand-held device that, when triggered, sends a message to the emergency services with your location. The emergency services staff can then look at your trip intention forms and decide how best to help you. In the Blue Mountains, you can borrow these for no charge, just complete this Trip intention form, and a borrowing form. The device can be picked up from:
NPWS Office – Govetts Leap Rd Blackheath – 9am to 4pm 7 days Ph: 02 4787 8877
Katoomba Police Station – 217 Katoomba St Katoomba – Anytime Ph: 02 4782 8199
Springwood Police Station – 4 Jerseywold Avenue Springwood – Anytime Ph: 02 4751 0299
More info.
NPWS Office – Govetts Leap Rd Blackheath – 9am to 4pm 7 days Ph: 02 4787 8877
Katoomba Police Station – 217 Katoomba St Katoomba – Anytime Ph: 02 4782 8199
Springwood Police Station – 4 Jerseywold Avenue Springwood – Anytime Ph: 02 4751 0299
More info.
Explorers Tree (Katoomba)
In 1813, the explorers Gregory Blaxland, William Wentworth and William Lawson, on their historic crossing of the Blue Mountains, engraved their names not only into the history books, but also reportedly into this tree on the side of Pulpit Hill. The tree now long dead was caged[1] in 1884 in an attempt to preserve the engravings[2]. The engravings are no longer visible[3] and there is even debate over the last 100+ years as to the authenticity of the engravings.
(0km) Explorers Tree → Six Foot Track Info Shelter
260 m
5 mins
8m
-6m
Easy track
From the ‘Explorers Tree’[5] (at the intersection of Nellies Glen Rd and the Great Western Hwy), this walk follows the ‘Six Foot Track – 200m’ sign[6] up along the sealed Nellies Glen Rd[7] for just over 200m before turning left at another ‘Six Foot Track’ sign[8]. Here the walk comes to a dirt car park[9] and shelter[10] with a large ‘Six Foot Track’ information sign[11].
(0.26km) Six Foot Track Info Shelter → Int of 6 Foot Track and Norths Lookout Trail
550 m
12 mins
2m
-68m
Moderate track
Continue straight: From the shelter and car park (on Nellies Glen Rd), this walk follows the ‘Six Foot Track’ sign[12] around the lower locked metal gate to follow the management trail gently downhill[13]. The walk continues down this trail, which becomes fairly steep in places, for about 500m. Here the trail flattens out and comes to an intersection marked with a couple of ‘Six Foot Track’ signs[14] and a ‘Nellies Glen Bushland Restoration’ sign[15].
(0.81km) Int of 6 Foot Track and Norths Lookout Trail → Norths Lookout
210 m
6 mins
1m
-32m
Moderate track
Continue straight: From the intersection[16], this walk heads through the gap in the large metal gate, over a small rise. The fairly narrow track soon leads down a series of timber steps[17], past some nice views for just shy of 150m to come to a faint intersection with a track (on your left), marked with a ‘Bonnie Doon Fauna Study’ sign[18].
Continue straight: From the intersection, this walk follows the track downhill towards the open views[19]. After about 50m the track comes to the fenced[20] and signposted ‘Norths Lookout’[21] with great views over Nellie’s Glen and into the valley[22]. At the end of this side trip, retrace your steps back to the main walk then Veer left.
Continue straight: From the intersection, this walk follows the track downhill towards the open views[19]. After about 50m the track comes to the fenced[20] and signposted ‘Norths Lookout’[21] with great views over Nellie’s Glen and into the valley[22]. At the end of this side trip, retrace your steps back to the main walk then Veer left.
(0.81km) Int of Six Foot Track and Norths Lookout Trail → Int at Lower Nellies Glen
1.6 km
44 mins
26m
-337m
Hard track
Turn right: From the intersection, this walk follows the ‘Six Foot Track’ sign[23], fairly steeply down the management trail past the ‘Nellies Glen’ metal plaque[24] and, about 10m later, past the timber ‘Nellies Glen’ sign. After another 80m, the trail narrows and this walk turns left to head through the green timber chicane with the ‘Caution – Steep Decent’ and ‘Pedestrian Access only’ signs[25]. As the sign suggests, this walk now leads steeply down the Nellies Glen canyon steps[26] for about 300m, passing alongside the tall rock walls[27] and crossing the usually small creek a few times before bending distinctly left to cross below a small set of falls (below the main Bonnie Doon Falls)[28]. Here the track mostly flattens out[29] and leads along the side of the gully for another 400m to pass a ‘Blue Mountains National Park’ sign[30], then just over 100m later, passes another sign marking the lower end of ‘Nellies Glen’[31]. About 600m after this sign, the track bends to cross a narrow gully then leads up to a small clearing at the northern end of the wide Nellies Glen trail.
(2.44km) Int at Lower Nellies Glen → Int of Nellies Glen Rd Trail and Devils Hole Trail
2 km
36 mins
14m
-102m
Moderate track
Veer left: From the clearing, this walk follows the wide trail gently downhill[32] while keeping the valley to your right. The trail leads generally downhill through the scribbly gum forest[33] for about 1.4km to then cross the culverted[34] Devils Hole Creek – just past the creek is an unused concrete pipe[35] with wild bee hives[36] inside. This walk continues along the trail for another 500m to an intersection with the Devils Hole Trail[37] (on your left), marked a ‘Six Foot Track’ and a ‘Ladders have been removed’ sign.
(4.42km) Int of Nellies Glen Rd Trail and Devils Hole Trail → Megalong Village site
90 m
1 mins
1m
0m
Easy track
Megalong Village (Historic)
In 1870, kerosene shale was discovered in the area surrounding the upper end of Megalong and Diamond Creeks so in 1885, Mr J. B. North started to mine the resource. The mine continued for nearly 10 years. During the life of the mine, the Megalong Village grew to to a small town with a hotel, butchery, bakery, public hall and around about 40 families[42]. When the mines were closed in 1904, the best buildings were demolished and rebuilt in Katoomba. In the December of 1904, a huge bushfire ripped up through the valley destroying what buildings were left. Now the area is private land with a horse paddock[43] with a view of the escarpment behind. A small bronze sign marks the site[44] .
(4.5km) Megalong Village site → Int Mitchells Creek and Nellies Glen Rd trails
1.1 km
18 mins
8m
-23m
Easy track
Continue straight: From the beside the historic Megalong ‘Village site’[45], this walk heads along the wide trail, initially keeping the horse paddock[46] and view to the escaprment to your left after just shy of 250m this walk heads through a usually closed gate[47] and continues gently undulating along the trail through the tall scribbly gum forest[48] for 500m, crossing a usually small creek[49] to then pass a 6FT ’40km’ arrow post[50]. About 400m further along this trail, soon after crossing the usually small Corral Creek[51], this walk comes to a T-intersection[52], where a ‘Six Foot Track’, sign[53] points back along the trail, and where there are some power lines[54] to your right.
(5.6km) Intersection of Medlow Gap Management Trail and 6 Foot Track → Int of Six Foot Track and Megalong Rd
2.6 km
48 mins
61m
-60m
Moderate track
Veer right: From the intersection, this walk heads west along the Nellies Glen Road trail, initially keeping the power lines to your right. After about 170m this walk veers right at the locked ‘Wari-Wari’ gate[55] to climb the fence using a stile [56]. The walk continue along the (now public) dirt Nellies Glen Road, for 900m passing a series of driveways[57], to rejoin then power lines[58] for 120m passing just below a nearby house[59]. Here the road leads downhill for 200m to pass a large ‘Road subject to flooding…’ sign[60] then just 100m later this walk comes to an intersection with ‘Six Foot Track’ sign and stile[61] (just before the road bends right to cross Megalong Creek[62]).
Continue straight: From the intersection, this walk follows the ‘Six Foot Track’ sign[63] over the fence using the stile[64]. A sign reminds walkers to stay on the track as this section is on private property[65]. The walk leads through mostly open farmland for 130m passing a ‘Private Land No Camping’ sign[66] to then cross Mitchells Creek[67], this creek may become impassable after heavy or prolonged rain. Over the next 300m the trail leads over a rise[68] through the farmland to then cross a fence using a stile on the right[69]. The track now leads through a denser forest for another 300m to cross ‘McLennan Bridge’[70], named after Mr Michael (Mick) McLellan who has been in charge of the maintenance of the 6FT for many years. Just shy of 150m after the bridge this walk continues straight at a four-way intersection[71] for another 200m to cross a fence using a stile[72]. Here the walk crosses the sealed Megalong Rd, to find a car park[73] beside a clearing[74] and several ‘Six Foot Track’ signposts[75] (about 400m south of Megalong Creek).
Continue straight: From the intersection, this walk follows the ‘Six Foot Track’ sign[63] over the fence using the stile[64]. A sign reminds walkers to stay on the track as this section is on private property[65]. The walk leads through mostly open farmland for 130m passing a ‘Private Land No Camping’ sign[66] to then cross Mitchells Creek[67], this creek may become impassable after heavy or prolonged rain. Over the next 300m the trail leads over a rise[68] through the farmland to then cross a fence using a stile on the right[69]. The track now leads through a denser forest for another 300m to cross ‘McLennan Bridge’[70], named after Mr Michael (Mick) McLellan who has been in charge of the maintenance of the 6FT for many years. Just shy of 150m after the bridge this walk continues straight at a four-way intersection[71] for another 200m to cross a fence using a stile[72]. Here the walk crosses the sealed Megalong Rd, to find a car park[73] beside a clearing[74] and several ‘Six Foot Track’ signposts[75] (about 400m south of Megalong Creek).
Old Ford Reserve
Old Ford Reserve campsite is a few meters north of the Megalong Rd bridge over Megalong Creek. The campsite is accessible by car, has a (wheelchair accessible) toilet, and plenty of flat space to pitch a tent. Some nice groupings of trees and access to the creek makes this an OK place to stay. Been on the side of the road this campsite does attract some load campers at times. The campsite is about 500m north of the Six Foot Track crossing point at Megalong Rd.
(8.23km) Int of 6 Foot Track and Megalong Rd → Megalong Cemetery
100 m
2 mins
0m
-5m
Easy track
Continue straight: From the car park on Megalong Road (about 400m south of Megalong Creek), this walk follows the ‘Six Foot Track’ sign[76] over the cattle grate[77] or stile[78] and goes beside the large sheltered ‘Six Foot Track’ information sign[79]. Here the walk heads gently downhill along the dirt road[80] for about 80m to come beside a stone memorial[81], marking ‘Megalong Cemetery’[82] (on your left).
Megalong Cemetery (historical)
The Megalong Cemetery became the final resting place for at least 14 people who died between 1894 and 1931[83]. Many of the grave sites[84] are in poor repair or can no longer be easily found – please take care in the area to avoid any further damage. A tall stone monument[85] marks the edge of the cemetery on the Six Foot Track, about 100m west of Megalong Road. This cemetery is currently under the management of the Blue Mountains City Council, and is recognised by the National Trust.
(8.32km) Megalong Cemetery → Int Near Guyver Bridge
770 m
15 mins
14m
-34m
Easy track
Continue straight: From beside ‘Megalong Cemetery’[87], this walk heads gently downhill along the dirt road[88] for about 80m to pass through gate with a ‘No Through Road’ sign[89]. Just shy of 300m later, this walk passes a few driveways, beside the farmland[90] to cross another cattle grate[91]. Then about 150m later, the road leads close to Megalong Creek[92], where a sign reminds visitors this is private land[93]. About 30m further on, the main dirt road veers right at a Y-intersection[94] then crosses a cattle grate[95]. Here the walk heads uphill along the dirt road for just over 200m (with views of the escarpment behind[96]) to cross another grate and come to an intersection marked with a ‘Six Foot Track’ sign pointing right into the valley[97].
(9.09km) Int Near Guyver Bridge → Euroka back gate
1.9 km
41 mins
69m
-122m
Moderate track
Turn right: From the intersection, this walk follows the ‘Six Foot Track’ sign[98] downhill along the narrow track into the valley. The walk now crosses a small creek on the timber ‘Guyver Bridge’[99], named in honour of Jon Guyver who worked hard to redevelop the 6FT as the track coordinator/administrator until 2010. Here the walk heads up the timber steps[100] and over a rise[101]. The track now follows a wire fence down through the farmland[102] and across a valley (above a dam) for almost 100m to metal stile just before a dirt trail[103]. Here the walk turns right and crosses the fence using the stile[104], then follows a ‘Six Foot Track’ sign along the track as it undulates over a series of hills[105] for about 300m before crossing another fence using another metal stile[106] beside a large tree. The track now leads uphill for 200m to pass a ‘Private Land – No Camping before Coxs River Reserve’ sign[107], then winds along the side of the hill for a further 150m before heading into a wooded forest and down some timber steps[108]. The walk then crosses a steep gully and winds along the side of the hill for just over 100m to pass a ’35km’ 6FT arrow post[109], then 150m later, crosses another fence using a metal stile[110]. Here the walk continues for another 600m through a mix of farmland and open forest, crossing a few more steep gullies with timber steps to head through a closed gate[111], marked with a few ‘Private Property’ signs[112].
(10.94km) Private Gate → Bowtells Bridge East
3.4 km
1 hr 25 mins
157m
-348m
Hard track
Continue straight: From the gate, this walk heads downhill along the narrowing track, keeping the valley to your right. After about 120m, this walk crosses a timber fence on a metal stile[113], then continues down the track over a few large rocks for just over 200m, to an intersection with a wide trail. Here the walk turns right then immediately left[114], to continue along the track as it narrows again. The track then leads down along the side of the valley for about 600m and passes through another usually closed gate[115], then about 250m later, the track passes a few granite boulders[116] and heads down a few timber steps. About 400m after this, this walk heads down a 100m-long series of timber steps[117] to cross a gully and find a series of large granite boulders[118] – one of the small overhangs is home to a wild bee hive[119]. The track leads out of the valley and gently down along the side of the hill for about 1km, where the valley opens up with wider views down to the Coxs River[120], then heads down some more timber steps[121]. About 250m later, the track leads down another set of timber steps[122] to then head through a pleasant lush gully with views close to the river[123]. The track then heads along the hillside for another 150m to an intersection (just above the swing bridge, to your right), marked with a ‘Six Foot Track’ and ‘Alternative Bridge’ signs[124].
Bowtells Swing Bridge
This suspension footbridge[125] spans the Coxs River and provides an alternate route for the Six Foot Track when the river is in flood[126]. Regardless of weather, this route is now becoming more popular with many walkers, wanting to avoid the river crossing. The bridge was built and opened in 1992 by the Royal Australian Engineers. The bridge is named after a fellow soldier of the builders, Corporal Bob Bowtell, who suffocated and died in foul air whilst attempting to clear a tunnel of the VC during the Vietnam war
. Bowtell grew up in Katoomba and is now buried in West Malaysia.
(14.38km) Bowtells Swing Bridge → Coxs River Campsite
1.1 km
25 mins
46m
-74m
Hard track
Continue straight: From the intersection just above above Bowtells Swing Bridge[128], this walk follows the ‘Six Foot Track’ sign[129] along the clear track keeping the main valley to your right. After about 30m the track passes an intersection with another track (to the bridge[130]) then continues along the side of the hill for about 800m crosses several gullies [131] to come an intersection with a trail beside a short timber fence[132]. The walk continues beside this fence for about 70m to then turn right to follow the ‘Six Foot Track’ sign[133] moderately steeply down the embankment. Here the walk leads down across the open floodplain[134] to the bank of the Cox’s River[135].
Continue straight: From the clearing and floodplain[136], this walk
crosses the river that may flow in two or three sections[137] across smooth and slippery rocks. This river becomes impassable when in flood[138], the river is normally only shin deep, if deeper consider using the swing bridge upstream. Once on the sandy beach on the far side, this walk follows the wide trail uphill for about 40m to the intersection marked with a ‘Six Foot Track’ sign[139], where the Coxs River Campsite is just up to the right. Now Veer right to rejoin the main walk .
Continue straight: From the clearing and floodplain[136], this walk
crosses the river that may flow in two or three sections[137] across smooth and slippery rocks. This river becomes impassable when in flood[138], the river is normally only shin deep, if deeper consider using the swing bridge upstream. Once on the sandy beach on the far side, this walk follows the wide trail uphill for about 40m to the intersection marked with a ‘Six Foot Track’ sign[139], where the Coxs River Campsite is just up to the right. Now Veer right to rejoin the main walk .
(14.38km) Bowtells Swing Bridge → Six Foot Track Lodge
920 m
24 mins
64m
-81m
Moderate track
Turn right: From the intersection, this walk follows the ‘Alternative Bridge When River High’ sign[140] down the timber steps[141] to the southern end of the ‘Bowtells Bridge’[142]. Here the walk climbs the ramp and crosses the Cox’s River on the suspension bridge[143], observing the ‘Only one Person at a time’[144] safety sign. This crossing can take some time with a large group – the bridge does swing a fair bit and people concerned by heights may find this challenging. The bridge spans 100m, giving great views of the river below[145]. On the far side, this walk steps off the bridge onto the large rock platform[146].
Continue straight: From the north side of the bridge, this walk heads up the timber steps through the dense forest[147] to soon pass the ‘Bowtells Bridge’ sign[148]. At the top of these steps, the track bends left then leads along the side of the hill for 500m, crossing a few gullies[149] and undulating up and down a series of timber steps to then pass between a couple of fences posts[150]. Here the walk continues down a series of timber steps[151] to a clearing and intersection marked with a ‘Private Land – No Camping’ sign[152].
Turn sharp right: From the intersection and clearing, this walk follows the ‘Camping Ground-500mtrs’ sign[153] north up the timber steps. The track soon bends left and follows the side of the hill[154] for about 130m to then head through a gate with a ‘Welcome’ sign[155]. The walk continues along the clear track for another 70m to the intersection with the timber path[156] just below the ‘Six Foot Track Lodge’[157].
Six Foot Track Lodge
The Six Foot Track Lodge is situated above the flats of the Coxs River along the Six Foot Track alternate route, not far north of Coxs River Campsite. The lodge consists of two cabins, each with the capacity to sleep twelve people in bunks[158]. The cabins are equipped with linen, warm blankets, log fire[159], pizza oven[160], tank water[161] and has its own outhouse toilet[162]. At $35 per person per night, this is a very pleasant way to spend an evening. Authentic meals can also be organised for a fee. For more information, visit www.6fttracklodge.com or call Pavel on 0421 932 631. Walk-ins are welcome, however to ensure beds are available, booking in advance is recommended.
(15.3km) Six Foot Track Lodge → Coxs River Campsite
410 m
8 mins
7m
-19m
Moderate track
Continue straight: From the intersection below the ‘Six Foot Track Lodge’[164], this walk follows the clear track west initially keeping the lodge up to your right. After about 30m this walk crosses a gully[165] then climbs over a fence using stile[166]. Here the walk turns right and follows the track for almost 50m to a T-intersection[167] with a wide trail, beside a private property gate[168] and marked with several ‘Six Foot Track’ signs[169].
Veer left: From the intersection, this walk follows the ‘Camping Ground-200m’ sign[170] gently down along wide trail[171]. After about 230m the trail flattens out and passes below the main camping area[172] marked with a ‘Coxs River Reserve’ sign[173]. About 30m past here, this walk comes to a clear intersection with a dirt road marked with a ‘Six Foot Track’ sign[174].
Veer left: From the intersection, this walk follows the ‘Camping Ground-200m’ sign[170] gently down along wide trail[171]. After about 230m the trail flattens out and passes below the main camping area[172] marked with a ‘Coxs River Reserve’ sign[173]. About 30m past here, this walk comes to a clear intersection with a dirt road marked with a ‘Six Foot Track’ sign[174].
Coxs River Campsite
Coxs River Campsite, on the Six Foot Track, is found on the western bank of the Coxs River. It provides a sheltered picnic table[175], water (rain tank[176] or creek[177] – treat before drinking either), toilet[178][179] and a flat grassed camping area[180] with excellent access to the river[181]. The campsite is used by people walking the Six Foot Track, but is also visited at times people people camping in 4WD. A nice place to camp. Despite the several fire scares, this is a fuel stove only area no fires allowed[182].
Coxs River
The Coxs River starts west of Katoomba, running south-east as the main tributary for the Warragamba Dam. The Six Foot Track crosses the river using on the slippery rounded stones or, when in flood, the large metal Bowtells Bridge. The campsite is located a short distance up the west bank from where the 6FT crosses. The water must be treated before drinking. The river provides some potentially nice swimming spots, with pools and interesting granite rock formations, be very careful if deciding to swim as it can also be a very dangerous.
(15.71km) Coxs River Campsite → Kiangatha Yards
3.1 km
1 hr 10 mins
354m
-61m
Moderate track
Turn right: From the intersection, this walk follows the ‘Six Foot Track’ sign[183] uphill along the dirt road
passing alongside the Coxs River Campsite (which is on your right). After about 150m this walk crosses the usually shallow Gibraltar Creek[184] that leads uphill for another 150m to pass close to a high tension power line tower[185] (up the hill to your left). The walk continues up along the dirt road for 200m to cross a usually small creek[186] then heads under the high tension power lines to cross the usually usually shallow Gibraltar Creek[187] again. These creeks may become impassable after heavy or prolonged rain, they also often dry up. From here the dirt road winds moderately steeply uphill for about 2.1km where it then passes around a left hand hairpin bend to pass another ‘Drive With Caution Walkers On Road’ sign[188] (where there is also some views to your left). The road leads more gently uphill where it then bends right to lead gently past the top of the Kiangatha Yards[189] to cross a cattle grate[190] on the dirt road.
passing alongside the Coxs River Campsite (which is on your right). After about 150m this walk crosses the usually shallow Gibraltar Creek[184] that leads uphill for another 150m to pass close to a high tension power line tower[185] (up the hill to your left). The walk continues up along the dirt road for 200m to cross a usually small creek[186] then heads under the high tension power lines to cross the usually usually shallow Gibraltar Creek[187] again. These creeks may become impassable after heavy or prolonged rain, they also often dry up. From here the dirt road winds moderately steeply uphill for about 2.1km where it then passes around a left hand hairpin bend to pass another ‘Drive With Caution Walkers On Road’ sign[188] (where there is also some views to your left). The road leads more gently uphill where it then bends right to lead gently past the top of the Kiangatha Yards[189] to cross a cattle grate[190] on the dirt road.
(18.76km) Kiangatha Yards → Alum Creek Reserve
3.1 km
1 hr 14 mins
184m
-190m
Hard track
Continue straight: From beside Kiangatha cattle Yards[191] this walk heads north west along the dirt road to cross a small dip and head straight through an intersection and continue for 250m to pass a ‘Grid’ sign[192] (facing away). About 140m later this walk pass another ‘Grid’ sign[193] then 100m after crosses another cattle grid[194]. The walk continues (moderately steeply in places) up the dirt road for 700m where it flattens out mostly[195] at a grassy clearing with view of the distant escarpment[196] (behind). Here the dirt road leads more consistently and steeply uphill for 300m until suddenly flattening out on at the top of Mini Mini Saddle, beside a large clearing[197] (on your left).
Continue straight: From beside the Mini Mini Saddle clearing[198], this walk follows the dirt road gently uphill along the side of the hill. The road leads past a open section of forest and starts to head downhill to pass a 6FT ’20km’ arrow post[199] about 250m after leaving the clearing. Here the track leads downhill, moderately steeply in places for 900m where the road bends left[200] around the edge of a grassy clearing. About 40m further down the road, this walk passes an intersection with the regenerating trail[201] (on your right) and continues steeply downhill for just shy of 300m to turn left at the intersection at the other end of the regenerating trail[202]. This walk continues more gently downhill along the dirt road for just over 350m until coming to the signposted (and gated) ‘Alum Creek Reserve’[203] (on your right).
Continue straight: From beside the Mini Mini Saddle clearing[198], this walk follows the dirt road gently uphill along the side of the hill. The road leads past a open section of forest and starts to head downhill to pass a 6FT ’20km’ arrow post[199] about 250m after leaving the clearing. Here the track leads downhill, moderately steeply in places for 900m where the road bends left[200] around the edge of a grassy clearing. About 40m further down the road, this walk passes an intersection with the regenerating trail[201] (on your right) and continues steeply downhill for just shy of 300m to turn left at the intersection at the other end of the regenerating trail[202]. This walk continues more gently downhill along the dirt road for just over 350m until coming to the signposted (and gated) ‘Alum Creek Reserve’[203] (on your right).
Alum Creek Camping ground
Signposted as ‘Alum Creek Reserve’[204], this fairly flat grassy area[205], off the side of the dirt Glen Chee Road, part of the six foot track). The campsite is the least used and least developed of the three official campsites on the Six Foot Track, and makes a good place to stay if attempting the walk in two days. There are no facilities provided but the flat campsite is in a well-protected valley with the small Alum Creek beside the campsite and the fairly reliable Little River down the road (treat water before use).
End of day 1
This is the planned overnight stay for the end of day 1, happy camping.
(21.82km) Alum Creek Reserve → Int of Black Range Rd and Cronje Mtn Fire Trail
4.2 km
1 hr 32 mins
468m
-54m
Hard track
Continue straight: From ‘Alum Creek Reserve’[206], this walk follows the dirt road downhill for just shy of 100m to cross Alum Creek[207]. Here the walk heads up between the two timber posts[208] and heads through old farmland[209] for about 300m to pass a ‘Drive with Caution Walkers on road’ sign[210] (facing away). Over next 300m this walk continues through the old farmland[211], then leads beside Little River[212] before crossing the usually shallow Little River[213]. Just over 100m later this dirt road leads across the river again [214], then again after another 110m[215]. These creeks may become impassable after heavy or prolonged rain, and may become dry. The dirt road now starts to head uphill for about 300m where it then bends right around a hand hairpin bend then a short distance further up to the ‘Kiangatha’ gate[216].
Continue straight: From here, this walk heads up through the Kiangatha Gate[217] and continues walking fairly steeply uphill along the dirt road. After about 500m the road leads around a left hand hairpin bend[218] then 150m later the road briefly flattens out beside a large flat clearing (on your left)[219]. The walk continues steeply uphill for 800m to walk past a ‘Drive with Caution Walkers On Road’ sign[220] (facing away) to come to a Y-intersection with the signposted ‘Waterfall Creek Fire Trail’[221] (on your right).
Turn left: From the intersection, this walk follows the arrow on the metal post quiet steeply uphill along the dirt road. After about 400m this walk passes a ’20km’ 6FT arrow post[222] then about 150m later the road flattens out briefly to pass a clearing on the top of the ridge (on your left)[223]. The dirt road continues to wind fairly steeply uphill for another 700m with some distance views of the escarpment[224] behind before passing around a sharp left hand hair pin bend[225]. Just shy of 150m later this walk comes to a clearing at the top if Black Range, marked with a few 6FT signs and the intersection with the signposted ‘Cronje Mountain Fire Trail’[226].
Continue straight: From here, this walk heads up through the Kiangatha Gate[217] and continues walking fairly steeply uphill along the dirt road. After about 500m the road leads around a left hand hairpin bend[218] then 150m later the road briefly flattens out beside a large flat clearing (on your left)[219]. The walk continues steeply uphill for 800m to walk past a ‘Drive with Caution Walkers On Road’ sign[220] (facing away) to come to a Y-intersection with the signposted ‘Waterfall Creek Fire Trail’[221] (on your right).
Turn left: From the intersection, this walk follows the arrow on the metal post quiet steeply uphill along the dirt road. After about 400m this walk passes a ’20km’ 6FT arrow post[222] then about 150m later the road flattens out briefly to pass a clearing on the top of the ridge (on your left)[223]. The dirt road continues to wind fairly steeply uphill for another 700m with some distance views of the escarpment[224] behind before passing around a sharp left hand hair pin bend[225]. Just shy of 150m later this walk comes to a clearing at the top if Black Range, marked with a few 6FT signs and the intersection with the signposted ‘Cronje Mountain Fire Trail’[226].
(26.01km) Int. Black Range Rd and Cronje Mtn Fire Trail → Int. Black Range Rd and Moorara Boss Fire Trail
2.1 km
38 mins
103m
-24m
Moderate track
Veer right: From the intersection, this walk follows the ‘6`t’ arrow on metal pole generally west along main dirt road that follows the top of the ridge line. The dirt road undulates along the ridge line for 2.1km, moderately steeply in a few places through a wooded forest and past a few large ant mounds[227] until leading up to the signposted intersection with ‘Moorara Boss Fire Trail’[228] (on your left).
(28.06km) Int. Black Range Rd and Moorara Boss Fire Trail → Int. Black Range Rd and Warlock Fire Trail
3.2 km
57 mins
118m
-32m
Moderate track
Continue straight: From the intersection, this walk follows the ‘6`t’ arrow on metal pole[229] west and uphill along the main dirt road that follows the ridge line. After about 100m this walk heads past a small dam on the side of the road[230] then continues along the dirt road as it gently undulates through the pleasant open forest for 2.3km before heading up a short steep section[231]. About 900m from the top of this steep section the road leads fairly gently up to and intersection with the signposted ‘Warlock Fire Trail’[232] (on your left).
(31.27km) Int. Black Range Rd and Warlock Fire Trail → Black Range Rd
3.1 km
51 mins
82m
-13m
Moderate track
Continue straight: From the intersection, this walk follows the arrow on the metal ‘6`T’ post west along the main dirt road. After just shy of 100m this road splits in two for a short distance[233] then almost 400m later this walk comes to an intersection with the signposted ‘Beefsteak Creek Fire Trail’[234] (on your right).
Continue straight: From the intersection, this walk follows the ‘6`t’ arrow on a metal post north west, uphill along the main dirt road. Soon the road leads up a short steep rise then leads more gently as it undulates along the ridge for 400m to pass straight ahead at an intersection marked with a metal ‘Kanangra Boyd National Park’ sign[235]. This walk continues along the main dirt road for another 1.2km to pass a short trail (on your right, that leads into a clearing that has been used as a campsite[236]). Here the dirt road continues gently uphill for 500m to find an intersection[237] with a faint trail (on the left), just before the clearing and pine forest[238].
Continue straight: From the intersection[239], this walk heads north and gently uphill along the main trail, towards the clearing. After about 80m the dirt road leads past a ‘Black Range Fire Trail’ sign[240] then about 25m later comes to the edge of the clearing and intersection with another trail[241]. Here the walk continues straight and gently up along the main dirt road for 400m as the road bends right to a T-intersection on the edge of the pine forest [242], marked with a ‘6`t’ metal arrow post[243].
Continue straight: From the intersection, this walk follows the ‘6`t’ arrow on a metal post north west, uphill along the main dirt road. Soon the road leads up a short steep rise then leads more gently as it undulates along the ridge for 400m to pass straight ahead at an intersection marked with a metal ‘Kanangra Boyd National Park’ sign[235]. This walk continues along the main dirt road for another 1.2km to pass a short trail (on your right, that leads into a clearing that has been used as a campsite[236]). Here the dirt road continues gently uphill for 500m to find an intersection[237] with a faint trail (on the left), just before the clearing and pine forest[238].
Continue straight: From the intersection[239], this walk heads north and gently uphill along the main trail, towards the clearing. After about 80m the dirt road leads past a ‘Black Range Fire Trail’ sign[240] then about 25m later comes to the edge of the clearing and intersection with another trail[241]. Here the walk continues straight and gently up along the main dirt road for 400m as the road bends right to a T-intersection on the edge of the pine forest [242], marked with a ‘6`t’ metal arrow post[243].
(34.34km) Black Range Rd → Black Range Camping Ground
360 m
8 mins
0m
-28m
Moderate track
Turn left: From the intersection, this walk follows the ‘6`t’ metal arrow post[244] downhill along the dirt road keeping the main pine forest to your right[245]. After about 250m this walk comes to a clear four way intersection[246] marked with several ‘Six Foot Track’ signs[247][248], and some power lines on your left.
Turn left: From the intersection, this walk follows the ‘Six Foot Track – Black Range Camping Ground’ sign[249] gently downhill and some under power lines[250] along the dirt road. After about 50m this walk heads past a ‘Drive With Caution Walkers On Road’ sign[251] then another 50m later comes to an information sign in front of the ‘Black Range Camping Ground’[252] (on your right).
Turn left: From the intersection, this walk follows the ‘Six Foot Track – Black Range Camping Ground’ sign[249] gently downhill and some under power lines[250] along the dirt road. After about 50m this walk heads past a ‘Drive With Caution Walkers On Road’ sign[251] then another 50m later comes to an information sign in front of the ‘Black Range Camping Ground’[252] (on your right).
Black Range camping ground
Black Range camping ground is found along the Six Foot Track, and is also accessible by car. The well maintained and signposted[253] campsite has a couple of sheltered picnic tables[254], toilets[255][256], rainwater tank[257] and and information board with map[258]. The campsite is in a large fenced grassy area[259]. The tank water is quiet reliable but the tank can become empty during long dry spells or through vandalism, please treat before use. A sign reminds campers that this is a Fuel Stove Only area – no camp fires[260]
(34.7km) Black Range Campsite → Int of 6 ft track and Jenolan Caves Rd
3 km
1 hr 5 mins
141m
-123m
Hard track
Continue straight: From the information sign in front of ‘Black Range Camping Ground’[261], this walk follows the dirt road gently downhill initially keeping the campsite to your right[262]. After about 100m this walk leaves the edge of the campsite and comes to an intersection with a management trail (on your left), marked with a 6FT arrow post[263].
Continue straight: From the intersection, this walk follows the 6FT arrow post gently downhill (south west) along the management trail[264] through the tall wooded forest. After almost 200m this walk passes a ’10km’ 6FT arrow post[265] then about 400m later the trail bends right and heads more steeply downhill[266] for about 200m where the trail bends left to cross a ferny gully (the upper reaches if Bulls Creek)[267]. The walk continues along the trail heading uphill past a few more 6FT arrow posts[268] for about 500m to a clearing at the top of the ridge[269]. Here the trail bends and leads downhill through tall eucalypt forest with some pine trees[270] for 250m to veer left at an intersection with a faint trail (on your right)[271]. The walk now continues up the moderately steep hill[272] keeping the valley on the left for just shy of 300m to then head up a notably steeper section of trail[273] with a few Telsta posts[274] for about 250m. About 40m from the top of this climb the walk comes to a clear intersection with a trail (on your right), marked with 6FT arrow post[275].
Continue straight: From the intersection, this walk follow 6FT arrow post south west[276] gently downhill along the clear trail. After about 50m the trail bends right then leads fairly steeply downhill[277] for 250m to a pleasant gully[278]. The trail then gently undulates along the side of the hill for 300m to find a T-intersection, marked with a 6FT arrow post (pointing right)[279].
Veer right: From the intersection, this walk follows the 6FT arrow post[280] gently uphill along the trail heading north west. After about 120m this trail bends left (at a large grassy clearing[281]) then just over 100m later the trail passes a ‘Road Ahead’ sign[282] and comes to a larger clearing and gravel stock pile[283] beside the sealed Jenolan Caves Rd[284],
Continue straight: From the intersection, this walk follows the 6FT arrow post gently downhill (south west) along the management trail[264] through the tall wooded forest. After almost 200m this walk passes a ’10km’ 6FT arrow post[265] then about 400m later the trail bends right and heads more steeply downhill[266] for about 200m where the trail bends left to cross a ferny gully (the upper reaches if Bulls Creek)[267]. The walk continues along the trail heading uphill past a few more 6FT arrow posts[268] for about 500m to a clearing at the top of the ridge[269]. Here the trail bends and leads downhill through tall eucalypt forest with some pine trees[270] for 250m to veer left at an intersection with a faint trail (on your right)[271]. The walk now continues up the moderately steep hill[272] keeping the valley on the left for just shy of 300m to then head up a notably steeper section of trail[273] with a few Telsta posts[274] for about 250m. About 40m from the top of this climb the walk comes to a clear intersection with a trail (on your right), marked with 6FT arrow post[275].
Continue straight: From the intersection, this walk follow 6FT arrow post south west[276] gently downhill along the clear trail. After about 50m the trail bends right then leads fairly steeply downhill[277] for 250m to a pleasant gully[278]. The trail then gently undulates along the side of the hill for 300m to find a T-intersection, marked with a 6FT arrow post (pointing right)[279].
Veer right: From the intersection, this walk follows the 6FT arrow post[280] gently uphill along the trail heading north west. After about 120m this trail bends left (at a large grassy clearing[281]) then just over 100m later the trail passes a ‘Road Ahead’ sign[282] and comes to a larger clearing and gravel stock pile[283] beside the sealed Jenolan Caves Rd[284],
(37.73km) Int of 6 ft track and Jenolan Caves Rd → Jenolan Caves Cottages Administration
2.4 km
49 mins
82m
-102m
Moderate track
Continue straight: From the clearing and gravel pit[285], this walk crosses Jenolan Caves Road[286] (take care with traffic) veering a little left to follow a 6FT arrow post[287] along the narrow track. Here the track leads past a ‘Road Ahead’ sign[288] (facing away) and winds gently along the side of the hill for about 300m before turning right, following a 6FT arrow post[289], down some timber steps[290]. After another 40m this walk crosses a ferny gully and small creek on a small flat timber plank bridge[291]. Here the walk heads along the side of the gully and up timber steps[292] for about 100m before flattening out and heading around the side of the hill for another 200m. Here the walk comes beside the road and heads just behind the safety barrier[293] for about 30m before heading around the side of another small hill for 120m. Here the walk turns right and follows another 6FT arrow post[294] down some timber steps[295] for about 80m to cross another gully on another small flat timber plank bridge[296]. The walk now heads up more timber steps[297] for about 40m where the track flattens out near the road again[298]. Turning right the walk now heads around the side a small hill for 40m before once again turning right and following the 6ft arrow post down timber steps[299] across a gully then head up the hill for 130m to the large blue ‘Jenolan Caves Welcome’ sign[300].
The track now widens (into an old trail) and follows fairly close to road and power lines for 400m before bending right to lead up over a hill[301] for about 600m (passing a ‘5km’ 6FT arrow) to then come down and walk along side of a vegetating clearing[302] and come back to the road[303]. From here this walk follows the track keeping the road a short distance to your left[304] for 150m to an intersection with driveway near a large blue ‘Jenloan Caves Cottages’ sign[305].
The track now widens (into an old trail) and follows fairly close to road and power lines for 400m before bending right to lead up over a hill[301] for about 600m (passing a ‘5km’ 6FT arrow) to then come down and walk along side of a vegetating clearing[302] and come back to the road[303]. From here this walk follows the track keeping the road a short distance to your left[304] for 150m to an intersection with driveway near a large blue ‘Jenloan Caves Cottages’ sign[305].
Jenolan Caves Cottages
Located 9km from Jenolan Caves by road, Jenolan Caves Cottages offers eight well presented self contained timber cottages for guests to stay in. Each is fully insulated and furnished, with lounge, kitchen, two bedrooms and linen. The is a large flat grassy area in front with often with kangaroos grazing and with a children’s playground. For more information call the Jenolan Caves on 1300 763 311. The cottages have a two night minimum stay and prices are from around $130 per night per cabin.
(40.11km) Jenolan Caves Cottages Administration → Jenolan Caves Cottages
540 m
11 mins
17m
-18m
Easy track
Veer right: From the intersection, this walk follows the ‘Cottages’ sign[308] along the driveway past the ’20’ km/h speed limit sign, initially keeping the office/house to your left[309]. The driveway leads over a small rise then heads downhill for about 300m to pass a toilet block[310]. Here the walk stays on the driveway as it bends left[311] and continues beside the clearing[312] to come beside the cottages[313].
(40.65km) Jenolan Caves Cottages → Carlotta Arch Lookout
3.7 km
1 hr 22 mins
65m
-402m
Hard track
Continue straight: From beside Jenolan Caves Cottages[314], this walk heads gently uphill along driveway[315] (initially keeping the cottages to your right) for about 60m to walk around the metal gate beside ‘Six Foot Track’ sign[316]. This walk continues along this mostly flat trail for 350m through tall wooded forest to a T-intersection marked with a ‘Kia-ora Hill Fire Trail’ sign[317]. This walk turns right and follows ‘Six Foot Track’ sign[318] gently down along the trail for about 300m to find a fairly large flat clearing[319]. The walk continues along the trail which generally leads downhill along the ridge line for 1.5km to where the trail moves to the side of the steep valley (on your right)[320]. The trail begins to become steeper then after 400m the trail leads particularly steeply down along the rocky trail[321] for about 600m. Here the trial flattens out on a saddle with a Y-intersection marked with a ‘Six Foot Track’ sign (pointing right) and a ‘Mt George’ sign (pointing ahead)[322].
Veer right: From the intersection, this walk follows the ‘Six Foot Track’ sign[323] downhill along the narrowing track, keeping the steep wide valley to your right. After about 25m the track leads between two timber posts[324] and continues fairly steeply down the side of the valley with glimpses to the cave buildings for 500m where the track flattens out a bit and heads under a solid gum tree leaning over the track[325]. The track continues leading downhill for another 300m to cross a narrow saddle and along a very narrow ridge[326] where there are good views down to Blue Lake[327] (on your left). The track now leads down some timber steps for about 50m to a T-intersection[328] with a gravel path where a ‘Six Foot Track’ sign points back uphill.
Turn left: From the intersection, this walk follows the ‘Caves House’ sign[329] gently downhill along the gravel path a short distance to an intersection and fenced lookout near ‘Carlotta Arch’[330][331] (on your left).
Veer right: From the intersection, this walk follows the ‘Six Foot Track’ sign[323] downhill along the narrowing track, keeping the steep wide valley to your right. After about 25m the track leads between two timber posts[324] and continues fairly steeply down the side of the valley with glimpses to the cave buildings for 500m where the track flattens out a bit and heads under a solid gum tree leaning over the track[325]. The track continues leading downhill for another 300m to cross a narrow saddle and along a very narrow ridge[326] where there are good views down to Blue Lake[327] (on your left). The track now leads down some timber steps for about 50m to a T-intersection[328] with a gravel path where a ‘Six Foot Track’ sign points back uphill.
Turn left: From the intersection, this walk follows the ‘Caves House’ sign[329] gently downhill along the gravel path a short distance to an intersection and fenced lookout near ‘Carlotta Arch’[330][331] (on your left).
(44.34km) Top of Carlotta Arch Steps → Bottom of Carlotta Arch Steps
30 m
1 mins
1m
0m
Moderate track
Turn left: From the intersection, this walk goes down the stairs until coming to the entrance of the cave. On the way, this walk goes under the towering Carlotta’s Arch. The lookout has great views of the valley and Blue Lake. At the end of this side trip, retrace your steps back to the main walk then Turn left.
Carlotta Arch
Carlotta Arch is a large and spectacular cave remnant overlooking Blue Lake. It is believed that the arch was named in honour of a daughter of a surveyor – General P.F. Adams. Adams is credited with having taken some of the earliest photos at Jenolan.
(44.34km) Carlotta Arch Lookout → Caves House
410 m
12 mins
21m
-74m
Moderate track
Continue straight: From the fenced lookout near ‘Carlotta Arch’[332][333], this walk follows the ‘Caves House’ sign gently uphill along the stone path[334] with handrail. The path leads over a small rise to a view into another valley. Here the path begins to zig zag fairly steeply downhill for 150m beside the limestone cliffs[335] passing views down to Caves House[336], past a bench seat[337] to a ‘Caves House’ information sign[338]. The path continues more gently downhill for another 100m past the ‘Grand Arch’ information sign (and view of the Arch)[339] then just over 30m later to the ‘Southside Show Caves’ information sign[340]. The path continues down the side of the valley for another 80m to head down some concrete steps to the side of Jenolan Caves Road[341], opposite Caves House[342], where a ‘Six Foot Track’ sign points up the steps[343]. The official end of the Six Foot Track.
Jenolan Caves House
Jenolan Caves House, built in 1898, is a heritage-listed building which houses dining, a variety of accommodation options, and other services for visitors to the caves. Jenolan has two licensed restaurants: Trails Bistro is open from breakfast onwards and closes early evening. Trails serves a range of light meals including sandwiches, salads and hot food. Chisholm’s Restaurant is open each morning for breakfast and each evening for dinner from 6.00pm. Essential items and beautiful souvenirs may be purchased from Things Jenolan, located on the ground floor of Caves House. Don’t forget to explore one of the many caves to explore in the area. For more information, call Jenolan Caves on 1300 76 33 11.
Maps for the Six Foot Track (Alum Creek Reserve) walk
You can download the PDF for this walk to print a map.
These maps below cover the walk and the wider area around the walk, they are worth carrying for safety reasons.
| Six Foot Track | 1:50 000 Map Series | Six Foot Track | NSW-six-foot-track |
| Hampton | 1:25 000 Map Series | 89304S HAMPTON | NSW-89304S |
| Jenolan | 1:25 000 Map Series | 89303N JENOLAN | NSW-89303N |
| Katoomba | 1:25 000 Map Series | 89301S KATOOMBA | NSW-89301S |
| Katoomba | 1:100 000 Map Series | 8930 KATOOMBA | 8930 |
Cross sectional view of the Six Foot Track (Alum Creek Reserve) bushwalking track
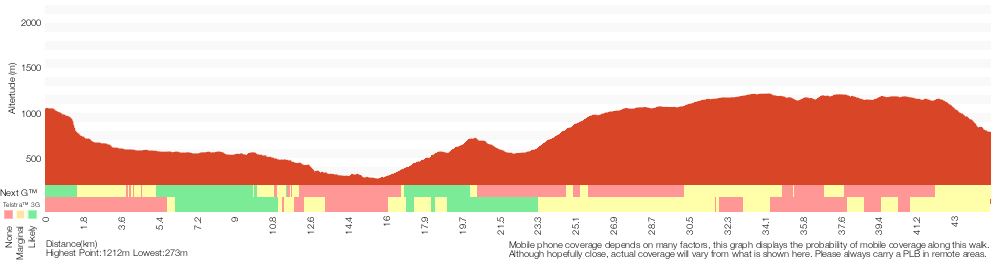
Analysis and summary of the altitude variation on the Six Foot Track (Alum Creek Reserve)
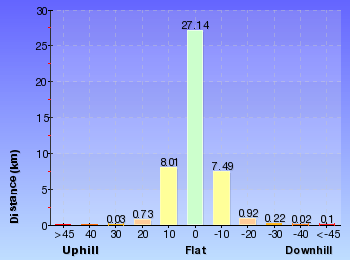
Daily actual walking time estimates
| Day | Walking Time | Length |
|---|---|---|
| 1 | 8 hrs 34 mins | 23.2 km |
| 2 | 7 hrs 46 mins | 23 km |
Overview of this walks grade – based on the AS 2156.1 – 2001
Under this standard, a walk is graded based on the most difficult section of the walk.
| Length | 44.8 km | ||
| Time | 2 Days | ||
| . | |||
| Grade 4/6 Hard track |
AS 2156.1 | Gradient | Very steep (4/6) |
| Quality of track | Rough track, where fallen trees and other obstacles are likely (4/6) | ||
| Signs | Directional signs along the way (3/6) | ||
| Experience Required | Some bushwalking experience recommended (3/6) | ||
| Weather | Storms may impact on navigation and safety (3/6) | ||
| Infrastructure | Limited facilities (such as cliffs not fenced, significant creeks not bridged) (4/6) |
Some more details of this walks Grading
Here is a bit more details explaining grading looking at sections of the walk
Gradient
18km of this walk has short steep hills and another 17km is very steep. Whilst another 8km has gentle hills with occasional steps and the remaining 1.8km is flat with no steps.
Quality of track
33km of this walk follows a clear and well formed track or trail and another 10km follows a formed track, with some branches and other obstacles. Whilst another 1.6km follows a rough track, where fallen trees and other obstacles are likely and the remaining 430m follows a smooth and hardened path.
Signs
Around 32km of this walk has directional signs at most intersection, whilst the remaining 13km is clearly signposted.
Experience Required
Around 33km of this walk requires no previous bushwalking experience, whilst the remaining 11km requires some bushwalking experience.
weather
Around 37km of this walk is not usually affected by severe weather events (that would unexpectedly impact safety and navigation), whilst the remaining 8km is affected by storms that may impact your navigation and safety.
Infrastructure
24km of this walk has limited facilities (such as not all cliffs fenced) and another 19km is close to useful facilities (such as fenced cliffs and seats). The remaining (1.6km) has limited facilities (such as cliffs not fenced, significant creeks not bridged).
Similar walks
A list of walks that share part of the track with the Six Foot Track (Alum Creek Reserve) walk.
828 m Return
30 mins
Moderate track
2 km Return
1 Hr
Moderate track
2.2 km Return
1 hr 30 mins
Moderate track
2.2 km Return
1 hr 9 mins
Moderate track
3.1 km Return
1 hr 30 mins
Hard track
3.5 km Circuit
2 hrs
Hard track
4 km Return
2 hrs
Moderate track
4.6 km One way
2 hrs
Hard track
7 km One way
3 hrs 30 mins
Very experienced only
12.6 km Return
5 hrs 30 mins
Hard track
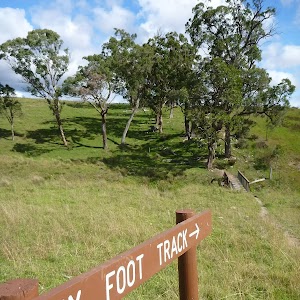
44.8 km One way
3 Days
Hard track

47.8 km One way
2 Days
Very experienced only
47.8 km One way
3 Days
Very experienced only
Other Nearby walks
A list of walks that start near the Six Foot Track (Alum Creek Reserve) walk.
1.8 km One way
1 Hr
Moderate track
1.7 km Return
2 hrs
Hard track
1.1 km Return
45 mins
Moderate track
352 m Circuit
20 mins
Moderate track
854 m Circuit
45 mins
Hard track
582 m Return
30 mins
Moderate track
3.3 km Return
1 hr 30 mins
Moderate track
892 m Return
30 mins
Moderate track
4.8 km Circuit
3 hrs
Hard track
2.3 km Return
1 hr 30 mins
Hard track
1.7 km Return
1 hr 15 mins
Hard track
8 km One way
5 hrs
Hard track
Plan your trip to and from the walk here
The Six Foot Track (Alum Creek Reserve) walk starts at the Explorers Tree (gps: -33.70397, 150.29126)
Your transport options to Explorers Tree are by;
![]() Bus. (get details)
Bus. (get details)
![]() Car. There is free parking available.
Car. There is free parking available.
(get details)
The Six Foot Track (Alum Creek Reserve) ends at the Caves House (gps: -33.820325, 150.02117)
Your transport options to Caves House are by;
![]() Bus. There is no public transport from Jenolan caves. There are a lot of tourist buses, most will not give you a lift.Trolley Tours has a special deal for bushwalkers and offers a ( concession) one way deal from Jenolan to Katoomba. The bus leaves the caves at 3pm daily and takes about 1.5 hrs to get to Katoomba town center (about 1 min walk to the train station). Tickets must be pre booked and paid for by phoning 1800 801 577, or through their website. (get details)
Bus. There is no public transport from Jenolan caves. There are a lot of tourist buses, most will not give you a lift.Trolley Tours has a special deal for bushwalkers and offers a ( concession) one way deal from Jenolan to Katoomba. The bus leaves the caves at 3pm daily and takes about 1.5 hrs to get to Katoomba town center (about 1 min walk to the train station). Tickets must be pre booked and paid for by phoning 1800 801 577, or through their website. (get details)
![]() Car. There is free parking available.
Car. There is free parking available.
(get details)
Short URL = http://wild.tl/sftacr
Gallery images
There are other downloads I am still working on.
You will probably need to login to access these — still all free.
* KML (google earth file)
* GPX (GPS file)
Special Maps/ brochures
* A3 topo maps
* PDF with Lands Topo map base
* PDF with arial image (and map overlay)
I wanted to get the main site live first, this extra stuff will come in time.
Happy walking
Matt 🙂
Scenic Railway to Leura Forest
And Walk
Scenic Railway to Leura Forest

4 hrs 30 mins
6.7 km Return
622 m
Moderate track
Any walk that begins with a trip on the world’s steepest railway is bound to be exciting, but its the tranquility of Leura Forest that makes this walk extra special. From the bottom of the Scenic Railway, this walk goes through the cool forest at the base of the cliffs, until reaching Leura Forest. This is a great spot to relax and enjoy the serenity of a day in the bush before returning back along the bush track.
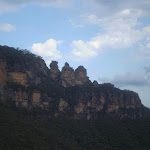


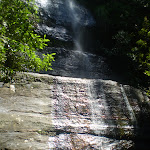
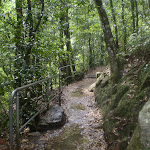
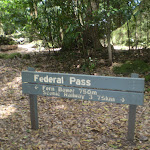
Scenic World
Scenic World is one of the most renowned tourist attractions of Katoomba and the Blue Mountains. Located on the cliffs of the Jamison Valley , visitors can enjoy a ride on the Scenic Railway (the world’s steepest incline railway) or the Scenic Cableway, into the Jamison Valley, and explore the Scenic Walkway from the base. Alternatively, the Scenic Skyway offers a bird’s eye view over the valley, with a glass floor to enhance the experience. Scenic World also features a revolving restaurant, a cafe and a kiosk, in addition to the documentary theatre and souvenir shop. Rides can be purchased, starting from $16 for adults and $10 for children, and combination or family passes are available. More info.
(0km) Scenic World → Scenic Railway (Bottom Platform)
300 m
26 mins
8m
-210m
Very easy
From Scenic World, this walk goes down the cliffs using the Scenic Railway. Hang on tight! This 415m-long journey is the world’s steepest railway. At the bottom, the track comes to a great viewing platform of the valley. Use of the railway costs $10 for adults and $5 for children one-way. Last train normally at 4:45pm (opens at 9am) More info.
(0.3km) Scenic Railway (Bottom Platform) → Int of Furber Steps and Scenic Railway Track
170 m
4 mins
15m
-10m
Easy track
Turn right: From the Scenic Railway Platform, this walk heads north-east (keeping the valley on the right), soon passing through the gate signposted ‘Blue Mountains National Park’, and then along the bush track. This goes along the flat, next to the cliffs, until reaching the bottom of a set of stairs on the left, signposted as the ‘Furber Steps’.
(0.47km) Int of Furber Steps and Scenic Railway Track → Cooks Crossing
170 m
5 mins
12m
-21m
Easy track
Continue straight: From the bottom of Furber steps, this walk follows the sign to ‘Katoomba Falls View’ keeping the handrail on the right. The walk goes along the flat and very well-managed bush track and passes a signposted ‘Turpentine Tree’ on the right. Soon after the Turpentine Tree, the track comes to the base of Katoomba Falls, at a place known as ‘Cooks Crossing’. There is a metal bridge that crosses the falls just past the picnic table.
(0.64km) Cooks Crossing → Int of Federal Pass, Scenic Railway and Dardenelles Tracks
1.7 km
52 mins
169m
-179m
Moderate track
Continue straight: From the base of Katoomba Falls, the walk crosses the creek along the metal footbridge and joins up with the track on the other side. The track starts to turn to the right, winding along Federal Pass walking track, under the cliffs. At several points, the walk passes some notable rock formations and caves embedded in the cliffs. In addition, there are occasional good views that are not shrouded by the trees. The track continues in this manner for some time, and then passes ‘under the (three) sisters’[2] (clearly signposted). After passing under this rock formation, the track turns to the left and climbs slightly up to a seat and an intersection signposted with ‘Dardanelles Pass’ and ‘Federal Pass’ signs.
(2.36km) Int of Federal Pass, Scenic Railway and Dardenelles Tracks → Leura Forest (Int of Federal Pass and Dardenelles Tracks)
1.3 km
36 mins
99m
-117m
Moderate track
Veer right: From the intersection, the walk follows the ‘Federal Pass’ – ‘Leura Forest’ sign (the lower track), keeping the main cliff face on the left. This track heads steadily downhill until flattening out and continuing generally north-east. The environment surrounding the bush track at this point is quite dense and, while very pretty, it is difficult to see views of the surrounding area, although there are occasional glimpses of Sublime Point Service Trail on the right. Soon before Leura Forest, the track is flat and passes over a small creek. Leura Forest is a shaded picnic area with several tables and a large pergola.
Leura Forest
Leura Forest is a great picnic area in the Jamison Valley at the junction of the Federal Pass and Dardenelles Tracks. This place was home to a popular tea house (also known as ‘Lady Carrington Dining Hall’) from the late 1800’s[3]. Today walkers can still enjoy the historic rotunda and the foundations of the original tea house[4]. The picnic area provides a great rest spot under the shade of the lilli pilli and coachwood forest.
Maps for the Scenic Railway to Leura Forest walk
You can download the PDF for this walk to print a map.
These maps below cover the walk and the wider area around the walk, they are worth carrying for safety reasons.
| Six Foot Track | 1:50 000 Map Series | Six Foot Track | NSW-six-foot-track |
| Katoomba | 1:25 000 Map Series | 89301S KATOOMBA | NSW-89301S |
| Katoomba | 1:100 000 Map Series | 8930 KATOOMBA | 8930 |
Cross sectional view of the Scenic Railway to Leura Forest bushwalking track

Analysis and summary of the altitude variation on the Scenic Railway to Leura Forest

Overview of this walks grade – based on the AS 2156.1 – 2001
Under this standard, a walk is graded based on the most difficult section of the walk.
| Length | 6.7 km | ||
| Time | 4 hrs 30 mins | ||
| . | |||
| Grade 3/6 Moderate track |
AS 2156.1 | Gradient | Short steep hills (3/6) |
| Quality of track | Clear and well formed track or trail (2/6) | ||
| Signs | Clearly signposted (1/6) | ||
| Experience Required | No experience required (1/6) | ||
| Weather | Weather generally has little impact on safety (1/6) | ||
| Infrastructure | Generally useful facilities (such as fenced cliffs and seats) (1/6) |
Some more details of this walks Grading
Here is a bit more details explaining grading looking at sections of the walk
Gradient
3km of this walk has short steep hills and another 340m has gentle hills with occasional steps. The remaining (300m) is flat with no steps.
Quality of track
Around 3.3km of this walk follows a clear and well formed track or trail, whilst the remaining 300m follows a smooth and hardened path.
Signs
This whole walk, 3.6km is clearly signposted.
Experience Required
This whole walk, 3.6km requires no previous bushwalking experience.
weather
This whole walk, 3.6km is not usually affected by severe weather events (that would unexpectedly impact safety and navigation).
Infrastructure
This whole walk, 3.6km is close to useful facilities (such as fenced cliffs and seats).
Similar walks
A list of walks that share part of the track with the Scenic Railway to Leura Forest walk.
869 m Circuit
1 hr 15 mins
Hard track
1.7 km Return
2 hrs
Hard track
1.7 km Return
3 hrs 45 mins
Hard track
2.7 km Return
2 hrs 30 mins
Moderate track
3.1 km One way
3 hrs
Hard track
3.1 km One way
3 hrs
Hard track
3.8 km Circuit
3 hrs
Hard track
4.4 km One way
3 hrs 45 mins
Hard track
4.8 km Circuit
3 hrs
Hard track
5.8 km Circuit
5 hrs 30 mins
Hard track
5.9 km Circuit
3 hrs 30 mins
Hard track
6.6 km One way
4 hrs
Hard track
6.8 km Circuit
5 hrs
Hard track
8 km One way
5 hrs
Hard track
9.4 km Circuit
5 hrs 30 mins
Hard track
12.4 km Return
7 hrs 30 mins
Hard track
16.2 km Return
11 hrs
Experienced only
29.2 km One way
2 Days
Experienced only
29.3 km One way
3 Days
Experienced only
33.8 km Circuit
3 Days
Experienced only
Other Nearby walks
A list of walks that start near the Scenic Railway to Leura Forest walk.
1.5 km Circuit
1 hr 45 mins
Hard track
2.1 km One way
1 hr 15 mins
Moderate track
1.2 km Return
2 hrs
Hard track
6.8 km One way
3 hrs 30 mins
Moderate track
1.1 km Circuit
2 hrs
Hard track
1.8 km One way
1 Hr
Moderate track
1.1 km Return
45 mins
Moderate track
352 m Circuit
20 mins
Moderate track
854 m Circuit
45 mins
Hard track
254 m Return
15 mins
Moderate track
556 m Return
20 mins
Very easy
218 m Return
20 mins
Moderate track
Plan your trip to and from the walk here
The Scenic Railway to Leura Forest walk starts and ends at the Scenic World (gps: -33.728585, 150.30095)
Your transport options to Scenic World are by;
![]() Bus. (get details)
Bus. (get details)
![]() Car. There is free parking available.
Car. There is free parking available.
(get details)
Short URL = http://wild.tl/srtlf
Gallery images
There are other downloads I am still working on.
You will probably need to login to access these — still all free.
* KML (google earth file)
* GPX (GPS file)
Special Maps/ brochures
* A3 topo maps
* PDF with Lands Topo map base
* PDF with arial image (and map overlay)
I wanted to get the main site live first, this extra stuff will come in time.
Happy walking
Matt 🙂
Comments